Summary:
NBA 2K27 badges can dramatically change how your MyPLAYER performs, but not every badge deserves your valuable badge points. This guide breaks down the best and worst badges across shooting, finishing, playmaking, defense, NBA 2K27 VC, rebounding, and physical categories to help you optimize your build.
NBA 2K27 Badge Guide: Spend Your Points Wisely
Badges remain one of the most important parts of building a competitive MyPLAYER in NBA 2K27. While attributes determine your player's basic abilities, the right badges can make those ratings feel significantly stronger on the court.
One major point to understand this year is that badge levels can be adjusted depending on your available points. While some online tests suggest stopping at Silver or Gold because of efficiency, there is another argument: if you have enough badge points to reach a higher tier, using the highest possible level can provide meaningful advantages.
However, badge points are limited, so you should always prioritize badges that directly support your playstyle.
NBA 2K27 Shooting Badges
Shooting badges are one of the easiest categories to optimize because their value depends heavily on the shots you regularly take.
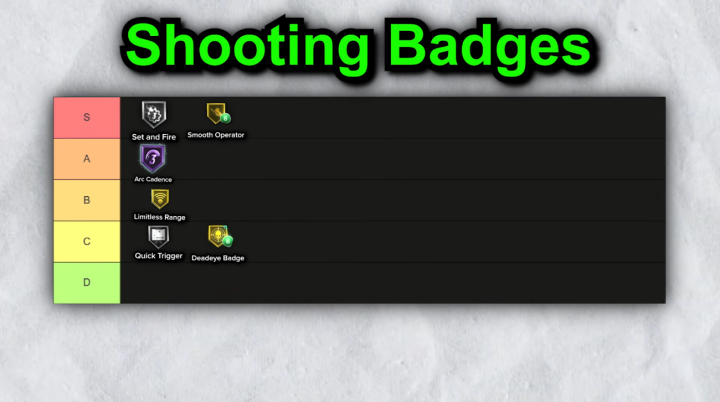
Arc Cadence stands out as an S-tier option, particularly for players who frequently use moving or off-balance jump shots. If those shots are an important part of your offensive game, this badge should receive a high priority.
Dead Eye is still useful, but it does not feel as essential as in previous NBA 2K games. Defensive pressure does not appear to be strong enough in every situation to justify spending a large number of points on it. It can help against contests, but it is not necessarily a must-have at the highest level.
Limitless Range remains effective, especially for players shooting from deep. However, because many players already shoot around nine meters, Silver or Gold can often provide enough value. If you have extra points, upgrading it further can still expand your shooting options.
Mini Magician and Post Fade Phenom are more situational. They can help specific shooting styles, but neither should be considered mandatory for every build.
Quick Trigger is another badge that depends heavily on your playstyle. If you constantly use no-dip shots, it becomes more valuable. Otherwise, spending several badge points on a move you only occasionally perform may not be efficient.
Two particularly strong options are Set in Fire and Smooth Operator. Set in Fire is considered an S-tier badge, while Smooth Operator provides a noticeable benefit for players who rely on mid-range and fadeaway shots.
NBA 2K27 Finishing Badges
Finishing is arguably one of the most powerful areas of NBA 2K27, but that does not mean every finishing badge deserves investment.
Aerial Wizard is unnecessary for most players because successful lob finishes depend heavily on your dunk attributes and animations rather than simply having the badge equipped.
Similarly, Float Game is mainly useful for players who regularly attack with floaters. If that is not part of your offensive identity, those points can be spent elsewhere.
Ghost Stepper is one of the easiest badges to ignore. Step-through layups are too uncommon for most players to justify spending valuable badge points on this mechanic.
Hook Specialist, Post Play Powerhouse, and Post Spin Catalyst are also highly dependent on your build. Post scorers can benefit from them, but guards and perimeter-oriented players should generally avoid them.
One of the most important finishing badges is Mix Master. With dynamic layup animations changing situations frequently, having a larger effective finishing window can be extremely useful when a normal attack turns into a difficult recovery attempt.
Then there is Posterizer, which belongs firmly in the S-tier conversation. Contact dunks are extremely powerful in NBA 2K27, making Posterizer especially valuable for high-driving-dunk builds.
Rise Up is another badge worth considering for centers and players who frequently finish directly underneath the basket. Despite some skepticism surrounding it, it can produce additional standing dunk animations when combined with the right attributes.
NBA 2K27 Playmaking Badges
Playmaking is arguably the most complicated category because your role, ball-handling style, stamina management, and passing responsibilities all affect badge value.
Ankle Assassin deserves serious attention. Higher levels can produce significantly more ankle-breaking animations, even with relatively simple stick movements. Ball handlers should strongly consider investing in it.
Bailout remains useful even at a low level. Having it at Bronze can provide valuable insurance when a drive or shot attempt goes wrong.
For centers, Break Starter remains important. Outlet passes may not always feel perfect, but playing without the badge can make transition offense even less reliable.
Dimer, meanwhile, has become much less important. If teammates are already capable shooters, there are better ways to spend your limited badge points.
Handles for Days is one of the strongest playmaking badges. Stamina drains quickly during extended dribble sequences, and this badge can make a significant difference for players who create shots through multiple dribble moves.
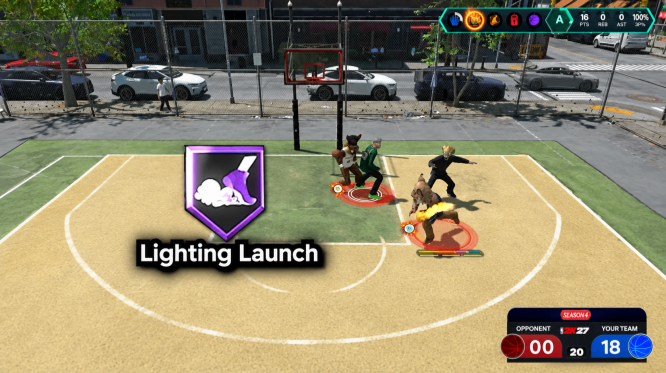
For primary ball handlers, Lightning Launch and Pace should be among the highest priorities. These badges directly affect how quickly your player gets into moves and creates separation. The difference between lower and higher levels can be particularly noticeable.
Strong Handle can be useful for players who intentionally build around physical ball handling, but it should not automatically take priority over the core movement badges.
One badge that appears particularly weak is Unpluckable. Based on the provided testing experience, upgrading it may not noticeably reduce steals. If your build desperately needs badge points elsewhere, this is one of the first playmaking badges worth reconsidering.
Versatile Visionary, however, is valuable because passing animations can be inconsistent. The badge can help improve difficult passing situations and make tighter passing windows more reliable.
NBA 2K27 Defense Badges
Defense badges can completely change how a MyPLAYER feels. A strong defensive rating combined with the right badges can turn a mediocre defender into a serious lockdown.
Challenger is one of the most important defensive badges for perimeter defenders. Contest effectiveness depends on both attributes and badges, so strong perimeter defense combined with Challenger can create significant pressure on opposing shooters.
Interceptor is another S-tier option and should be prioritized by defenders who want to generate steals through passing-lane positioning.
Pick Dodger is extremely useful for players who frequently defend the ball handler. It becomes particularly important for lockdown builds.
Immovable Enforcer could become one of the more underrated defensive badges in NBA 2K27. Its ability to improve physical resistance can help defenders deal with powerful attackers and potentially stop contact finishes.
Ankle Braces is useful but more situational. It becomes much more important for lockdown players who constantly defend elite ball handlers.
High-Flying Denier can help with chase-down blocks, but because these situations may only occur a few times per game, it does not necessarily need to be maxed.
Glove can make steals easier, although the current steal environment means players can still generate steals without investing heavily in it.
NBA 2K27 Rebounding Badges
There are fewer rebounding badges, making this category relatively straightforward.
Sink Snatcher is arguably the most important option. Its boost to jumping and rebounding when you time your jump perfectly can produce significantly better rebounding animations.
Box Out Boss is also valuable because securing position is often more important than simply jumping higher.
Crasher and Possession Closer are useful because winning a rebound means little if you cannot actually secure possession afterward.
Breaker is probably the easiest badge to deprioritize. Breaking through box-outs is useful, but spending too many points on it may not provide the same consistent value as the core rebounding badges.
NBA 2K27 Physical Badges
Physical badges depend heavily on your position and role.
Brick Wall should primarily be reserved for centers. Guards and wings generally have better uses for their badge points.
Bruiser is particularly powerful for lockdown defenders. Physical contact can drain stamina, making this badge valuable when constantly pressuring opponents.
Pogo Stick is another excellent choice, especially for defensive-minded builds that need repeated jumping ability.
Flash can improve off-ball movement during transitions, but its value is more situational.
Slippery Off-Ball is less appealing because activating it can consume adrenaline that could otherwise be used for offensive movement.
Finally, Workhorse can be useful for players who want to win loose-ball situations. It may not be essential for every build, but grabbing an important 50/50 ball can occasionally decide an entire game.
Final NBA 2K27 Badge Priorities
The key lesson from the NBA 2K27 badge breakdown is simple: don’t waste badge points on mechanics you rarely use. Prioritize badges that fit your build and playstyle. Shooting builds should focus on shooting, finishers on reliable scoring, ball handlers on movement and stamina, cheap NBA 2K27 VC, and defenders on contests and steals. Choose higher badge tiers when the badge is essential to your playstyle.