Summary
Badge setup can make a major difference in NBA 2K27. With the ability to equip and remove badges, you have more freedom to adjust your build to fit your playstyle. However, that also means it is easy to waste Badge Points on options that provide little value.
The key is to prioritize badges that consistently affect your game while avoiding badges that only help with rare situations. Here is a category-by-category breakdown of the best badges to run in NBA 2K27, along with the badges that may not be worth your points. To unlock the badges you need faster, Buy NBA 2K27 VC and secure the resources.
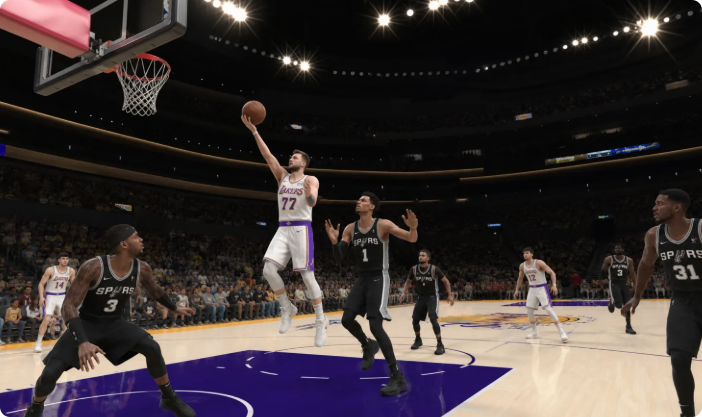
Shooting Badges
Shooting is one of the most important areas to optimize, especially if your build relies on jump shots or fades. However, not every shooting badge needs to be maxed.
Best Shooting Badges
Arc Cadence is considered an S-tier shooting badge, particularly for players who regularly use fades. If fading is an important part of your scoring package, this is one of the first badges to prioritize.
Set and Fire is another S-tier option. It provides a noticeable benefit and is recommended at the highest tier available to your build.
Smooth Operator is especially useful for players who rely on midrange shots and fades. The boost is noticeable when the badge is equipped, making it a strong choice for this playstyle.
Limitless Range remains useful, but it is no longer considered as essential as in previous games. Players can still shoot effectively from deep, so Silver to Gold can be enough if Badge Points are limited. Higher levels can still help by opening the green window further.
Shooting Badges to Consider Carefully
Deadeye is still useful, but it is not considered an S-tier priority because the contest system does not appear as punishing this year.
Mini Marksman provides a benefit but is better treated as an extra badge rather than a must-have.
Post Fade Phenom can help with post fades, but post fades are already effective without heavily investing in the badge.
Quick Trigger is mainly worthwhile for players who consistently use no-dip shots. Otherwise, spending several Badge Points on a move you only use occasionally may not be efficient.
Finishing Badges
Finishing has many badges, but several of them are highly dependent on ratings or specific playstyles. You should focus your points on the options that consistently affect your finishing.
Best Finishing Badges
Posterizer is an S-tier finishing badge. Contact dunks are extremely effective in NBA 2K27, and a higher Posterizer level can make a noticeable difference for builds with strong driving dunk ratings.
Layup Mixmaster is another important option, particularly because of this year's dynamic layup system. It can help keep the green window larger and is useful when a dunk attempt turns into a layup or another bailout situation.
Rise Up is worth considering for centers and other players with strong standing dunk ratings. It can help produce more standing dunk animations around the basket.
Finishing Badges to Avoid Wasting Points On
Aerial Wizard is not necessary simply to catch lobs because the result is heavily dependent on your dunk rating.
Float Game is only worth considering if floaters are a major part of your offense.
Ghost Stepper is generally not worth investing in because step-through layups and similar shot-fake situations are relatively uncommon.
Hook Specialist, Post Powerhouse, and Post Spin Catalyst are much more specialized. These badges make sense for post-scoring builds but have little value outside that playstyle.
Physical Finisher can also be difficult to justify because contact layups are not expected to occur often enough for many builds.
Playmaking Badges
Playmaking is one of the most complicated categories because its value depends heavily on how you handle the ball.
Best Playmaking Badges
Lightning Launch and Pace are the two highest-priority playmaking badges for ball handlers. Lightning Launch affects the initial burst and first movement, while Pace helps with movement afterward. Running both at the highest practical level can make a significant difference.
Handles for Days is also extremely important. Stamina disappears relatively quickly in NBA 2K27, and this badge helps maintain your effectiveness after extended dribbling. The difference between Silver, Gold, and higher tiers can be substantial.
Ankle Assassin is another badge that deserves attention. It can produce frequent ankle-breaker animations, even when using relatively simple left-stick movement.
Bailout is useful even at Bronze because it can help when passing out of difficult situations.
For centers, Breakstarter is valuable when playing 3v3 or 5v5. Fast breaks may already be inconsistent, but they can become even worse without this badge.
Versatile Visionary is also useful because passing animations can be unreliable. A higher level can help with passes through tighter windows.
Playmaking Badges to Limit
Dimer is no longer viewed as a must-have after changes to shooting. If Badge Points are limited, they can often be better spent elsewhere.
Strong Handle can provide useful animations, but it is considered less important than the primary movement badges.
Unpluckable is the biggest warning. The source's testing suggests that it currently provides very little noticeable protection against steals, even at high levels. For that reason, those Badge Points may be better invested elsewhere.
Defensive Badges
Defensive badges can dramatically change how a build feels. The right combination can make a defender much more effective, especially when ratings and badges work together.
Best Defensive Badges
Interceptor is an S-tier choice and should be run as high as possible.
Challenger is another important badge for perimeter defenders. High perimeter defense combined with a strong Challenger level can make lockdown defenders much more difficult to attack.
Immovable Enforcer is one of the more underrated options. It improves strength-related defensive resistance and can help prevent opponents from finishing dunks.
Pick Dodger is particularly important for lockdowns and players regularly defending the ball.
Seat Belt is also highly valuable because of the body-up animations it can produce.
For players who spend most of their time in the paint, Paint Patroller is a necessary consideration.
Defensive Badges That Are More Situational
Ankle Braces can help prevent ankle-breaker animations, but they may only matter once or twice per game for many players.
High-Flying Denier provides chase-down defensive help, but it can be kept at a lower tier if those situations are uncommon.
Glove can make steals easier, although the source suggests that steals can already be generated frequently without investing heavily in it.
Post Lockdown is difficult to justify for most players because post scorers are relatively uncommon.
Wall Up can improve contests while using hands-up defense in the paint, but those situations may not justify spending points over more valuable defensive badges.
Rebounding Badges
Rebounding is a smaller category, but most big-man builds will have enough Badge Points to equip several options.
Best Rebounding Badge
Sync Snatcher stands out as the most important rebounding badge. Perfectly timing a rebound provides an additional vertical and rebounding boost, producing stronger rebound animations.
Box Out Boss, Crasher, and Possess Enclosure can also contribute to securing rebounds. Breaker is the badge that can be deprioritized if you need to save points, since breaking through box-outs is not always necessary.
Guards with limited rebounding investment can simply prioritize Sync Snatcher rather than spending heavily throughout the category.
Physical Badges
Physical badges depend heavily on your position and role.
Best Physical Badges
Bruiser is an S-tier option for defenders and lockdowns. It can drain an opponent's stamina through physical interactions, making it especially valuable for aggressive defenders.
Pogo Stick is another S-tier physical badge. It is useful for repeated defensive actions and can be especially valuable because it occupies the physical badge slot.
Workhorse is situational but useful for players who want to compete for loose balls and win important 50/50 possessions.
Position-Specific Options
Brick Wall should primarily be reserved for centers or very specific offensive systems that rely heavily on screens.
Flash can improve off-ball movement during transitions, but it is not considered essential for Park players and may be more useful in 5v5 situations.
Slippery Offball is less appealing because triggering it consumes an adrenaline bar, which can also affect your shooting window.
How to Spend Badge Points in NBA 2K27
The most important rule is to avoid automatically spreading Badge Points across every available option. If you have enough points, prioritize your strongest badges at the highest practical level.
At the same time, do not max every badge simply because you can. Your playstyle matters. A post scorer has different needs from a lockdown, while a center has different priorities from a ball-handling guard.
Because NBA 2K27 lets you switch badges, use that flexibility to adjust your setup. Maximize the badges that consistently influence your game, keep situational badges at lower levels when necessary, and remove options that rarely affect your play. To experiment with different badge combinations, NBA 2K27 VC can help you unlock the upgrades.
The goal is not simply to equip the most badges. It is to build a setup where every Badge Point contributes to the way you actually play.