Summary
The new Eagle Gas Airstrike has opened the door for a powerful damage-over-time setup in Helldivers 2. Paired with the Napalm Airstrike, Gas Mines, and Cremator, it creates a devastating area-denial setup that can repeatedly shut down Bug Breaches while making excellent use of Helldivers 2 Items. In the right hands, this combination may even outperform the traditional Orbital Napalm Barrage on Terminid missions.

1. Why Is the Eagle Gas Airstrike So Strong?
The biggest strength of the Eagle Gas Airstrike isn't instant burst damage. Instead, it excels at controlling an area and forcing enemies to fight through lingering damage.
Once deployed, the gas remains on the battlefield and continuously damages enemies inside the affected area. This makes it particularly effective against large groups of Terminids coming from a Bug Breach.
Its main advantages include:
Strong area denial: Controls key sections of the battlefield.
Reliable damage over time: Enemies continue taking damage while inside the gas.
Excellent synergy: Works extremely well with Napalm for combined fire and gas damage.
Good team utility: Less likely to instantly wipe teammates than some high-damage explosive options.
Strong repeatability: Eagle rearm allows you to keep bringing the pressure during extended fights.
Rather than simply clearing a wave, the gas gives you a way to control where the Terminids can move.
2. Recommended Loadout: Build Around Fire and Gas
The main idea behind this setup is simple:
Use gas and fire to control the battlefield, then save your heavy weapons for the biggest targets.
Stratagems:
A strong starting setup is:
Eagle Gas Airstrike
Napalm Airstrike
Gas Mines
Cremator
Orbital Gas Strike — optional
The Orbital Gas Strike is much less important than the Eagle version. If the Eagle Gas Airstrike is available, you already have plenty of area control, so the fourth slot can be replaced depending on the mission.
An Exosuit can also be a strong alternative if you want additional firepower against Mega Nests and heavily armored enemies.
Weapons:
The Crossbow is useful for closing Bug Holes and dealing with nests without wasting your main damage tools.
For heavy enemies, bring weapons such as:
Ultimatum
Giganades
Other reliable anti-heavy options
The basic division of labor is straightforward:
Small and medium Terminids: Gas, Napalm, and Cremator.
Bile Titans, Chargers, and Impalers: Heavy weapons and focused Cremator damage.
3. Armor Choice Matters
One important lesson from the testing is that your armor should match the entire loadout.
Running an armor set that only provides fire resistance isn't ideal when you're constantly fighting around your own gas clouds.
Instead, an armor set with both fire and gas resistance gives you much more room to operate.
You'll often be fighting close to the edge of your own area-denial zones. Better resistance means more freedom to reposition without accidentally turning your own stratagems into a death trap.
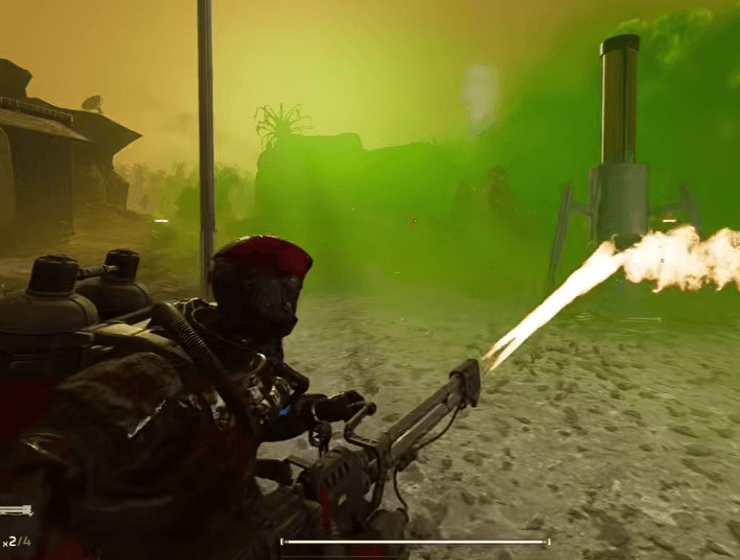
4. How to Use the Build in Combat
The basic combat loop is extremely easy to understand:
Gas the breach → Add Napalm → Hold the flank → Burn survivors → Kill the big targets.
When a Bug Breach appears, drop the Eagle Gas Airstrike directly onto the spawn area.
As the Terminids move through the gas, follow up with a Napalm Airstrike to create another layer of damage.
At the same time, place Gas Mines on a flank, choke point, or retreat route. This prevents enemies from simply walking around your main damage zone.
Once the smaller enemies are under control, switch to the Cremator and your heavy weapons to finish off anything that survives.
The goal isn't to kill everything instantly. The goal is to make it extremely difficult for the enemy wave to advance.
5. Why It Could Replace Orbital Napalm Barrage
This is where the build gets particularly interesting.
The Orbital Napalm Barrage is still an extremely powerful option, but the Eagle-based setup offers something different: control and repeatability.
More Flexible:
With Eagle stratagems, you can adjust your position and deploy another strike exactly where you need it.
Instead of completely abandoning an area after calling in a massive orbital barrage, you can gradually fall back while continuing to control the enemy's advance.
Easier to Cycle:
Eagle stratagems can be restored through rearming.
That means you can potentially have another round ready for the next Bug Breach instead of depending on one long-cooldown ability.
This becomes especially valuable during missions with repeated reinforcement waves.
Better Battlefield Control:
Orbital Napalm Barrage is more like dropping a massive carpet of destruction.
The gas-and-fire combination gives you more precise control.
You can gas one side, burn another, fall back, then create another damage zone in front of you.
This allows you to give up ground much more slowly while keeping the Terminids trapped inside dangerous areas.
6. Who Should Use This Build?
This setup is particularly effective for players who enjoy:
Area denial
Damage-over-time builds
Terminid missions
Large-scale Bug Breaches
Defensive or kiting playstyles
Controlling enemy movement instead of relying on pure burst damage
It is especially enjoyable on missions where you expect constant waves of Terminids.
The Gloom can also make Eagle management more important because of the increased rearm time, so planning your strikes rather than wasting them is still important.
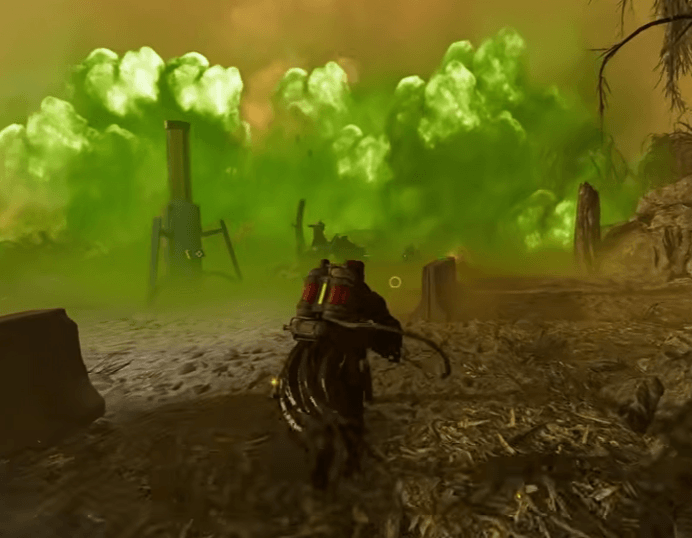
7. Strengths and Weaknesses
Strengths:
Excellent Bug Breach control
Extremely strong area denial
Great synergy between gas and fire
Reliable against large groups
Strong repeatability through Eagle rearming
Gives you more control over enemy movement
Weaknesses:
Heavy enemies still require dedicated damage
Positioning is extremely important
Less focused on instant burst damage
Poor positioning can expose you to your own fire and gas
Requires good timing between Eagle strikes
The build is strongest when you constantly control the battlefield rather than standing still and trying to out-damage the entire swarm.
8. Final Verdict
The Eagle Gas Airstrike is much more than a new gimmick. When combined with the Napalm Airstrike, Gas Mines, and Cremator, it creates one of the most effective area-denial setups for fighting Terminids.
The biggest advantage is consistency. You can repeatedly cover Bug Breaches with gas and fire, force enemies into dangerous zones, and use your heavy weapons only when Chargers, Impalers, or Bile Titans appear.
For players who enjoy controlling the battlefield instead of simply throwing the biggest explosion available, this Helldivers 2 gas and fire loadout is absolutely worth trying, especially if you're looking for cheap Helldivers 2 Items to support your overall setup and improve your Terminid farming experience.