
Arc Raiders Flickering Threat Quest Guide
The Flickering Threat quest in Arc Raiders offers players an exciting challenge involving repair and restoration of power. Given by Celeste, a key NPC in the game, this quest brings the player into a tense, hazardous environment to ensure the generators powering the region stay operational. With some puzzles to solve, a few items to gather, and some exploration to do, this quest provides a great mix of mechanics, story development, and useful rewards for the player. Here's your comprehensive guide to completing the Flickering Threat quest and securing your rewards!
Overview of the Flickering Threat Quest
The quest is introduced by Celeste, who informs the player that her regular engineer is out of commission due to injuries. As a result, she needs someone to handle the critical repair work on the power generators near the Dam. She asks the player to head to the Generator Room, repair the broken generator, and ensure that power is restored to the region.
Objective Breakdown
Find the Generator Room
Repair the Generator (Requires 4 Wires)
Find the Ventilation Shaft (Located near the tall building west of the elevator, accessible via the SE door of the Generator Room)
Enable the Power via the Power Switch Underneath the Stairs
Upon completing these objectives, the player will be rewarded with:
Helmet (Radio Renegade Variant)
5x Medium Gun Parts
3x Advanced Mechanical Components
The rewards are highly valuable for any player looking to improve their gear and enhance their arsenal in Arc Raiders.
Quest Guide: Step-by-Step Instructions
Now that we understand the basics of the quest, let's break it down further into manageable steps.
Step 1: Finding the Generator Room
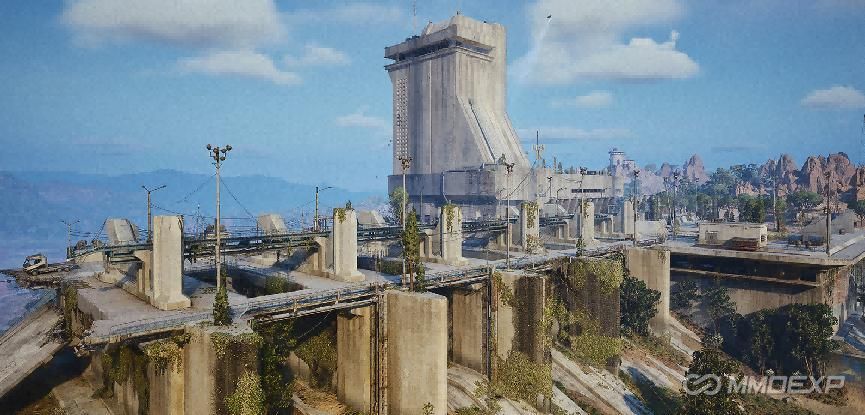
The first objective of the Flickering Threat quest requires you to find the Generator Room. To do so, you'll need to make your way toward the Dam area. This location is usually marked on your in-game map, so it should be easy to find.
Once you arrive at the Dam, you'll need to locate the entrance to the Generator Room. The door is typically situated at the base of the structure, so look for a metal or reinforced door leading underground or into a facility. You might need to fight off a few enemies that are roaming nearby, so keep an eye out for hostile forces.
As you approach the Generator Room, take note of any locked doors, locked crates, or other obstacles in your way. Some of these might require you to solve a minor puzzle or fight enemies before you can proceed.
Step 2: Repairing the Generator
Once inside the Generator Room, you'll find the broken generator that needs repair. The damage to the generator is significant, and it requires specific parts to get it back up and running. These parts are listed in your objectives as 4 Wires.
Where to find the Wires: The wires are typically scattered throughout the room or might require a quick search in nearby areas. Look inside tool boxes, crates, or lockers for the necessary components. If you're having trouble finding them, consider checking other areas near the generator or fighting any remaining enemies in the vicinity.
Repairing the Generator: Once you have collected the 4 Wires, head back to the generator and interact with it to begin the repair process. This is usually a simple prompt where you will need to use the wires to patch up the damaged components of the machine.
After the generator is repaired, you'll be given confirmation that it's operational again, but that's not the end of the quest. You will still need to restore the full power to the Dam.
Step 3: Finding the Ventilation Shaft
Now that the generator is repaired, your next task is to find the Ventilation Shaft. This might seem like a daunting task at first, but with a bit of exploration, it's relatively straightforward.
Location: The Ventilation Shaft is located in a tall building to the west of the elevator. To reach it, head toward the SE door of the Generator Room. From there, you'll find the building that houses the ventilation system. You may have to traverse some external areas to get there, so be prepared for enemies or environmental hazards.
The tall building is marked with a sign or an indicator that can help guide you to the entrance. Once you find the building, look for the ventilation access points or the specific area that allows you to interact and continue.
Step 4: Enabling the Power via the Power Switch
After you've located the ventilation shaft, your final task is to enable the power. This involves finding a power switch that's located underneath a set of stairs. Here's what you need to do:
Once you've accessed the building, head toward the stairs. Look for a small, interactive panel or switch underneath the stairs.
The switch should be clearly marked or signposted, so you won't miss it.
Activate the Power Switch: Interact with the switch to restore power to the Dam area, ensuring that the generators are properly functioning once again.
Common Challenges and Tips
While the Flickering Threat quest is relatively straightforward, there are a few challenges that players might encounter along the way. Here are some tips to help you complete the quest efficiently:
Tip 1: Preparation is Key
Before embarking on the quest, make sure you have the necessary gear. This includes weapons, healing items, and any other tools that could help you fight off enemies in the area.
The Generator Room and surrounding areas are usually filled with hostile forces. Being adequately prepared will save you time and frustration during your journey.
Tip 2: Watch Out for Enemies
While you're repairing the generator and searching for the ventilation shaft, you'll encounter various enemies, including robotic units, drones, or raiders.
Be sure to stay on the lookout for enemies, especially as you enter the Generator Room and surrounding area. Use your weapons or stealth to avoid unnecessary combat when possible, but don't hesitate to engage when needed.
Tip 3: Resource Management
During the quest, you'll be collecting resources like wires, gun parts, and mechanical components. Make sure you have enough inventory space to carry everything you need, and don't forget to check crates and boxes along the way for additional parts or hidden rewards.
Tip 4: Follow the Markers
The game typically marks objectives clearly on your map or with visual cues in the environment. If you get lost, look for these indicators, such as lights, markers, or icons, that point you toward the next objective.
For example, the Ventilation Shaft location will have a clear marker that can guide you through the building.
Quest Rewards
Upon completion of the Flickering Threat quest, you'll receive the following valuable rewards:
Helmet (Radio Renegade Variant): This helmet is a functional piece of headgear with a distinct, rugged design. The Radio Renegade Variant offers enhanced protection and a unique look that stands out from standard helmets. It's a great cosmetic addition and offers decent protection stats.
5x Medium Gun Parts: These parts are essential for crafting or upgrading medium-sized weapons in Arc Raiders. Whether you're upgrading your existing gear or crafting something new, these components will be crucial in enhancing your firepower.
3x Advanced Mechanical Components: A highly sought-after crafting material, these components are used to upgrade or craft higher-tier gear and tools. The advanced nature of these components makes them vital for players looking to progress in the game and tackle more difficult challenges.
The Flickering Threat quest in Arc Raiders is a fun and rewarding task that combines exploration, combat, and puzzle-solving. It offers a solid mix of gameplay mechanics and provides useful rewards, ARC Raiders Coins and ARC Raiders Items that will help you enhance your arsenal and improve your character's survivability. By following this guide and staying prepared, you'll be able to navigate the quest with ease, repair the generator, and restore power to the Dam area without issue.
Good luck, Raider!
MMOexp ARC Raiders Team