Summary
The Deal Melee Damage to ARC Enemies trial in ARC Raiders looks simple, but reaching a score near 200K requires much more than repeatedly hitting ARC machines. Your spawn, lobby, Matriarch positioning, skill tree, stamina management, and target selection all matter. With the right setup, including useful ARC Raiders Items, and a clean route, a 197K+ score is possible.
1. Why the Matriarch Is Your Best Target
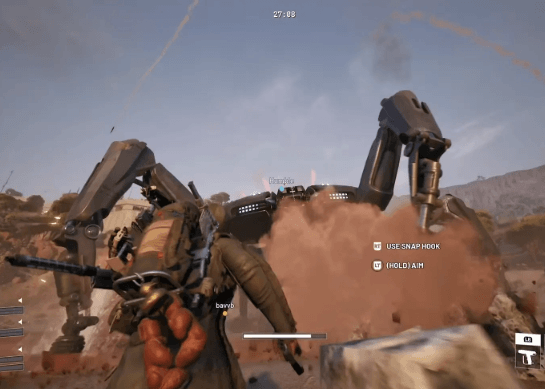
For this trial, the Matriarch should be your primary source of melee damage. It has a huge health pool, giving you enough opportunities to build a massive score without constantly searching for new enemies.
Dam Battlegrounds is particularly useful because the Matriarch can appear in a favorable corner position. A strong spawn can save valuable time and give you more opportunities to attack before the extraction timer becomes a problem.
Blue Gate can also work well. However, your final score depends heavily on the lobby. If other players deal heavy damage to the Matriarch, your potential score drops dramatically.
2. The Most Important Skill Tree
Your skill tree has a major impact on this challenge.
Effortless Swing is one of the most important skills because it reduces stamina pressure and allows you to perform more melee attacks. Since this trial revolves around continuous melee damage, better stamina efficiency directly translates into a higher score.
You should also consider Fly Swatter. With the right investment, it can help you quickly eliminate Wasp targets when you need additional melee points.
Another valuable choice is Three Deep Breaths. Meleeing continuously drains stamina, and difficult situations can leave you without enough time to recover. Faster actions can give you the extra moment needed to roll, sprint, or reposition when the Matriarch or another ARC enemy attacks.
If you have limited skill points, prioritize stamina efficiency first and then build around survivability and mobility.
3. Recommended Loadout
The loadout used for this type of run is relatively simple:
- Survivor — enough inventory space without overcommitting to backpack capacity.
- Blue Shield — provides a safer defensive option while fighting inside the Matriarch.
- Breda — useful for dealing with situations where you need a light-ammo weapon.
- Equalizer — helps weaken ARC enemies such as Rocketeers before finishing them with melee attacks.
- Scanners — essential for maintaining the trial's damage cycle.
- Snap Hook — provides mobility and an emergency escape option.
- Photocloak — useful when the situation becomes dangerous.
- Vita Spray — provides additional healing.
- Zip Lines — optional, but useful for faster movement and recovery.
The Blue Shield is particularly useful here. Unlike a Green Shield's vulnerable charging period, it begins regenerating the shield once activated, making it more reliable when small sources of damage can interrupt your defense.
4. How to Maximize Matriarch Damage
The biggest mistake is rushing your swings without paying attention to positioning.
Try to stay in a safe position where your melee attacks consistently connect with the Matriarch's body. Looking downward and crouching while swinging can sometimes produce a better attack angle, especially when the geometry makes normal swings unreliable.
Your goal should be to maintain a steady rhythm rather than constantly repositioning.
A strong run can potentially leave the Matriarch around 140K–150K damage or higher before you move on to secondary targets. If another player starts meleeing the same Matriarch, however, your final score can fall significantly.
Communication can therefore be surprisingly important. If another player is already attacking, politely asking them to leave one target for your trial can save an otherwise excellent run.
5. Add Extra ARC Targets
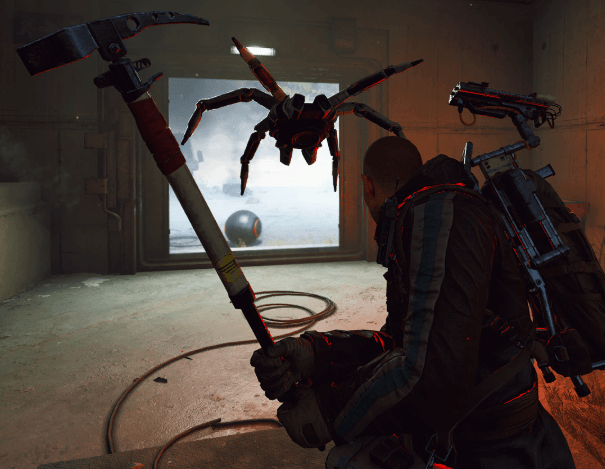
Once the Matriarch is no longer providing enough opportunities, start looking for additional ARC enemies.
Wasp, Hornet, and Rocketeer can all help increase your final score. Rocketeers are particularly valuable because you can use the Equalizer to damage their wings, force them down, and then finish them with melee attacks.
However, don't spend too much time chasing one difficult target. A Rocketeer that flies away, lands badly, or explodes on impact can waste several minutes.
The same applies to Wasp and Hornet targets. If an enemy becomes too difficult to position, move on and protect your remaining time.
6. Timing Is Everything
This challenge is partly a damage test and partly a time-management test.
Keep track of the scanner timing and avoid wasting opportunities. Scanners can accumulate up to the allowed limit, meaning you don't always need to use every scanner immediately.
At the same time, watch the extraction warning carefully. Running across the entire map for one additional ARC enemy is rarely worth sacrificing an otherwise strong score.
The run described above reached 197K+ damage, but several missed opportunities prevented it from breaking the 200K mark. A Rocketeer that exploded during the attempt and other positioning mistakes were enough to leave the run just short of the target.

7. Final Tips for a 200K Run
To consistently push toward 200K, focus on five things:
- Choose a favorable Matriarch spawn.
- Use Effortless Swing to maximize melee uptime.
- Protect your Matriarch damage from other players.
- Use Equalizer to create melee opportunities against Rocketeers.
- Stop chasing targets when the time investment becomes too high.
The biggest lesson is that you don't need a perfect run from start to finish. A strong Matriarch score combined with several efficient ARC kills can put you surprisingly close to 200K.
Final Takeaway
The ARC Raiders Melee Damage trial rewards preparation, patience, and efficient target selection. Start with the Matriarch, maintain consistent melee damage, use your skill tree to control stamina, and consider ARC Raiders Items for sale when preparing your loadout for the challenge. Only pursue secondary ARC targets when they are worth the time. With a good lobby and clean execution, breaking 200K melee damage is absolutely within reach.
![[Expedition ⑤ Material] Foundation 1~4](https://assets.mmoexp.com/images/202607/18319d795653d1162748a8e5f10e1d3655a23dc7.webp)
![[Nomadic Envoys Services] Stash slots +24](https://assets.mmoexp.com/images/202605/7cc0b5e15731160f00918a5748eccd12f26fe3a5.webp)
![[BluePrint] Extended Barrel III](https://assets.mmoexp.com/images/202605/8ae025bf6fe8359742ebe88275df0051724ab65c.jpg)