Among the most memorable and challenging encounters in Path of Exile 2, few bosses leave as strong an impression as Jamanra, the Abomination. Once the proud Faridun King, Jamanra's corruption has twisted him into a monstrous force of nature, embodying the chaos and decay that plague the Vasiri Desert. Throughout Act Two, he taunts and torments you from afar, until the climactic confrontation aboard The Dreadnought, a massive desert caravan rolling toward oblivion.
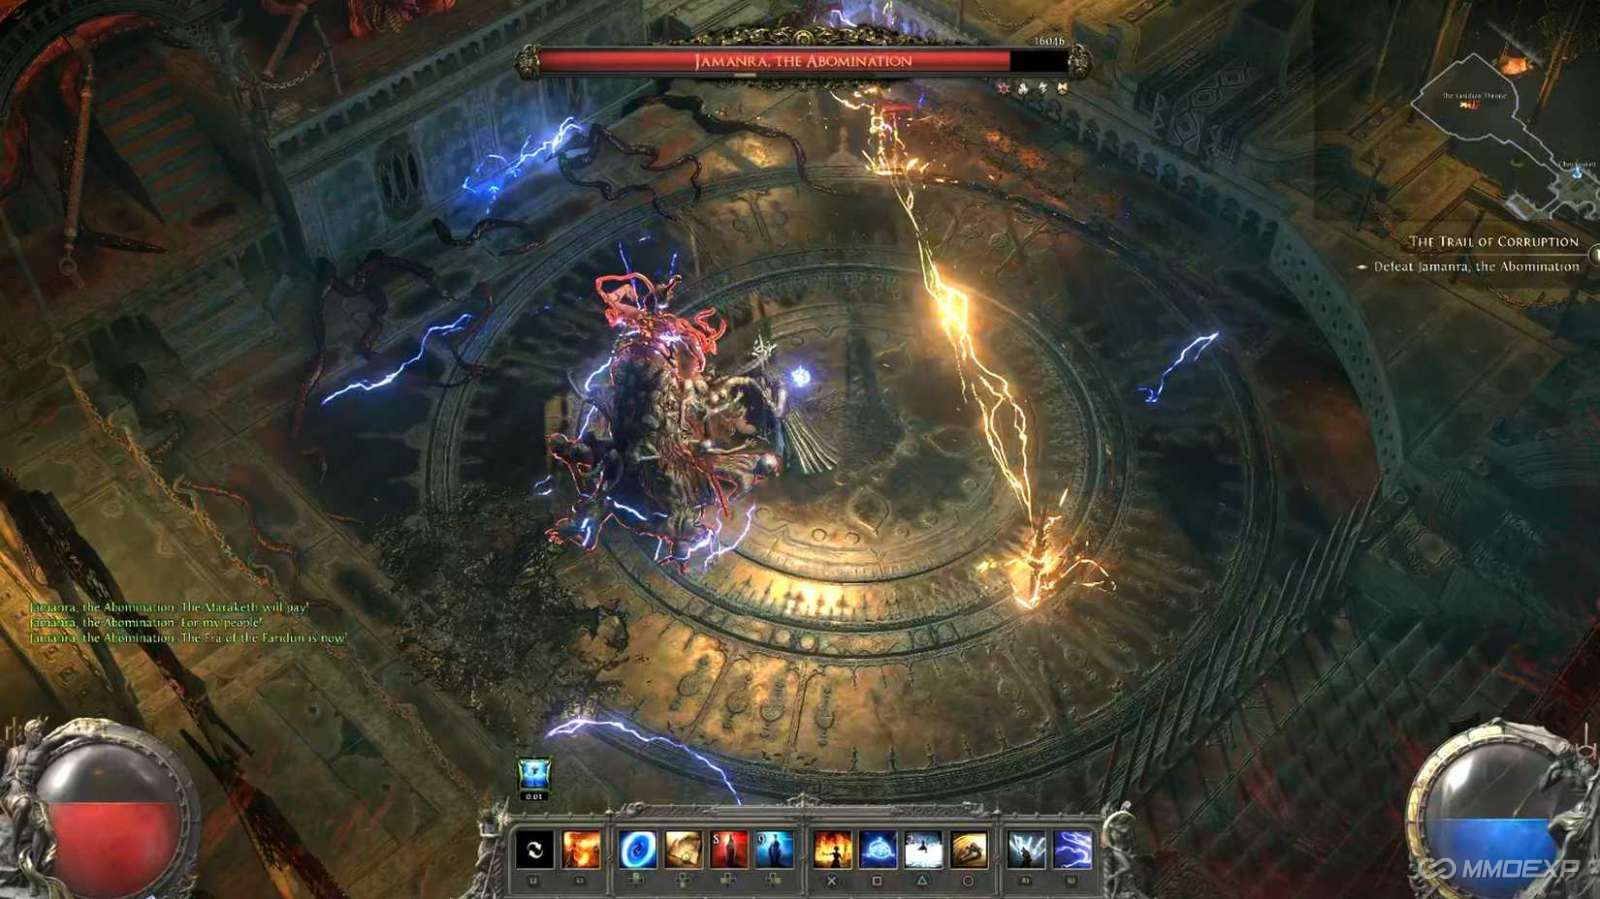
This comprehensive boss guide explains where to find Jamanra, breaks down each phase of his battle, and offers essential strategies for victory. You'll also learn what rewards await you.
Where to Find Jamanra, the Abomination
You'll encounter Jamanra at the end of The Trail of Corruption, Part 2, one of the most cinematic sequences in Path of Exile 2. The journey culminates on The Dreadnought, a sprawling network of interconnected carts hurtling through the desert sands. This setting makes for a dynamic and dangerous battleground, with tight spaces, shifting hazards, and limited mobility.
To reach Jamanra, fight your way across the Dreadnought, defeating waves of Faridun soldiers and cursed undead until you reach the boss arena. The moment you set foot on the final cart, Jamanra will descend in a storm of lightning and rage, initiating the first phase of the battle.
Phase One
The first phase of the Jamanra fight unfolds aboard the Dreadnought. The confined environment heightens the danger of his attacks, forcing constant movement and awareness.
Jamanra's Attacks
Jamanra specializes in lightning-based area-of-effect (AoE) abilities, capable of devastating large sections of the battlefield. His attacks include:
Chain Lightning Crystals: Two lightning-charged crystals appear on the field, tethered by deadly arcs of electricity. Standing between them is fatal. Move toward the upper edges of the arena, these corners are generally safe zones.
Sandstorm Summon: Jamanra conjures a massive sandstorm that sweeps across the Dreadnought, obscuring vision and dealing continuous damage. When this happens, take shelter behind Asala, your ally. Asala's barrier shields you from the worst of the storm, allowing you to survive while waves of undead swarm in.
Undead Reinforcements: During the sandstorm, Jamanra summons undead Faridun to keep you occupied. They attack relentlessly in tight quarters, so keep your life flask active to maintain health.
When the sandstorm clears, Jamanra briefly kneels to regain his composure, this is your best window to unleash your strongest abilities. Use this opportunity to deal massive damage before he resumes his assault.
Tactical Tips for Phase One
Mobility is crucial. Stay light on your feet, keep your distance from the tethered lightning crystals, and use ranged attacks or AoE skills to clear the undead efficiently. Once the sandstorm passes, close in for a flurry of strikes or heavy spells.
Players focusing on cold damage or armor-breaking builds should begin applying pressure early, as Jamanra's defenses only grow more dangerous in the next phase.
Phase Two
Once Jamanra's health drops below 66%, he unleashes his fury. With a roar, he summons a colossal sword and cleaves The Dreadnought in half, sending both you and him tumbling into the sands below. The second phase takes place in the open desert, a larger arena, but one filled with deadly hazards.
Jamanra's New Arsenal
Phase Two introduces several new attacks and hazards, most of which appear in pairs, the number two is the theme of this fight: