A Gladiator's Guide to Beating the Nightmare Boss Cycle in Aion 2
The Nightmare Boss Cycle stands as the ultimate test in Aion 2. As a Gladiator who has cleared this daunting challenge, I'm here to break down the strategy, build, and mindset you need to emerge victorious. While this guide is tailored for Gladiators, the core principles apply to every class facing this brutal fight.

Part 1: The Gladiator Build & Setup
Survival is paramount. Your build must balance sustain, mobility, and burst damage for the execution phase.
Core Skills & Enhancements:
Leaping Slam: Damage Tolerance is essential for surviving the boss's heaviest hits.
Overhead Slam: The HP Absorption upgrade is crucial for sustain. A secondary priority is the 7% chance to activate passive. Avoid the "stop on hit" upgrades, as standing still is often fatal.
Mocking Blade: HP Absorption is non-negotiable for boss sustain. Pair it with Multi-hit for faster healing or Ignore Block/Evasion for consistent damage.
Rush Strike: This is your key mobility tool. Prioritize the 10-meter range and Cooldown Speed upgrades. Use it on cooldown for positioning and to apply consistent stagger damage.
Rending Blow (Your Block Skill): This is your most important defensive tool. You must have the upgrade that provides +200 Block. Without sufficient block rating, the boss will overwhelm you.
Critical Passives:
Blood Absorption: Vital for life steal.
Blocking and Healing on Protection Armor: Significant survivability boost.
Survival Stance: Reduces incoming damage.
Stigma Setup:
Wrath Wave (Mandatory): Your primary burst and stagger tool.
Blade Toss: Excellent for spacing. Use it when you're away from the boss to lower its defense and chip away at its stagger bar.
Tenaciousness: A clutch "oh-shit" button that provides healing and incoming heal buffs.
Ultimate Stigma:
Rage Burst (Level 10 Ideal): This is your fight-winning damage. When the boss is staggered and knocked down, activating Rage Burst will deal massive damage (10-12k+). This is how you secure the kill.
Part 2: Essential Consumables & Buffs
You cannot attempt this fight without proper preparation. These consumables are not optional.
Scrolls: Use Superior Battle Enhancement (Damage), Superior Critical Hit, and Superior Movement Speed scrolls.
Food: This is a two-part requirement:
Wind Breeze Special Juice: For Stamina Regeneration. This is critical for maintaining your mobility and block usage.
Max Stamina Food: To increase your stamina pool, allowing for more evasions and blocks.
Title: Use a Movement Speed title unless you already have max movement speed on your boots, in which case a Stamina title is acceptable. Melee classes especially need the mobility.
Part 3: Fight Strategy & Core Principles
The Golden Rule: Never Stop Moving
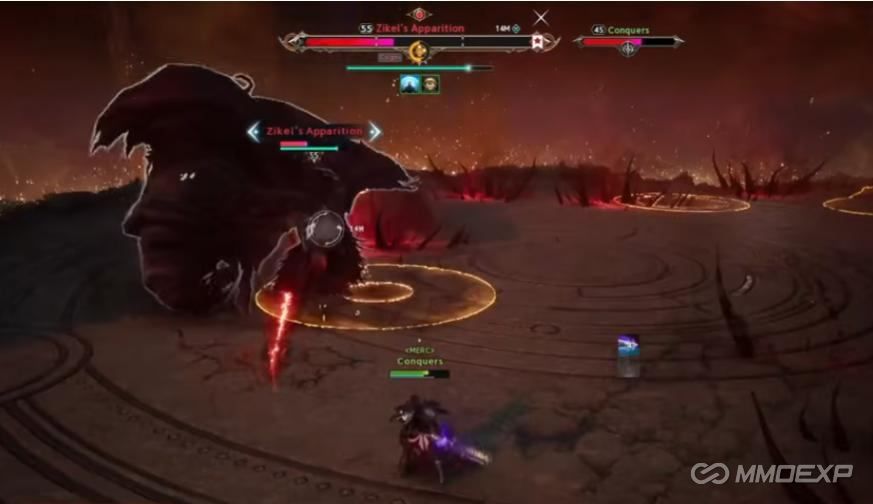
Standing still is death. The boss has devastating area attacks and tracking mechanics. Use Rush Strike and standard dashes to constantly reposition, always circling and avoiding red zones.
Master the Defensive Rhythm
Your block is your best friend. Rending Blow with its +200 Block upgrade will mitigate a huge portion of the boss's standard attacks. Learn the boss's attack animation to time your blocks, conserving stamina. Pair blocking with your HP Absorption skills (Overhead Slam, Mocking Blade) to heal back any damage you do take.
Phase Execution: The 3 Lines & 1 Circle
A key mechanic in the fight involves the boss creating three line-shaped AoE attacks followed by a large circular AoE in the center of the arena.
The Mistake: Getting hit by the lines and then panicking.
The Solution: Dodge the three lines by watching their telegraphs. Immediately after, you must move to the safe circle in the center of the arena to avoid the massive blast that follows. Forgetting this sequence is a common wipe cause.
Burst When It's Time
Do not waste your big cooldowns. Your damage window is when the boss's Stagger Bar is broken, and it is knocked down.
Use Blade Toss and Rush Strike to help build the stagger bar from a safe distance.
Once the bar is broken and the boss is vulnerable, unleash everything: Wrath Wave, Mocking Blade, and most importantly, your ultimate Rage Burst. This is how you push phases and end the fight.
Part 4: Stat Check & Final Advice
Before you even attempt the fight, ensure you meet the stat check.
For Gladiators: Your Block Rating must be high (aim for 1,800+ while stationary, enhanced further by skills). If your block is too low, you will take unsustainable damage.
For Other Classes: If you're not a blocking class, you likely need very high Evasion to achieve the same goal of mitigating incoming damage.
Final Power Recommendation: While skill matters most, being significantly under-geared will make the fight nearly impossible. I cleared it at approximately 2.86k power with the build and strategy outlined above.
Mindset & Persistence
This boss will kill you. You will get hit by de-synced skills and unfair-seeming mechanics. The key is to learn from each attempt. Identify which mechanic killed you, and plan your mobility or defensive cooldown for it next time. Stay calm during the final, hectic 10% of the boss's health. Enhance your class with Aion 2 Kinah and Aion 2 Items, and master the techniques mentioned above to increase your chances of defeating it.
MMOexp Aion 2 Team
