Summary
Shooting in NBA 2K27 is notoriously punishing for new and veteran players, with tight green windows and unforgiving timing mechanics that make consistent scoring extremely difficult. This complete guide covers the game’s current meta jump shot setup, optimized controller and HUD settings, must-equip shooting badges, hot zone farming methods, and hidden pro tricks. Following these adjustments can drastically improve in-game shooting percentages, turning subpar 10–15% three-point shooting into consistent 60%+ elite-level performance in competitive matches, while NBA 2K27 MT can also help players optimize their MyPLAYER progression and access useful resources more efficiently.
Why Shooting Feels Hard in NBA 2K27
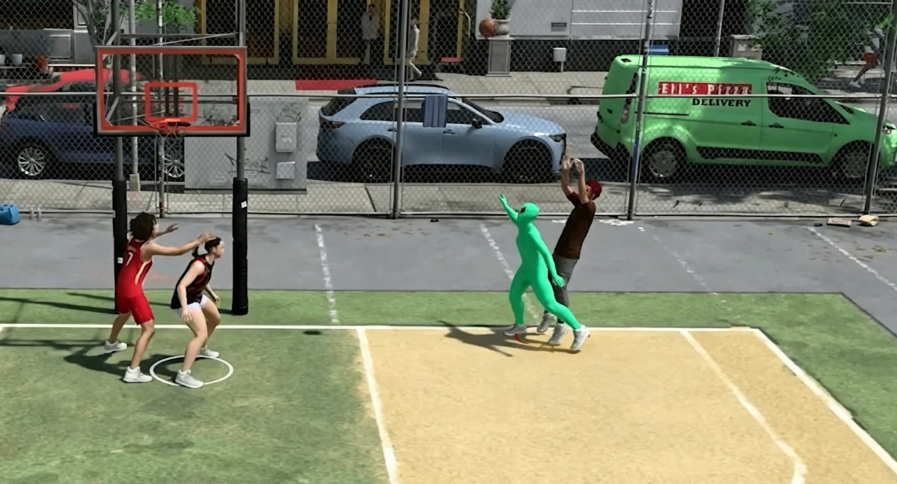
NBA 2K27 overhauled core shooting mechanics compared to previous franchise entries. The biggest change is stricter green window grading, where low-rated jump shot animations feature nearly invisible timing windows that make greens nearly impossible.
Many default and custom jump shots carry poor release window grades, marked D+ or F, which heavily penalize average players. Contest detection is also amplified this year, making contested fadeaways and quick stops far less reliable without a meta-optimized jump shot build.
Even skilled players struggle early-game without proper settings and animations, as base shooting physics require precise timing and setup to land consistent buckets.
Meta NBA 2K27 Jump Shot Breakdown (Max Green Window)
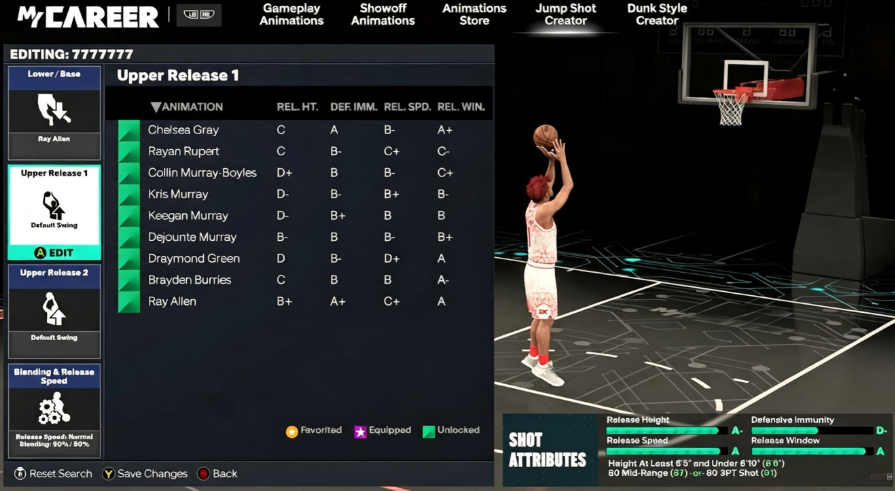
The current best competitive jump shot for NBA 2K27 prioritizes top-tier release window grades and fast animation speed to beat contest pressure. The primary setup uses a Ray Allen base paired with two elite release animations for maximum consistency.
This build requires an 89 mid-range or 89 three-point attribute to unlock its full potential, boasting a solid B+ release window grade for reliable greens in all scenarios. For players with lower attribute ratings, a viable substitute uses the LaMelo Ball base, which only needs an 86 mid-range or 82 three-point rating.
Optimal release tuning includes Oscar Robertson Release 1 and Beluba Release 2 with max release speed. This combination delivers fast, smooth animations that reduce contest effectiveness and open up green opportunities on quick stops, catch-and-shoot plays, and fadeaway attempts.
Essential Controller & HUD Shooting Settings
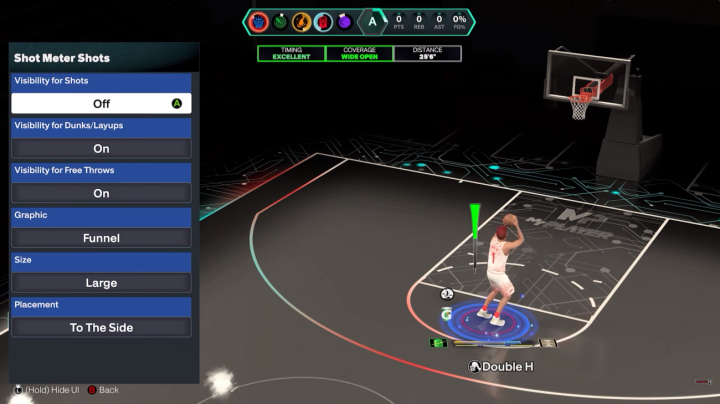
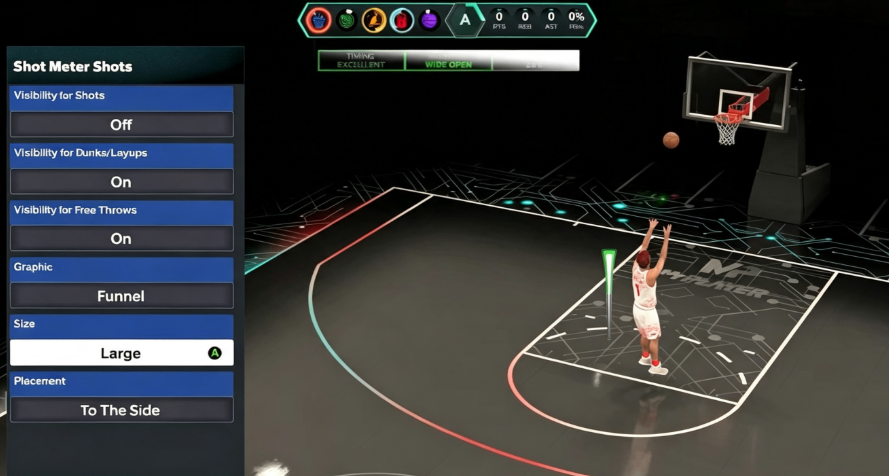
Settings are just as critical as jump shot animations for consistent shooting in NBA 2K27. Players should switch shot timing to Push and Release, which extends visual reaction time and improves timing accuracy.
Set shot timing to Absolute and disable unnecessary assist features to remove inconsistent auto-adjust mechanics. The most impactful change is hiding the shot meter after mastering timing, granting a permanent 10% green window bonus.
New players can keep a large meter temporarily for practice before disabling it. Always enable full shot feedback for all shots, which displays exact timing and contest results to help players learn optimal shot selection and fix timing errors quickly.
Best Shooting Badges for Consistent Greens
Certain shooting badges dominate the NBA 2K27 meta and drastically boost shot success across all playstyles. The Cadence badge is a top-tier pick, stabilizing timing after dribble moves and improving fadeaway mid-range and three-point consistency.
Set and Fire is mandatory for spot-up and catch-and-shoot players, boosting open stationary shots. Smooth Operator enhances contested mid-range fades, while Deadeye reduces penalty from closing defenders.
Limitless Range extends effective shooting distance for deep threes. Quick Trigger offers fast no-dip shots but requires advanced timing skill, making it situational for casual players. Equipping these badges transforms average jump shots into reliable competitive weapons.
Pro Tips to Maximize Shooting Percentage
Farming hot zones is a key overlooked mechanic in NBA 2K27. Players can unlock lethal purple zones by beating the hardest-level Lethal Shooter challenge in the shooting gym. Additional red hot zones unlock after completing two street game shooting drills per court area.
Consumable boosts significantly improve performance. Jump shot VC boosts and Gatorade energy buffs maintain optimal shooting stamina, preventing fatigue penalties that ruin late-game timing accuracy.
Button timing is recommended over rhythm shooting for most players, offering simpler, more consistent inputs without sacrificing shot bonuses. This method eliminates risky right-stick flick inconsistencies during high-pressure matches.
Player Recommendations
Casual players should prioritize the LaMelo Ball base substitute build for lower attribute requirements and easier early-game usability. Master basic settings and hot zones before upgrading to the Ray Allen meta build.
Competitive players aiming for high win rates should unlock the full Ray Allen jump shot setup, max core shooting badges, and farm all lethal hot zones. Focus on open catch-and-shoot and quick-stop opportunities to avoid unnecessary contest pressure.
All players should disable the shot meter once timing is consistent to secure the permanent green window bonus and maximize long-term shooting performance.
Final Verdict
NBA 2K27’s shooting system rewards optimized setups and mechanical discipline more than any recent entry. The Ray Allen meta jump shot, paired with tuned controller settings and core shooting badges, eliminates the game’s notorious shooting inconsistency.
By combining proper animations, setting tweaks, hot zone farming, and smart consumable usage, players can easily climb from sub-15% three-point shooting to elite 60%+ consistency. This all-in-one setup remains the most reliable shooting blueprint for casual and competitive NBA 2K27 players in the current meta, while players looking to accelerate their progression and unlock key upgrades can buy NBA 2K27 VC for additional resources.