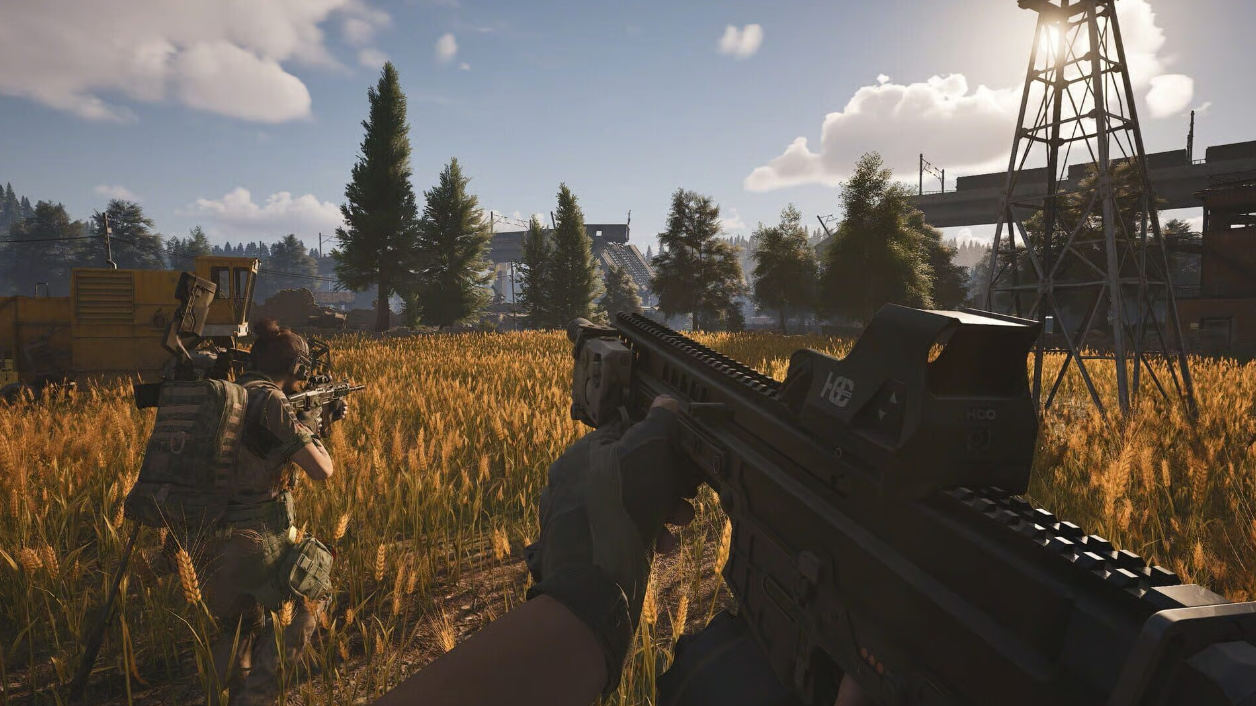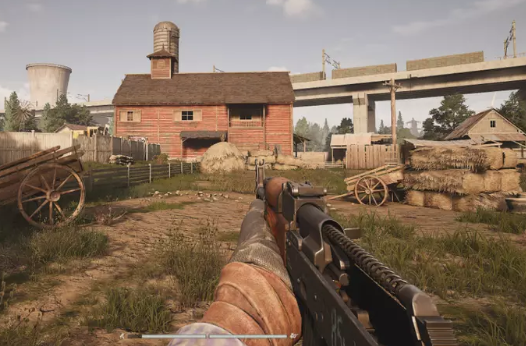
Summary: In Arena Breakout: Infinite (ABI) Season 6, mastering the game's brutal, hardcore economy is just as important as mastering your aim. Following the rollout of the sweeping ABI 2.0 update, the market prices for high-tier tactical gear, Class 5/6 body armor, and armor-piercing ammunition have surged to unprecedented heights.
Running full "meta" kits-featuring heavily modded assault rifles and expensive penetration bullets-will quickly deplete your stash value after just a few bad raids. Fortunately, the Season 6 combat meta provides a massive loophole for smart, budget-conscious players. By understanding weapon mechanics, limb damage distribution, and low-cost modification strategies, you can build weapons that shred millionaire "Chads" in fractions of a second while risking less than 50,000 Koen.
This comprehensive guide delivers an in-depth breakdown of the game's economic mechanics alongside three high-damage, ultra-budget weapon blueprints dominating the ABI landscape today.
The Core Math: High Flesh Damage Bypasses the Hardcore Economy
To successfully weaponize a budget build against fully geared opponents, you must exploit the game's limb damage model and the tactical concept known as the "Leg Meta."
In Arena Breakout: Infinite, ammunition generally falls into two distinct categories:
Armor-Piercing (AP) Rounds: These bullets feature high penetration stats designed to punch through heavy helmets and chest plates. They are incredibly expensive to buy from the Market or high-level Contacts, often costing thousands of Koen per single bullet.
Flesh-Damage Rounds: These bullets have zero armor penetration capabilities but boast massive, catastrophic raw damage stats. Because they cannot pierce armor, they are incredibly cheap, often sold for a fraction of the price of AP rounds.
The "Leg Meta" Loophole
Body armor in ABI only shields an operator's thorax and stomach, while helmets cover portions of the head. An operator's legs have absolutely zero armor protection. There is no item, skill, or clothing tier in the game that can shield a player's lower limbs from incoming fire.
Furthermore, ABI utilizes a Damage Overflow Mechanism. When a specific limb's health pool is completely depleted (turning "blacked out" on the health UI), any additional bullets hitting that limb do not disappear. Instead, that raw damage is multiplied and immediately distributed evenly across all remaining healthy vital organs of the body.
By using an ultra-cheap weapon with a blistering rate of fire packed with high-flesh-damage bullets, you can completely ignore an enemy's 1-million-Koen Tier 6 armor vest. You are not trying to break their armor; you are completely bypassing it by shooting them where armor doesn't exist.
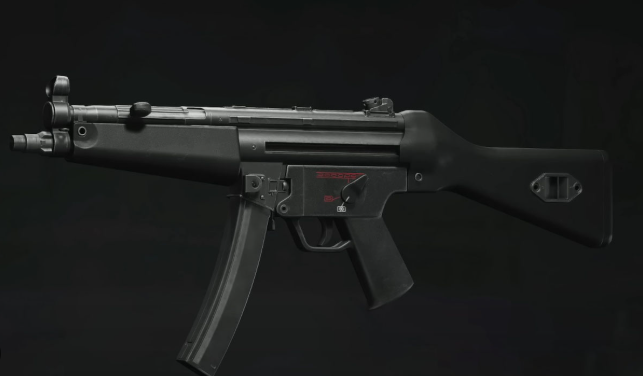
Blueprint 1: The Legendary MP5 "Leg Melter" (Cost: ~35,000 Koen)
The MP5 submachine gun remains the undisputed king of the budget economy in Season 6. It features incredibly low vertical and horizontal base recoil out of the box, meaning you do not need to spend money on expensive stocks or lasers to keep your sights steady.
Base MP5 Weapon
Magazine: 50-Round Drum Magazine (Mandatory for squad wipes)
Handguard: MP5 Tactical Handguard (Unlocks modular rail space)
Foregrip: Lightweight Vertical Grip (Cheap, effective ergonomics)
Sight: Simple Red Dot / Reflex Sight (Clear, open visual frame)
Target Ammunition: 9x19mm Dumdum
Damage Profile: 77 Flesh Damage per hit.
The Math: A PMC has 440 total health points. At an 800 RPM (Rounds Per Minute) fire rate, the MP5 unloads bullets at blinding speeds. Landing just 6 to 7 rounds of Dumdum ammo directly into an enemy's shins or knees will instantly deplete their entire 440 HP pool. This results in a Time-to-Kill (TTK) of roughly 0.45 seconds, letting you drop a top-tier player faster than they can aim down their sights.
Best Map Locations: The tight corridors of Farm's Motel, the indoor hallways of Armory, or the underground bunkers of Bonsai.
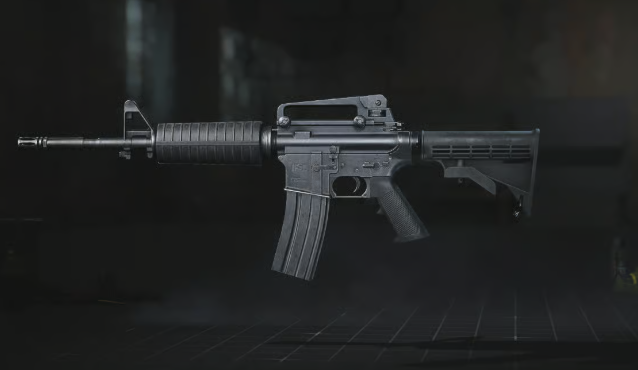
Blueprint 2: The M16 "Burst Champion" Mid-Range Rifle (Cost: ~45,000 Koen)
If you prefer wide-open maps like Valley or Northridge, close-range submachine guns can leave you exposed. The M16 is the ultimate budget alternative for medium-range engagements, delivering the lethal punch of 5.56x45mm rounds at a tiny fraction of the cost of an M4A1.
Base Weapon: M16 Assault Rifle (Keep the factory stock and barrel to save funds)
Target Ammunition: 5.56x45mm HP (74 Flesh Damage) or M855 (Budget penetration alternative)
Key Modifications:
Compact Reflex Sight: Gives you a clear reticle over longer distances without introducing high screen-shake.
Basic Tactical Foregrip: Drastically improves ergonomics, allowing you to aim down sights faster and hold your breath longer.
Standard 30-Round Polymer Mag: Extremely cheap and lightweight, keeping your movement speed high.
Tactical Execution: Switch the M16 to its highly accurate 3-round burst mode. At distances between 30 to 60 meters, aim squarely at the enemy's lower pelvic area or upper thighs. A single, well-placed three-round burst will deliver over 220 points of unmitigated flesh damage instantly, causing severe bleeding, fracturing their legs, and setting them up for an easy follow-up kill.
Blueprint 3: The M870 "One-Tap" Close-Quarters Shotgun (Cost: ~20,000 Koen)
For players looking to execute pure "Zero-to-Hero" runs, nothing matches the devastating financial efficiency of the pump-action M870 shotgun. This is the cheapest build in the entire game capable of neutralizing a fully kitted squad leader in a single click.
Base Weapon: M870 Shotgun
Target Ammunition: Type 8 Buckshot (Massive pellet spread) or FX Slug (High precision flesh damage)
Key Modifications: None. Leave the weapon completely stock. Modding a pump-action shotgun yields diminishing returns. The goal here is absolute minimal risk with maximum reward.
Tactical Execution: This build requires a patient, ambush-heavy playstyle. Hold tight corners, hide behind doors in high-traffic extraction zones, or camp high-tier loot containers inside buildings. When an enemy walks past your position, wait until they are within 5 meters, then fire a single shell directly into their exposed legs. The multi-pellet burst of Type 8 Buckshot will transfer all its damage into their lower body instantly, resulting in an immediate one-tap blackout and kill.
For players focused on building their stash efficiently, understanding the value of Arena Breakout: Infinite Koens can help determine how much to invest in weapons, ammunition, and attachments before each raid.
4 Golden Rules for Dominating the ABI Economy
To maximize your profit margins and ensure your budget runs steadily build up your stash balance, memorize these tactical guidelines:
Prioritize Ammo Value Over Attachments: A cheap, unmodded gun firing high-damage ammo will always outperform a 200,000-Koen fully-decked rifle firing cheap, low-tier ammunition. Put your currency into your magazines, not your weapon cosmetics or luxury stocks.
Never Buy Upgraded Stocks and Buffer Tubes: Standard factory stocks work perfectly fine for budget setups. Spending an extra 25,000 Koen on a meta buffer tube and stock assembly only offers minor single-digit stat increases that will not change the outcome of a leg-meta ambush.
Unlearn Center-Mass Aiming: Most traditional first-person shooters train your muscle memory to target the chest or head. When running a flesh-damage budget build, you must actively break this habit. Keep your crosshairs lowered at hip or knee height. If you accidentally spray your cheap ammo into a Tier 6 chest plate, your bullets will simply shatter, dealing zero damage and leaving you completely exposed.
Loot Intelligently: When you successfully take down a wealthy player using these economy builds, do not just blindly grab their gear. Strip their expensive optics, tactical flashlights, suppressors, and high-tier AP ammo directly into your Secure Container. Leave heavy, low-value armor rigs behind to maximize your inventory's profit-per-slot ratio before heading to the extraction zone.