Summary
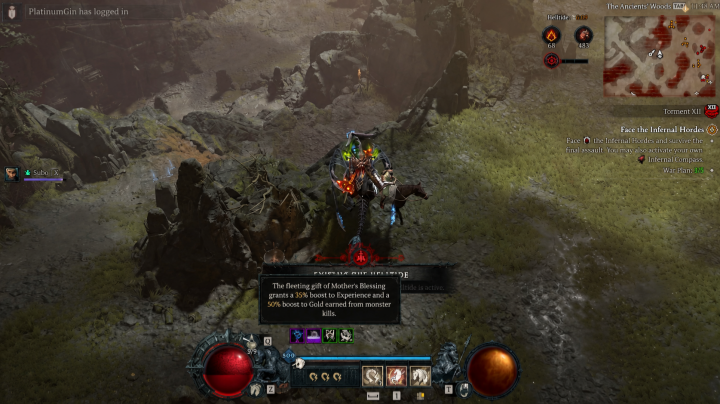
With the Mother's Blessing event running until August 18th, Diablo 4 players are enjoying a massive 35% increased experience and 50% increased gold boost—multiplicative rates that make this the perfect time to push for those extra Paragon points. Whether you're chasing level 300 or just want to strengthen your build, now is the time to log in and optimize your farming strategy. If you're looking to gear up quickly or stockpile materials for endgame content, you can also buy Diablo 4 Gold from trusted platforms to supplement your farming efforts. This guide will walk you through the most efficient method to level your Paragon board during this event: Helltide Worm farming.

Table of Contents
What Are Helltide Worms?
Preparing for the Farm
The Worm Loop Strategy
Maximizing Experience with Ruptures
Solo vs. Group Farming
Recommended Build for Speed Farming
Additional Resources
What Are Helltide Worms?
Helltide Worms are special enemies that spawn at fixed locations throughout Helltide zones. However, they don't always appear every time you pass by. To trigger them consistently, you need to raise your Threat Meter above 50%.
The Threat Meter is located at the top of your screen. Once it reaches the second bar, worms begin spawning much more frequently. This makes high-threat Helltides the ideal environment for worm farming.
Fixed Spawn Locations
Worm spawns are not random. They have set locations in each Helltide zone. For example, in Scosglen, you'll find worms scattered across specific paths. The most efficient approach is to create a farming loop that checks multiple spawn points.
Preparing for the Farm
1. Know the Event Details
Mother's Blessing Duration: Now through August 18th
Buff: 35% increased XP, 50% increased gold (multiplicative)
Goal: Farm as many monsters as possible to maximize experience gains
2. Check the Worm Locations
Use a Helltide worm map to identify fixed spawn points. The map should show:
Color-coded paths for efficient looping
Teleport points to reset your route
All known worm spawn locations in each zone
3. Build Your Threat Meter
Threat Meter > 50% is the threshold for consistent worm spawns
Fight enemies near worm locations to build threat while checking spawns
This way, you're always progressing both goals simultaneously
The Worm Loop Strategy
Solo Farming Route
Start at town near the Helltide zone
Ride to the first worm location on your route
Circle the spawn point—if the worm appears, kill it
Move to the next location on your loop
Continue the circuit until you reach the end
Teleport back to town and restart the route
Color-Coded Pathing
Most worm maps use color coding to indicate:
Green → Primary route (high-density worm spawns)
Red/Orange → Secondary routes (lower priority)
Dotted lines → Teleport return points
This visual system makes it easy to maintain a consistent loop without wasting time checking empty spots.
Alternative Approach: Mixed Farming
If you're low on materials or want to set yourself up for sustained farming:
Focus primarily on worms for pure XP
Stop at nearby Helltide events when convenient
Don't worry about salvaging or turning in whispers if XP is your only goal
Why? Every second spent on non-combat activities is time not earning the Mother's Blessing XP bonus.
Maximizing Experience with Ruptures
What Are Surging Ruptures?
Surging Ruptures are high-density enemy spawns that appear during Helltides. These are the absolute best source of monster kills per minute.
Why Ruptures Are Optimal:
Factor | Benefit |
Highest Density | More monsters per square meter than any other content |
Multi-Stage Spawns | Can contain smaller ruptures inside them |
Goblin Spawns | Can trigger additional ruptures |
Synergy with Worms | Fighting near worms while clearing ruptures doubles your spawn opportunities |
The Dual Strategy
Best Approach: Combine worm farming with surging ruptures.
Find a rupture near your worm route
Close tears inside the rupture as quickly as possible
Fight near the worm spawn point while closing tears
Move away to close more tears, then return to the worm area
Repeat — this keeps both worms and rupture enemies spawning constantly
The result: Non-stop monster kills that maximize the 35% XP buff.
Solo vs. Group Farming
Group Advantages
Aspect | Solo | Group |
Threat Meter | Single player's meter | Multiple meters = more spawns |
Worm Spawn Rate | Good | Significantly higher |
Experience Gain | Solid | Better (more worms = more XP) |
Loot | Decent | Shared but more frequent drops |
Group Strategy:
Each player has their own threat meter
More players = more chances for worm spawns
Constant worm spawning = non-stop XP and loot
Finding a Group
Looking for teammates? Here are the best options:
Discord communities with active trade and group-finding channels
In-game clan systems
Trade channels (often easier than external websites)
Recommended Build for Speed Farming
The "Brobarian" Speed Build
For players looking to maximize efficiency, a speed-focused Barbarian build is one of the best choices.
Key Features:
Not the tankiest — sacrifices survivability for speed
Extremely fast movement — zoom through routes
AoE damage — everything dies around you without needing to stop
Playstyle:
Hold down buttons — no complex combos
Move the joystick — your character does the rest
Enjoy the ride — enemies die as you pass
Other Class Options
While Barbarian works well for this strategy, other classes can also excel:
Rogue — high mobility and clear speed
Sorcerer — excellent AoE coverage
Spiritborn — strong damage with mobility options
Choose a build that allows you to kill without stopping, as downtime kills efficiency.
Additional Resources
Community Tools
Several resources can help optimize your farming:
Worm Confirm Cheat Sheets — fixed spawn maps for all Helltide zones
Horadric Cube Reference — crafting recipes and slot mechanics
Build Libraries — organized by category (crafting, farming, leveling, endgame)
Finding Help
Active Discord Servers — daily voice chat, theorycrafting, and trade
Class-Specific Channels — get build advice for your character
In-Game Clans — join a community for group content
Quick Summary: The Ultimate Helltide Worm Farm Checklist
Step | Action |
1 | Log in before August 18th |
2 | Enter a Helltide and build Threat Meter above 50% |
3 | Check worm spawn map and plan your loop |
4 | Farm worms while clearing surging ruptures |
5 | Teleport back to town to reset route |
6 | Group up if possible for even better spawn rates |
7 | Don't waste time on salvaging or whisper turn-ins (if only XP matters) |

Final Thoughts
The Mother's Blessing event is the perfect opportunity to make significant Paragon progress. By combining the XP buff with Helltide Worm farming and surging rupture density, you can maximize every minute of gameplay. For players who want to stock up on materials or gear without the extra grind, there are platforms with Diablo 4 Gold for sale—MMOEXP is a solid option to consider for fast and reliable transactions. By following the strategies in this guide, you'll turn this limited-time event into your most productive farming session yet.
Key takeaways:
Threat Meter > 50% is essential for worm spawns
Worms + Ruptures = maximum monster density
Groups significantly improve spawn rates
Speed builds minimize downtime
Don't overcomplicate it — just kill, move, and repeat
The more efficiently you farm during this event, the more Paragon points you'll earn. So grab your gear, find your Helltide, and start grinding.