
If you want a loadout in Helldivers 2 that trivializes Terminid missions, this is about as close to “easy mode” as the game gets. The concept behind this build is simple: combine area denial, infinite sustain damage, and autonomous crowd control so that individual positioning mistakes barely matter. Once everything is deployed, your job is mainly movement and target prioritization rather than raw firefighting skill, especially for players who want to buy Helldivers 2 Items to optimize their setup more quickly. If you’re aiming to maximize efficiency and reduce grind while still running top-tier loadouts, consider making a purchase to accelerate your progression and fully unlock the tools that make this build so dominant.
Below is a structured breakdown of the build and how it performs in a high-difficulty Terminid dive.
Core Stratagem Loadout: Maximum Area Control
Orbital Napalm Barrage
This is the centerpiece of the entire setup. The Orbital Napalm Barrage functions as a large-scale area denial tool that continuously saturates zones with fire damage over time.
In practice, it performs three key roles:
· Deletes bug breaches on spawn
· Softens or outright clears mega nests and egg clusters
· Forces constant repositioning from Terminid waves
Its main strength is not precision-it is coverage. Once called in, entire engagement zones become temporarily uninhabitable for enemies.
Eagle Air Strike
The Eagle Air Strike acts as the build’s flexible response tool. Unlike the Napalm Barrage, it is precise, fast, and adaptable.
It is used for:
· Destroying bug holes
· Removing medium-to-large armored threats
· Emergency clearing during chaotic breaches
Think of it as a tactical “catch-all” stratagem that fills every gap the napalm leaves behind.
Quasar Cannon
The Quasar Cannon is the dedicated anti-heavy weapon. It replaces the need for traditional ammo management and provides consistent elite-killing power.
Primary targets include:
· Chargers
· Bile Titans
· High-priority armored units
Its strength lies in reliability: every shot meaningfully impacts the battlefield, and there is no reliance on resupply cycles.
Guard Dog (Gas Variant)
The Gas Guard Dog provides passive crowd control by applying disruptive gas effects to nearby enemies.
Its role is subtle but crucial:
· Slows enemy advances
· Breaks melee pressure from swarms
· Creates “safe windows” for reloads and stratagem calls
It effectively turns close-range pressure into manageable traffic rather than lethal swarming.
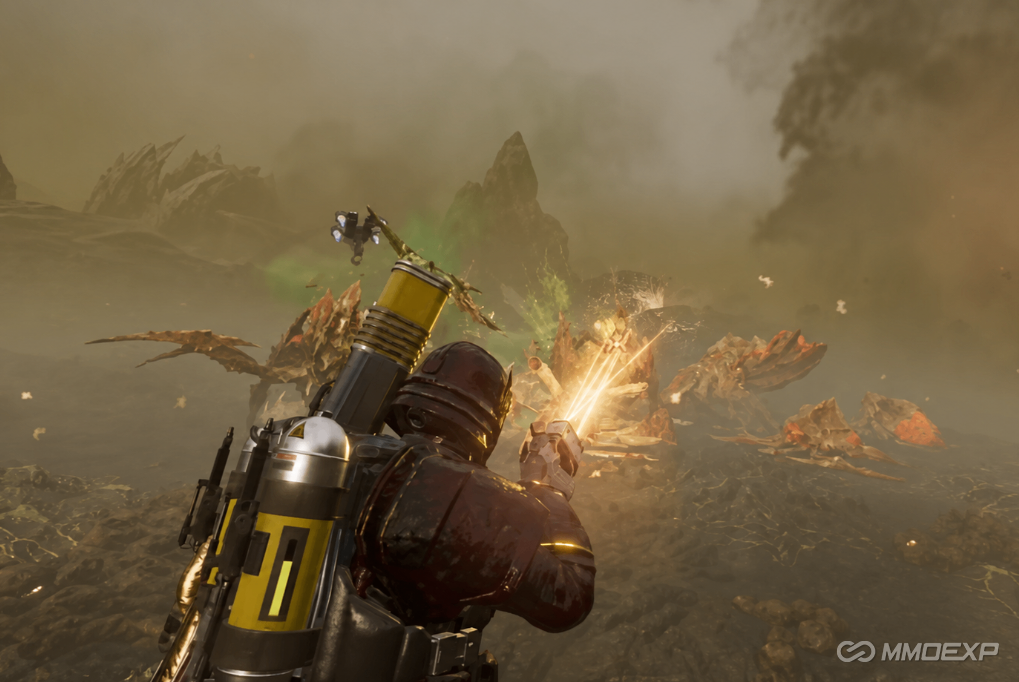
Primary Weapon: The Trident (Laser Dominance)
The Trident is the defining piece of this loadout’s lethality.
Its advantages include:
· Effectively infinite ammo
· No damage falloff over distance
· Consistent DPS comparable to (or exceeding) the Breaker-class shotguns
This creates a sustained-fire weapon that never requires downtime. Against Terminids, that matters more than burst damage because engagements are constant and multi-directional.
In practical terms, it allows you to:
· Delete Hive Guards without repositioning
· Maintain pressure while stratagems recharge
· Clear light enemies while focusing heavies
Secondary and Utility Tools
Grenade Pistol / Explosives
Used primarily for:
· Bug hole finishing
· Emergency burst damage
· Tight cluster clear
“Giga Grenades” (Thermite-style explosives in context)
These are high-impact area clears used to:
· Instantly thin dense enemy groups
· Secure bug nest progress without stratagem reliance
They function as a tactical reset button when swarm density spikes too high.
Combat Strategy: How the Build Actually Plays
1. Opening Engagement
The ideal opener is the Orbital Napalm Barrage. Once deployed, you immediately create a controlled zone where enemy reinforcement becomes inefficient.
You then reposition outward rather than fighting inside spawn zones.
2. Elite Target Priority
Once heavies appear:
· Quasar Cannon handles Chargers and Titans
· Air Strike finishes grouped threats or structures
The key is not overcommitting ammo or stratagems-each elite is removed with minimal resource overlap.
3. Nest and Objective Clearing
Bug nests are approached in a loop:
· Napalm softens or denies entry zones
· Eagle Air Strike removes holes
· Grenades finish remaining clusters
This creates a predictable rhythm: suppress → strike → clean up.
4. Swarm Management
Swarm pressure is never directly “fought.” Instead:
· Gas Guard Dog disrupts movement
· Napalm zones punish clustering
· Primary weapon handles stragglers
You are not stopping waves-you are redirecting them into damage zones.
Performance Outcome
In a full Terminid mission using this loadout:
· Mega nests can be cleared in minutes
· Bug breaches rarely become dangerous
· Ammo dependency is minimal
· Death risk is significantly reduced even on high difficulty
The result is a highly efficient but low-complexity clear pattern where battlefield control replaces mechanical execution.
Final Assessment
This build is extremely powerful because it removes traditional failure points in Helldivers 2:
· Ammo scarcity is negated (Trident + stratagem uptime)
· Swarm pressure is neutralized (gas + napalm synergy)
· Heavy threats are hard-countered (Quasar Cannon)
· Objective pressure is accelerated (Eagle Air Strike)
However, it comes with a trade-off: it reduces engagement complexity. Once optimized, it can make high-level dives feel mechanically repetitive. For players focused purely on efficiency, especially those who may be trying to gear up quickly through options like cheap Helldivers 2 Items, it is one of the strongest Terminid-clearing loadouts available. For those prioritizing challenge, it may be too effective.


