Most naval builds chase sustained DPS. They fire on cooldown, stack reload speed, and pray the enemy sinks before their own hull gives out. That works—until you run into a tank that just won't buckle.
This build flips the script. Iron Thunder isn't about constant firing. It's about controlled bursts. Stop firing, wait 1.5 seconds, and your next volley hits 65% harder. That's not a bonus—that's a delete button. And when you mount it on a Galleon or Oppressor, you become the heaviest artillery piece on the water.
Here's exactly how to build it, sail it, and punish anyone who thinks they can trade broadsides with you.
The Hull-7/7 or Go Home
Before we talk about guns, talk about bones. A 7/7 upgraded hull gives you the health, brace strength, and resistances to anchor in close range and survive the return fire.
High base HP lets you tank initial salvos while you line up your own.
Solid block strength means you can brace through the enemy's burst window.
Balanced resistances (burn, flood, fire, penetration, electric, poison) mean you don't fold to common status-spam builds.
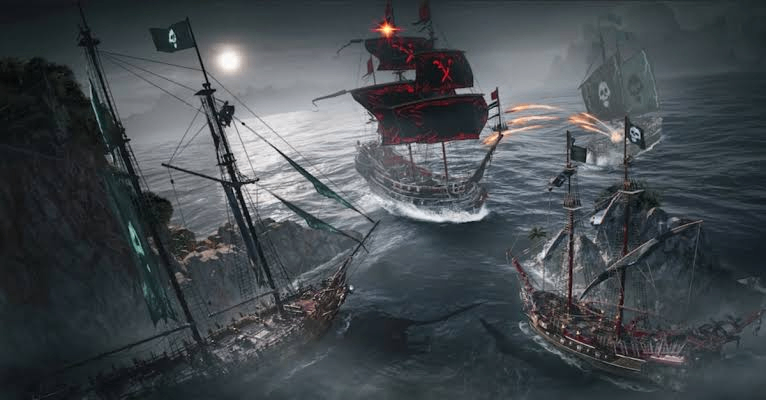
This isn't a kiting frigate. You're a heavy gunship that sails into the kill box, takes a punch, and delivers two back. If your hull isn't maxed, stop reading and go upgrade—because this playstyle demands a ship that can eat damage while you wait for that 1.5-second window.
Talent Tree-Feed the Burst, Not the Heal
The skill points make or break the rhythm. You're not building a medic boat.
Priority nodes:
Direct damage-flat damage increases on heavy artillery.
Reload speed-shorter reload = faster access to that Iron Thunder proc.
Critical hit control-more crits on the burst volley = exponential pain.
Flood damage-pairs perfectly with the secondary weapon system.
Secondary investments:
Slow repair-for between-engagement sustain.
Trade-damage talents-boost output when you're trading blows.
Heavy artillery fire and specialized ammo enhancement-these turn a good volley into a devastating one.
Healing tree? Keep only Battlefield Medics and Emergency Repair.
Don't go deeper. Every point spent on pure survival is a point not spent on making that 1.5-second window hit like a tsunami. This build wins by out-damaging, not out-lasting.
Weapon Layout-Same Quadrant, Same Rhythm
Here's where most players mess up. They scatter weapon types across broadsides, hoping for versatility. That kills Iron Thunder.
Front and rear slots: Equip healing weapons. These are for team support and topping off between fights—not for your primary damage cycle. Use them sparingly.
Broadside (the real payload):
Run Urbain's Great Guns on your primary broadside. Why? Because they allow all weapons in the same quadrant to fire simultaneously. That's non-negotiable for this build. A staggered broadside wastes the 1.5-second buff window—you need every cannon to land at the same moment.
Stat priorities on those guns:
Tear and Rupture-for immediate armor strip.
Flood Damage-stacks with your talent tree.
Burning Continuation-keeps pressure on after the volley.
If your starboard side is your main damage dealer, stack reload speed on that side exclusively. Faster reload = more frequent Iron Thunder triggers. The off-broadside can be utility or backup—but never fire it during your burst cycle.
Furniture & Auxiliary-Force Multipliers
Your guns bring the punch. Your furniture brings the math.
Hallmarker's Table-applies a mark on broadside hit, increasing all subsequent damage against that target. This means your second Iron Thunder volley hits even harder than the first.
Grand Rob Workshop-shortens reload time and boosts secondary broadside damage. More uptime, more burst.
Breach Lock Furnace-ideal for close-quarters. The bonus scales the closer you are to the enemy. This build wants to be in kissing distance.
Flood-damage furniture-any piece that increases secondary damage and range of flood weapons makes your sustained pressure stick.
Nocturne Heart earns a special mention as an auxiliary slot—it gives resistances and survivability without compromising your offensive rhythm. Perfect for those tight turning duels.
Tactical Execution-Sail Like a Battleship, Think Like a Sniper
Here's the real secret: Iron Thunder is not a DPS aura. It's a timing mechanic.
Assess the target's armor. Unarmored? Fire immediately to suppress. Armored? Wait—line up the perfect angle, then unleash.
Stop firing non-auxiliary weapons once you're in rhythm. That 1.5-second wait is not downtime—it's setup. Use it to reposition, brace, or adjust your angle.
Fire your primary broadside as one single, synchronized punch. Not two clicks. Not a ripple. One hammer.
Watch for the status proc. Once Iron Thunder activates at Tier 3, the damage is overwhelming. You'll see chunks of health disappear that other builds take three cycles to match.
Close the distance. Trade one brace for one volley. Then sail away and reload while your enemy repairs—and hit them again before they finish.
Why This Works in Endgame PvP and PvE
This build punishes hesitation. It punishes scatter-fire. And it absolutely punishes anyone who thinks they can out-tank a Galleon.
The Iron Thunder rhythm forces you to play disciplined—but the payoff is a burst window that can flip a 3v1 in your favor. In hostile takeovers, Legendary Heists, or open-sea duels, this setup consistently outperforms pure DPS spam because it concentrates damage into one devastating moment that the enemy can't brace through.
If your gear isn't quite there yet—missing a key furniture piece or still grinding for Urbain's Great Guns—don't stall your progress. A lot of endgame captains speed up their equipment grind by grabbing Skull and Bones Items at MMOexp to fill those final slots without spending weeks on trade routes. Gets you into the fight faster, with the exact stats you need.
And if you're running low on buy Skull and Bones Silver for that 7/7 hull, MMOexp is another reliable stop to round out your resource stack. Saves you the sailing time, keeps you on the water where you belong.