Summary
Black Temple is coming to WoW TBC Classic Anniversary Phase 3 on August 27, and guilds should start preparing now. The raid features nine major encounters, dangerous trash packs, and mechanics that can punish unprepared groups. From High Warlord Naj'entus to Illidan Stormrage, this guide covers key mechanics, positioning tips, and priorities for a smoother Week 1 clear, while WoW Classic TBC Anniversary Gold can help with raid preparation.

1. Black Temple Trash: Play Safe and Control Pulls
Black Temple trash is more dangerous than it first appears. Many mobs have frontal attacks, cleaves, interrupts, crowd control, or abilities that can wipe careless groups.
The most important rule is simple: keep mobs facing away from the raid. Interrupt dangerous casts and prioritize mobs that buff or empower others.
Some particularly dangerous enemies include Coilskar Generals, Shadowmoon Reavers, and Bonechewer Blade Furies. Reavers should be killed quickly because their spell absorption can lead to massive damage, while Blade Furies should be controlled before their Whirlwind causes problems.
2. High Warlord Naj'entus
Naj'entus is one of the more straightforward Black Temple bosses, but positioning still matters.
Spread ranged players roughly six yards apart to reduce damage from Needle Spine. When a player is impaled, another raid member must pick up the spine and use it to break Naj'entus' Tidal Shield.
Before breaking the shield, make sure the raid is topped off. Tidal Burst deals heavy raid-wide damage, so healing coordination is essential.
3. Supremus
Supremus is a two-phase encounter that alternates between tanking and movement.
During Phase 1, melee should stay behind the boss while ranged players spread out. Avoid Molten Flame and keep tanks healthy for Hateful Strike.
Phase 2 becomes a movement check. When Supremus fixates on you, run away, but don't get more than 40 yards away or he will charge. Volcanic Geysers also create dangerous areas, so keep watching the ground.
4. Shade of Akama and Gorefiend
Shade of Akama is relatively easy if the raid handles the channelers correctly. Kill the six channelers quickly, then burn down the boss once he reaches Akama.
Gorefiend is also mechanically simple, but Shadow of Death requires preparation. Players affected should wait until the debuff is nearly finished before moving to the designated area. Once inside the spirit phase, quickly destroy the Shadowy Constructs using the special action-bar abilities.
5. Reliquary of Souls
Reliquary is one of the first serious progression checks for less experienced groups.
Phase 1 requires careful tank rotation because healing is disabled. In Phase 2, interrupts become critical. Spirit Shock must be interrupted, while Rune Shield should be spell-stolen immediately.
Save Heroism or Bloodlust for Phase 3. During this phase, raid damage constantly increases, so maximize DPS while keeping players affected by Spite alive.

6. Gurtogg Bloodboil
Bloodboil is heavily focused on communication and positioning.
Tanks need to rotate stacks of Acidic Wound, while ranged and healers cycle through Blood Boil assignments. During Phase 2, Fel Rage creates a temporary supercharged player who requires heavy healing.
The fight becomes much easier when every group knows exactly when to move in and out.
7. Mother Shahraz
Mother Shahraz is famous for her Fatal Attraction mechanic. For Week 1, Shadow Resistance is highly recommended because it makes the encounter much more manageable.
Keep the three tanks together in front of the boss for Saber Lash. When Fatal Attraction targets you, immediately move away from the other affected players. Avoid running through the raid while doing so.
8. Illidari Council
The Illidari Council can become a major progression wall. The four bosses share one health pool, but each requires different handling.
Gathios should be carefully moved as Consecrates appear. Veras needs attention because of Deadly Poison and Envenom. Lady Malande must be interrupted consistently, especially Circle of Healing.
Zerevor should be controlled at range, with the raid staying away from Arcane Explosion. For Week 1, a six-healer strategy is safer than trying to maximize DPS.
9. Illidan Stormrage
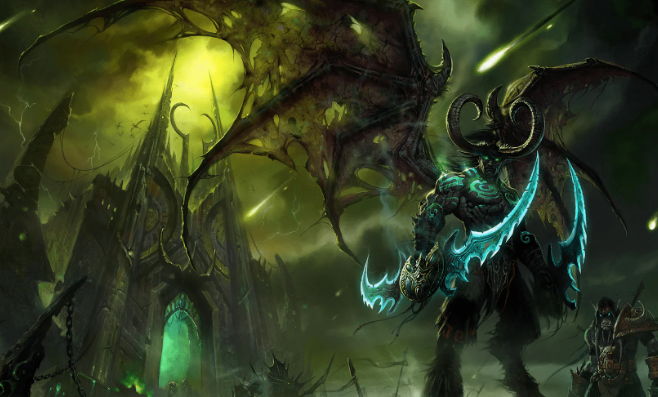
Illidan is the final and most demanding encounter.
Phase 1 focuses on tanking and avoiding Flame Crash and Parasitic Shadowfiends. A Warrior or Paladin tank is preferred because Shear requires attacks to be blocked, parried, or dodged.
At 65%, Phase 2 introduces the Flames of Azzinoth. Tanks need to control the fire elementals while ranged players spread out to reduce overlapping damage.
Phase 3 is the major DPS check. Use Heroism or Bloodlust and push Illidan aggressively. Strong guilds may be able to skip the demon phase entirely. If not, a Warlock tank with Shadow Resistance becomes essential.
Final Black Temple Preparation Tips
For WoW TBC Classic Anniversary Phase 3, don't treat Black Temple like a simple gear check. Positioning, interrupts, tank swaps, movement, and communication will determine whether your first clear succeeds.
Before August 27, make sure your raid has consumables, resistance gear where required, clear assignments, and a plan for every major mechanic.
In short: Naj'entus and Supremus are relatively manageable, while Reliquary, Bloodboil, Mother Shahraz, Council, and Illidan are the encounters most likely to test your raid. Prepare early with enough cheap WoW TBC Classic Anniversary Gold, prioritize mechanics over parses, and focus on securing your Week 1 clear.