Summary
Diablo 4 Season 14 has introduced several opportunities to optimize the Shred Druid for high-tier Pit progression, but many players encounter the same obstacles after transitioning into the endgame. Damage feels inconsistent, survivability drops sharply in higher Pit levels, bosses take too long to stagger, and small gearing mistakes significantly reduce overall performance.
This guide focuses on solving those practical issues instead of explaining every game mechanic. Following the natural progression from gearing to Pit optimization, you'll learn how to transition your build efficiently, improve both offense and defense, prioritize Mythic items, and make informed adjustments that help you push Pit 135+ more consistently.
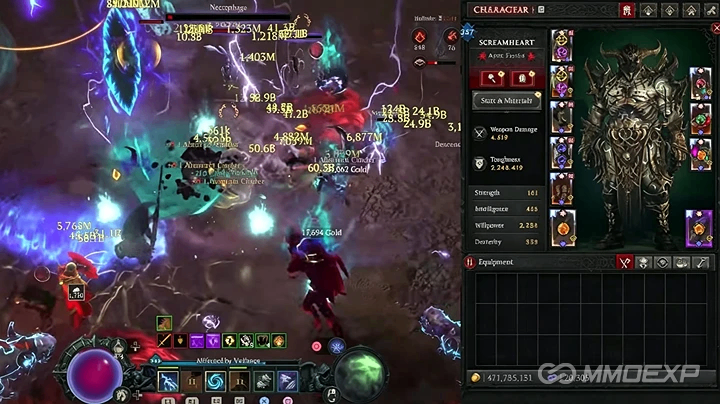
Part 1: Build a Stable Foundation Before Attempting High Pit Levels
Why it matters
Many players jump directly into Pit pushing before their character is properly prepared. The result is frequent deaths and inconsistent clears that are caused by missing core items rather than lack of player skill.
What to do
Progress through the build in stages instead of immediately copying an endgame setup.
A practical progression looks like this:
Level using the Chaos Storm setup.
Transition after obtaining the 2-piece Storm Shepherd Set.
Move into the Speed Farming Shred build.
Upgrade into the Midgame version.
Finish with the dedicated Pit Push variant.
Each stage improves your character while avoiding unnecessary resource investment.
Do not skip directly to the Pit setup if your gear cannot support it.
Part 2: Solve Damage Problems Before Looking for More DPS
Why it matters
Many players believe low damage comes from missing Mythic items, but incorrect Aspect placement often causes a much larger performance loss.
What to do
One of the most important upgrades is placing Overcharged Aspect on your Amulet.
Use the Horadric Cube together with a Cooling Tuning Prism to repeatedly transfigure the Amulet until you obtain:
Overcharged Aspect (preferred)
Great Storm Aspect (acceptable alternative)
The Overcharged version applies Vulnerable more efficiently while providing better overall damage scaling.
Also remember that Lightning Storm only displays correctly during Grizzly Rage if Werewolf is selected, and this configuration also increases Lightning Storm's damage.
Before changing gear, verify these settings first because they often solve damage issues immediately.
Part 3: Increase Survivability Without Sacrificing Too Much Damage
Why it matters
Pit 130+ enemies deal enough damage that even strong offensive builds can die instantly without proper defensive stats.
What to do
Prioritize Maximum Life on nearly every equipment slot.
Aim to have Max Life on:
Helmet
Chest
Gloves
Pants
Boots
Amulet
Rings whenever possible
Next, improve your elemental defenses.
Your defensive equipment should include All Resist, especially on:
Chest
Pants
Boots
Socket resistance gems based on the damage types causing the most deaths.
Recommended priorities include:
Poison Resistance
Lightning Resistance
Fire Resistance
Physical Resistance when available
Cold damage can also become dangerous during high Pit clears, so adjust your resistances according to the enemies you frequently encounter.
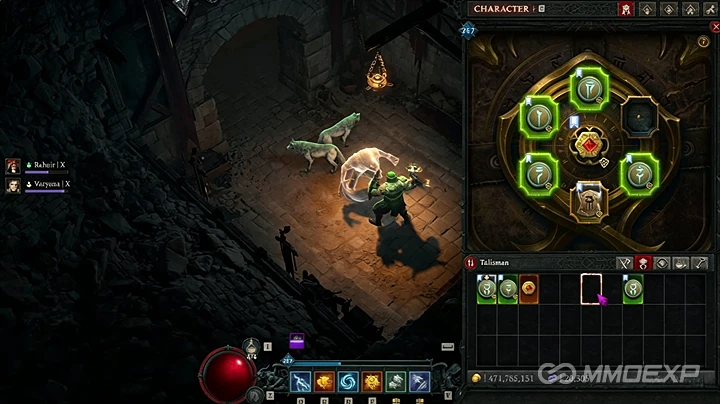
Part 4: Optimize Resources for Longer Boss Fights
Why it matters
Running out of Spirit or losing Ultimate uptime significantly lowers Shred's sustained damage.
What to do
Several gear choices improve resource management without reducing DPS.
Useful upgrades include:
Resource Generation on the Amulet
Resource Generation on the Helmet
Maximum Resource on the Chest Armor
The build already gains additional Spirit through:
Tibault's Will
Blood Howl
Lust for Carnage
Urge of Verathiel
Because of these existing sources, Resource Generation often provides better consistency than Lucky Hit Resource effects.
For Spirit Boons, Prickleskin becomes an excellent offensive option once Maximum Resource reaches comfortable levels.
Part 5: Target the Right Mythic Item First
Why it matters
Not every Mythic provides the same performance increase.
Players often waste valuable crafting materials chasing lower-impact upgrades first.
What to do
Prioritize obtaining Ifas' Dire Totem.
It provides the largest overall damage increase for the endgame Shred Druid.
When crafting Mythic one-handed weapons at the Jeweler, you have a chance to obtain:
Ifas' Dire Totem
Waxing Gibbous
Since both are valuable outcomes, this crafting category offers excellent efficiency compared to targeting other Mythic equipment.
If upgrading through trading instead of farming, some players may choose to buy Diablo 4 Items that directly complete their build rather than investing large amounts of crafting materials into uncertain upgrades. This approach can reduce the time needed to reach endgame optimization when specific Mythic or Greater Affix items are the only remaining upgrades.
Part 6: Improve Boss Damage Through Proper Crowd Control
Why it matters
Many players deal excellent damage to regular monsters but struggle against Pit bosses.
The issue often comes from incorrect Crowd Control application.
What to do
Use Talismans that provide:
Nature Magic Skills
Chance to Freeze
The build relies on Freeze because bosses only receive the full benefit of Zurath's damage bonus after being staggered through Freeze.
Avoid introducing unnecessary Crowd Control effects that interfere with Freeze.
The primary Freeze source should remain the Thul Rune, allowing more reliable stagger timing during boss encounters.
The faster bosses reach the correct stagger state, the faster they can be eliminated.
Part 7: Fine-Tune Skills and Paragon for Pit 135+
Why it matters
Once your equipment is nearly complete, skill allocation becomes increasingly important.
Small changes can noticeably improve both damage and survivability.
What to do
Recommended adjustments include:
Choose Overpower instead of the Unstoppable upgrade on Bulwark.
Move the Unstoppable effect to Blood Howl.
Add Barrier through your Gloves.
Maximize Cyclone Armor for additional defense.
Extend Debilitating Roar to maintain higher damage uptime.
For Paragon Boards:
Remove unnecessary Critical Strike Chance if already capped.
Invest spare points into nearby Willpower nodes.
Only reduce defensive nodes after confirming you can comfortably survive current Pit levels.
These changes provide gradual improvements without requiring major equipment replacements.
Part 8: Understand Current Build Interactions
Why it matters
Several current interactions affect Shred Druid performance.
Knowing them helps explain why damage sometimes changes between runs.
What to do
The Arch Druid's Aspect currently grants stronger damage than expected because it applies multiple damage multipliers simultaneously.
This allows the build to avoid using Thundergod's while still gaining a substantial damage increase.
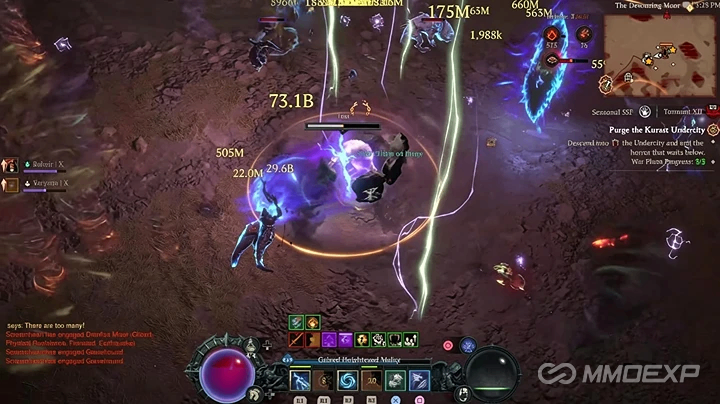
Another interaction involves the five-piece set bonus, which can snapshot into Lightning Storm.
Recasting Lightning Storm may significantly increase damage during very high Pit attempts.
This optimization is primarily useful for Pit 125+ progression. For general Torment farming, repeatedly recasting the skill offers very little practical benefit.
Key Takeaways
Progress through the Shred build in stages instead of rushing directly into the Pit version.
Apply Overcharged Aspect on the Amulet for stronger Vulnerable uptime.
Stack Maximum Life and All Resist before chasing additional damage.
Improve Resource Generation to maintain consistent Shred and Ultimate uptime.
Target Ifas' Dire Totem as your first Mythic priority.
Use Freeze through the Thul Rune to maximize boss stagger damage.
Optimize skills and Paragon only after your core equipment is complete.
Snapshot interactions are valuable for leaderboard pushes but unnecessary for routine farming.
Conclusion
Reaching Pit 135+ with a Shred Druid is less about finding a single overpowered item and more about optimizing every stage of character progression. Building a solid defensive foundation, maintaining reliable resource generation, prioritizing the correct Mythic upgrades, and understanding how Freeze, Vulnerable, and Lightning Storm interact will produce far more consistent results than simply increasing sheet damage. By improving one area at a time, you can steadily push deeper into the Pit while maintaining a balanced build capable of handling Diablo 4 Season 14's toughest endgame challenges.