
Diablo 4 Shield of Retribution Paladin Build Guide
The Shield of Retribution Paladin has evolved into one of the strongest builds this season in Diablo IV. With insane damage scaling, near-invulnerability options, and multiple viable playstyles, this build is capable of:
· Tier 118 Hardcore clears
· Sub-2 minute Pit 99 runs
· One-shotting T5 bosses
· Dominating T7 content in groups
Whether you're pushing endgame content or looking to buy Diablo 4 Gold to speed up your progression, this guide breaks down all updated variants, optimization strategies, and how to push this build to its absolute limit.
Why This Build Is So Strong
The Shield of Retribution build revolves around:
· Massive block scaling
· High uptime buffs (Clash, Resolve, Arbiter)
· Synergy between Juggernaut + Resolve stacks
· Extremely efficient AoE shield throws
The result? A build that melts everything while remaining deceptively tanky.
Core Playstyle
At its core, the rotation is simple but has a key optimization:
Never spam Shield endlessly
Instead, follow this pattern:
· Cast Shield 3 times
· Use another skill (Clash, Aura, Consecration)
· Repeat
This ensures:
· Maximum DPS uptime
· Better resource efficiency
· Full benefit from key mechanics like Ward of the White Dove
Build Variants (VERY IMPORTANT)
This build has multiple optimized versions, and choosing the right one is critical.
1. Speed Farming (BEST OVERALL)
Argent Veil Arbiter Evade Build
This is the fastest and most broken version right now.
How it works:
· Use Argent Veil
· Spam evade
· Automatically trigger shield attacks
· Maintain Arbiter buff
Why it's insane:
· Clears Pit 99 in ~90–120 seconds
· Minimal input required
· Extremely high mobility
You’re basically flying through dungeons while auto-casting destruction
2. Arbiter Push Build (Leaderboard Setup)
This is the highest damage version, used for top-tier pushing.
Key Mechanics:
· Maintain permanent Arbiter
Abuse:
· Aspect of Strife (~188% damage)
· Ascension Aspect (huge multiplier)
Downsides:
· Requires pre-stacking buffs
· Setup-heavy (not casual-friendly)
Best for:
· Tower pushing
· Leaderboard attempts
3. Fortress Variant (Safe & Consistent)
If you hate setup mechanics—this is your version.
Benefits:
· Near invincibility inside Fortress
· Consistent Resolve generation
· Easier to play
Trade-off:
· Slightly lower peak damage vs Arbiter
· Best for:
Hardcore
Bossing
Players who prefer consistency
4. Bossing Variant
Designed specifically for T7 bosses and high-end encounters.
Strategy:
· Drop Fortress
· Stand inside
· Tank everything
· Burst bosses down
· You literally become unkillable while dealing massive damage.
Survivability Guide (MOST COMMON ISSUE)
Many players struggle here—this is how you fix it.
1. Block Chance (CRITICAL)
You need 100% block chance.
1. Sources:
· Clash → +15%
2. Paragon boards:
· Castle
· Beacon
· Shield Bearer
If Clash is not active → you can get one-shot.
Safer Option:
Use On Guard temper
· Grants permanent block cap
· Recommended for Hardcore
2. Life Scaling
Since you’re using a unique shield (no DR roll):
· Stack +Life on:
1. Gloves
2. Rings
3. Boots
· Use:
1. Life potion
· Life incense
· Example:
· 290k base toughness
· 380k+ with buffs
3. Potions & Incense
These give a massive survivability boost (~30%+). Don’t ignore them—especially in Hardcore.
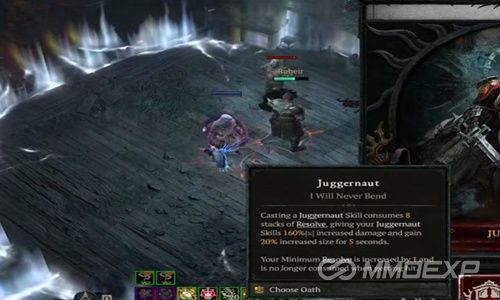
Resolve System (HUGE DAMAGE BOOST)
This is where your real damage comes from.
How it works:
· Build up Resolve stacks
· Hit max → consumed
· Gain 5-second damage buff
Key item:
· Mantle of the Grey
· Grants ~12% damage per Resolve stack
Optimization Tips
· Increase:
1. Max Resolve stacks
2. Resolve generation
· Use:
1. Resolve Generated (push builds)
2. Max Resolve (bossing)
3. More stacks = exponentially more damage
Gear & Aspect Strategy
Your setup changes depending on your goal:
Scenario - Focus
Speed Farming - Mobility + Arbiter
Push - Max damage scaling
Bossing - Fortress + survivability
Hardcore - Block cap + life
Expect to swap:
· Pants (tempers)
· Aspects
· Some skill nodes
Gameplay Tips
· Always maintain Clash buff
· Rotate skills every 3 casts
· Stay inside Fortress (if using it)
· Don’t enter fights without block ready
· Manage resources in Arbiter builds
Final Thoughts
The Shield of Retribution Paladin is currently:
· One of the fastest builds in the game
· One of the safest (with Fortress)
· One of the highest damage scaling setups
If you want:
· Speed → Argent Veil Arbiter
· Safety → Fortress
· Top ranks → Arbiter Push
Whether you're aiming to maximize efficiency or looking to buy cheap Diablo 4 Items from trusted platforms like MMOEXP to accelerate your progress, this build can do it all—you just need the right variant.
MMOexp Diablo 4 Team