
Dreadmyst Dungeon Mage Guide: Step-by-Step Clear Strategy
The Dreadmyst dungeon introduces a challenging but highly rewarding experience, especially for mage players who can leverage crowd control and burst timing to dominate encounters. This guide breaks down each phase of the dungeon, focusing on skill sequencing, cooldown management, and survival timing to help you complete the run efficiently and safely. For players looking to accelerate their progression or gear optimization, some may choose to buy Dreadmyst Gold to better prepare for the dungeon’s demanding encounters.
Preparation and Mindset
Before entering Dreadmyst, understand that this dungeon rewards patience and precision over reckless aggression. Enemies hit hard, and improper timing-especially on defensive skills-can quickly lead to failure. As a mage, your strength lies in controlling the battlefield while executing high-damage burst windows. Keep your cooldown awareness sharp and avoid rushing your rotations.
Opening Section: Establishing Control
The first segment of the dungeon is relatively straightforward. Begin with your standard combo rotation:
· Cast Inferno to initiate damage.
· Follow with Frost Nova to apply crowd control.
· Use Bind Spirit on the cleric enemy to immobilize them.
Once this setup is complete, maintain pressure by repeatedly using Bind Spirit while waiting for your major cooldowns-particularly Inferno-to refresh. The key here is consistency: keep enemies locked down and avoid unnecessary risks.
After using Fire Blast, pause briefly before activating Bone of Protection. This delay is critical to avoid incoming stun mechanics that can disrupt your flow and expose you to heavy damage.
Cleric Encounter: Timing Is Everything
The cleric is the first real test of execution. Mistiming your defensive skills here can result in significant damage taken.
Follow this sequence carefully:
1. Apply your buffs first.
2. Cast Inferno, then Frost Nova.
3. Wait for the cleric’s first offensive cast and immediately use Anti-Magic.
4. As the second offensive cast reaches halfway, activate Bone of Protection.
Once both threats are mitigated, unleash your burst damage. If your output isn’t sufficient to finish the target, revert to Bind Spirit and repeat the control cycle until the cleric is defeated.
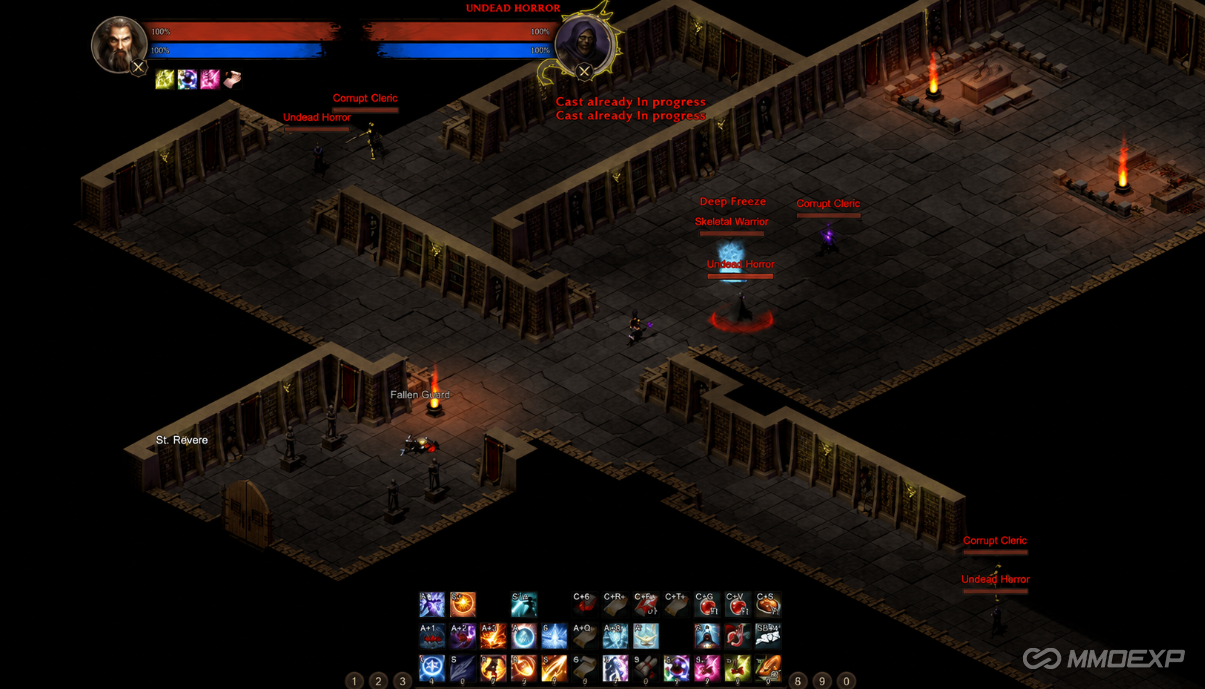
Mob Packs: Prioritization and Control
When dealing with multiple enemies, target priority becomes essential:
· Use Bind Spirit on the cleric to prevent healing or disruption.
· Freeze the warrior using Frost Nova.
· Focus your burst damage on the horror-type enemy first.
Maintain awareness of your Bind Spirit cooldown. The moment its effect on the cleric is about to expire, be ready to reapply it. Once the mob pack is thinned out, transition into a one-on-one approach using the same strategy applied during the cleric encounter.
An alternative clearing method is to open with Inferno followed by Frost Nova for quick AoE control, then proceed with targeted elimination. This approach is slightly faster but requires tighter execution.
Mid-Dungeon Encounters: Consistency Over Speed
As you progress deeper into Dreadmyst, enemy pressure increases. Continue using your standard combo and focus on eliminating high-threat enemies like horror mobs first. Once again, revert to the cleric strategy when dealing with single targets.
Avoid overextending during this phase. Maintaining control is more important than maximizing damage output.
Boss Fight: Burst Windows and Defensive Precision
The final boss encounter is where your mastery of timing is fully tested.
Opening Rotation:
· Inferno
· Frost Ward
· Frost Bolt
· Bind Spirit
This establishes early control and prepares you for the critical burst phase.
Core Burst Combo:
This sequence must be executed quickly within a narrow window:
1. Cast Inferno.
2. Immediately follow with Frost Ward.
3. Activate Bone of Protection without delay.
4. Use Anti-Magic right after.
This sequence protects you during the boss’s most dangerous damage window. Missing this timing can result in heavy damage or even a wipe.
After stabilizing:
· Cast Fire Blast and Fire Ball for burst damage.
· Optionally continue with Frost Nova and Frost Bolt for additional pressure.
· Finish with Bind Spirit to regain control.
If survivability is a concern, skip the extended combo and transition directly into Bind Spirit after Fire Ball to play more conservatively.
Final Thoughts
Dreadmyst is a mechanically demanding dungeon that rewards disciplined execution. As a mage, your success depends on precise timing, intelligent cooldown usage, and consistent crowd control. Focus on mastering each phase rather than rushing through encounters, and you’ll find the dungeon becomes far more manageable over time. If you're looking to optimize your progression further, having access to resources like cheap Dreadmyst Gold can help smooth out gear upgrades and preparation. With practice, this run becomes not only efficient but highly satisfying-especially when every combo lands exactly as planned.