
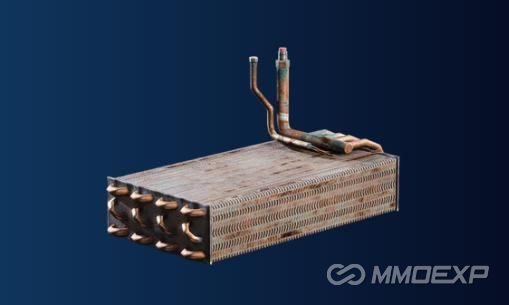
In the gritty, post-apocalyptic world of Arc Raiders, survival hinges on scavenging rare materials to progress through expeditions, craft gear, and retire your raider. One of the most frustrating yet essential items you'll hunt is the Cooling Coil. This rare Industrial loot item is a key requirement for Expedition 2, specifically Phase 2 (Core Systems to Framework transition). Players need exactly four Cooling Coils, alongside 35 Durable Cloth, 25 Wires, and 20 Electrical Components, to advance.
Cooling Coils aren't just quest fodder. Once submitted, you can recycle extras into 6 Chemicals and 2 Steel Springs-valuable for crafting advanced mechanical components and extended magazines-or sell them for 1,000 ARC Raiders coins each. They don't drop from enemies or appear in every raid, so knowing precise spawn locations separates successful farmers from those stuck in endless loops. Cooling Coils spawn exclusively in Industrial zones, marked by a building icon on the map. Inside these areas, prioritize red lockers, breachable metal crates, toolboxes, metal shelves, car hoods, and generators. Red lockers offer the highest spawn rate, often yielding the coil alongside Epic-tier materials.
The game features five main maps-Dam Battlegrounds (starter), Spaceport, Blue Gate, Stella Montis, and Buried City-but Industrial hotspots cluster on three: Dam Battlegrounds, Spaceport, and Blue Gate. Stella Montis works for end-game runs but carries higher PvP and ARC enemy risk.
Top Spot: Dam Battlegrounds - Hydroponic Dome Complex
Dam Battlegrounds stands as the premier map for Cooling Coil farming. Its compact, high-density Industrial zones let you load in, loot, and extract in under 10 minutes if you spawn favorably. The undisputed champion is the Hydroponic Dome Complex in the southwest. Larger domed structures here brim with red lockers and open metal shelves-exactly where coils frequently sit in plain sight or tucked inside.
Clear ARC units and rival raiders first; the area draws traffic due to its loot value. Breach every container: red lockers first, then crates and shelves.
Secondary Dam Spots:
Water Treatment Control: Excellent if you hold a Dam Surveillance Key. A locked room features an entire row of red lockers along the left wall-prime real estate for at least one coil. Combine with nearby toolboxes and metal boxes for bonus loot.
Power Generation Complex: Generator-filled buildings overflow with breachable crates and toolboxes. Great density, though more spread out than the domes.
Scrap Yard (southern map): Lower risk but lower yield. Use it as a backup if domes are contested.
Dam Battlegrounds excels for early-game players-no unlock requirements, 30-minute raid timer (extendable in events). Spawn luck helps; rush north or the primary facility for underground sections packed with metal containers.
Strong Alternative: Spaceport - Rocket Assembly and Nearby Industrial Hubs
If Dam feels overcrowded or you unlock Spaceport (after 12 rounds), head here next. The map's northern industrial cluster delivers reliable spawns. Rocket Assembly tops the list: red lockers line both the first and second floors, often dropping coils plus high-tier mats. It's centrally located, reducing travel time but increasing PvP encounters.
Follow with Container Storage and Vehicle Maintenance-a short walk south, both labeled Industrial. These feature vehicle wrecks, car hoods, and crates ideal for coils. Shipping Warehouse lags in yield and sits on the map edge; avoid unless spawning nearby.
Spaceport offers medium loot rarity overall, balancing risk and reward. Focus on electrical zones-red lockers remain your best friend across every floor and building.
Viable Backup: The Blue Gate - Warehouse Complex
The Blue Gate (unlocked after 18 rounds) suits mid-to-late progression. The Warehouse Complex near the center provides a decent row of top-floor lockers. Results vary-some runs yield coils quickly, others nothing-so treat it as a secondary option if Dam or Spaceport raids go south. Adorned Wreckage on the west side works if you spawn close, but its distance makes it inefficient for dedicated farming.
Stella Montis (24 rounds to unlock) includes Loading Bay (both levels) and potential server rooms in the Lobby Metro or Buried City areas. These high-risk zones suit players already geared for end-game, but skip them for coil farming unless you're there for other objectives. Higher ARC aggression and player density make it suboptimal.
Pro Farming Strategies and Tips
Here's how veterans maximize efficiency:
Loot Priority Order: Always scan for red lockers first-they're the meta container. Then breach crates, check toolboxes, shelves, car hoods, and generators. Ignore non-Industrial icons unless desperate.
Loadout Optimization: Run light for speed. A stealth-focused kit with silenced weapons, breach tools, and extra inventory slots shines. Bring a Dam Surveillance Key for Water Treatment locks. Prioritize mobility gear to rotate between POIs or extract fast under fire.
PvPvE Awareness: These are hot zones. Hydroponic Domes and Rocket Assembly attract crowds-listen for footsteps, use cover, and extract at the first sign of trouble. ARC enemies guard prime loot; thin them quietly or bait players into fights while you loot side rooms.
Route Planning: Study interactive maps (available via community sites). On Dam, spawn-adjacent routes to Hydroponic or underground bays cut time. On Spaceport, chain Rocket Assembly → Container Storage in one fluid loop.
Multi-Run Efficiency: Aim for 2-4 coils per session. Many players complete the four-coil requirement in two Dam raids. Track your inventory-recycle extras immediately for springs if not needed for the expedition.
Common Pitfalls to Avoid: Don't waste time in low-yield areas like general warehouses or non-Industrial buildings. Searching Spaceport's outer edges early wastes timer. Over-looting contested spots without clearing threats leads to lost extracts. Some confuse Cooling Coils with Cooling Fans (a different expedition item)-double-check your project tab.
Why These Spots Work (and When to Adapt)
Industrial zones share spawn logic: Cooling Coils tie to electrical/power-themed props in lore-rich environments-hydroponics for climate control, rocket assembly for machinery, warehouses for storage tech. Dynamic events (night raids, storms) can boost or hinder visibility, but core containers stay consistent.
Adapt by map rotation. Early players stick to Dam. Mid-game mixes Spaceport for variety. Late-game uses Blue Gate or Stella as backups. If servers feel sweaty, off-peak hours or less popular POIs reduce competition.
In summary, Dam Battlegrounds' Hydroponic Dome Complex is your go-to for fast, reliable Cooling Coil farms. Supplement with Spaceport's Rocket Assembly and Water Treatment Control for variety. Master red locker routes, respect the PvPvE tension, and you'll knock out those four coils in a handful of raids-pushing your Expedition forward and freeing you to tackle tougher challenges like Framework upgrades or deeper Stella Montis runs. If you want to acquire these items more quickly and reliably, you can purchase them directly from MMOexp. We offer a variety of rare items—such as ARC Raiders Blueprints, Cooling Coils, and more—to help you rapidly enhance your gaming experience.
Arc Raiders rewards knowledge and efficiency. With this guide, you're equipped to scavenge smarter, extract safer, and retire your raider with style. Happy hunting in the Rust Belt-those coils are waiting in the domes and lockers.
MMOexp ARC Raiders Team


")