
Diablo IV Shield Charge Retribution Paladin Build Guide
This build is one of the most overlooked endgame setups right now. It revolves around Shield Charge triggering massive Retribution (Thorns-based AoE explosions) while constantly “blocking” during movement, turning you into an unstoppable, screen-clearing tank.
It can:
· Melt Ashava-tier bosses in seconds
· Clear Pit 100+
· Farm open world by literally holding one button
Build Overview
At its core, this is not a traditional damage build.
Instead, it uses:
· Shield Charge = movement + trigger engine
· Blocking mechanics = Retribution procs
· Thorns scaling = primary damage source
· Freeze effects = crowd control + survivability
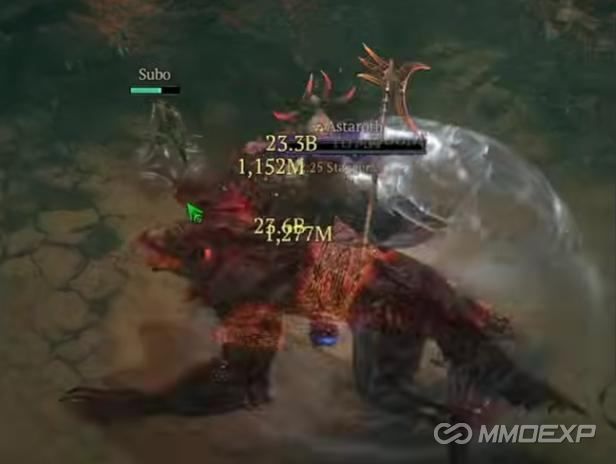
Most enemies die instantly from Retribution procs. Anything that survives gets frozen and deleted on the next pass.
Mandatory Requirement
Lum Rune (Required)
If you don’t use the Lum rune, the build breaks.
Why?
· Resource sustain is entirely dependent on it
· Without it, Shield Charge spam becomes impossible
This is the only true “must-have” item.
Core Gameplay Loop
The rotation is extremely simple:
Open World / Speed Farming:
· Hold Shield Charge
· Run through packs
· Everything explodes from Retribution procs
Pit 100+ / High End Content:
· Hold Shield Charge
· Occasionally activate Clash
· Maintain Retribution stacks and buffs
That’s it.
You are essentially: A living bulldozer that triggers screen-wide thorns explosions.
Main Damage Mechanics
1. Shield Charge (Vessel Skill)
· Counts as a core skill
· Also counts as blocking while moving
· Triggers Retribution repeatedly
· Does minor direct damage (~10%)
2. Retribution (Primary Damage Engine)
This is where the build gets ridiculous:
· Activated when blocking
· Converts blocked hits into AoE thorns bursts
· Creates “white bubble explosions” around you
· Scales extremely well with block frequency
3. Freeze Synergy (Northern Guard style effects)
· Blocking while charging = constant freeze checks
· Enemies are frequently frozen mid-animation
· Frozen enemies = free kills + safety buffer
Key Skills
Core Setup
· Shield Charge → main spam ability
· Clash → burst Retribution + Thorns amplification (use in Pit pushes)
· Arbiter of Justice → vulnerability + movement speed
· Fanaticism → crit buff (secondary value)
· Falling Star → mobility QoL (terrain skip utility)
Gear Setup
Mythic Version (Best-in-slot)
· Air of Perdition
· Harlequin Crest alternative slot or Starless Skies (if available)
· Mantle of the Gray (or similar defensive mythic options)
Non-Mythic Version (Still fully functional)
· Godslayer-type helm (buffed option)
· Any high damage or survivability aspect gear
· Focus: crit chance + block synergy + resource sustain
Key Aspects & Effects
· Utmost Glory → scaling damage boost
· Northern Guard-type effect → freeze on block
· Chastisement Aspect → damage amplification
· Hellslayer-style defensive scaling → fortify sustain
· Juggernaut’s Covenant → core scaling layer
Stat Priority
Offensive
· Critical Strike Chance (aim near 100%)
· Core Skill ranks (Shield Charge scaling)
· Vulnerability uptime
· Thorns scaling
Defensive
· Block chance (critical for Retribution engine)
· Armor
· Fortify generation
Paragon Board Setup
1. Exploit
· Early vulnerability + damage boost
2. Beacon
· General scaling damage node
3. Shield Bearer (Honed)
· Converts block into damage scaling
· Resource gain on crit synergy
4. Relentless (Turf)
· Cooldown reduction for Arbiter loops
5. Castle (Spear)
· Crit-based scaling for late game DPS
Key Passive
Code of Arms
· Core enabler of overall scaling
· Works with block + crit hybrid structure
Why This Build Works
This build abuses a very specific interaction: Shield Charge counts as blocking → blocking triggers Retribution → Retribution scales with Thorns → repeated movement = constant AoE explosions
So instead of “attacking,” you are:
· Blocking
· Charging
· Triggering explosions continuously
Strengths & Weaknesses
Strengths
· Extremely fast clear speed
· One-button gameplay
· Incredible survivability (freeze + block spam)
· Strong Pit 100+ viability
· Great for farming and speed runs
Weaknesses
· Requires Lum rune (mandatory)
· Can feel “braindead” in open world
· Less optimal boss DPS than pure Shield of Retribution setup
· Scaling depends heavily on correct gear synergy
Shield Charge vs Shield of Retribution
Build - Strength
Shield of Retribution - Higher boss damage
Shield Charge Variant - Faster clears + smoother gameplay
This build wins in speed and comfort! Shield of Retribution wins in raw boss DPS.
Final Thoughts
This Shield Charge Retribution build is currently one of the most underrated endgame setups in Diablo 4. It doesn’t rely on complicated rotations, animation canceling, or strict timing. You simply need to invest enough D4 Gold and Diablo 4 Items to pour your heart into crafting it—and you will surely enjoy the joy it brings.
Instead, it turns you into: A moving explosion engine that deletes everything by simply existing in motion. If future patches add more on-block effects, this build could become one of the strongest in the entire game. MMOEXP also provides a reliable marketplace for players looking to support their Diablo 4 progression with items, builds, and in-game resources.
MMOexp Diablo 4 Team