
The world of ARC Raiders has grown deadlier with the introduction of two new ARC machines: Firefly and Comet. These aren't ordinary drones - they are highly aggressive, designed to hunt, explode, and dominate the battlefield. Firefly controls the skies with relentless dive attacks, while Comet dominates the ground as a rolling fortress of destruction. Both challenge solo players and squads alike, forcing Raiders to adapt through smart loadouts, precise tactics, and teamwork.
Mastering these new threats requires understanding their behaviors, exploiting weak points, and coordinating with your team. The following guide breaks down developer-endorsed strategies to turn seemingly impossible encounters into manageable - and even rewarding - battles.
Understanding Firefly and Comet
Both Firefly and Comet reflect ARC Raiders' new enemy design philosophy: aggressive pressure combined with short, exploitable vulnerability windows.
Firefly pressures players with high-speed aerial attacks, diving unpredictably to force errors.
Comet punishes clustered squads with explosive attacks and a lethal self-destruct sequence.
Success against these enemies depends less on raw firepower and more on positioning, timing, and environmental awareness. Learning their behavior patterns gives you a significant survival advantage.
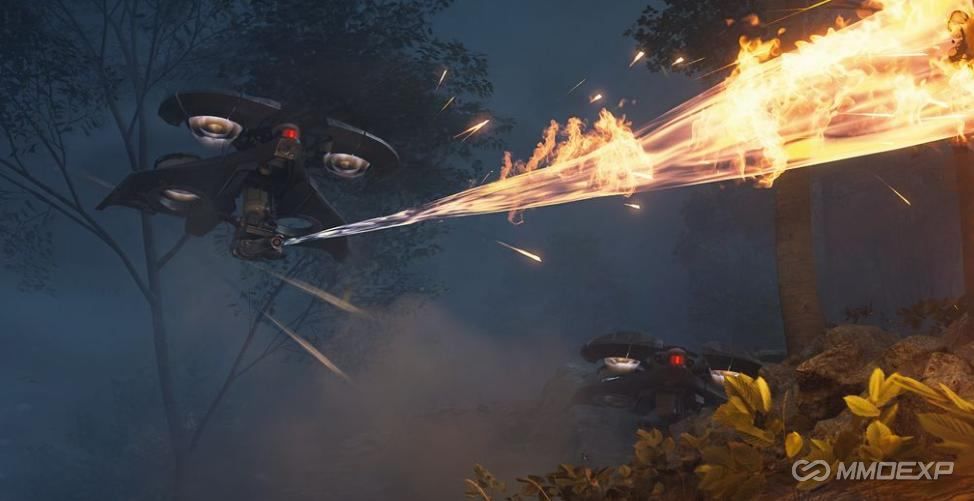
Firefly:Behavior and Threat
Firefly is unlike other flying enemies such as Wasp or Hornet. It begins cautiously but quickly becomes relentless, diving to deal high damage. Open terrain is extremely dangerous, and partial cover provides little protection.
Key takeaway: Treat Firefly as a line-of-sight predator - if it sees you, it can attack effectively.
Tactics for Survival
1.Prioritize Hard Cover:
The most effective counter to Firefly is forcing it to lose line-of-sight. Buildings, bunkers, tunnels, and dense indoor areas are ideal. Using these structures not only blocks attacks but also gives you time to reload, heal teammates, or plan your next move. Vertical structures can also create awkward attack angles for Firefly, buying you valuable seconds to reposition.
2.Use the Photoelectric Cloak:
This device temporarily scrambles Firefly's sensors, rendering you invisible for a few seconds. Proper use can allow players to escape dive attacks, revive teammates, or line up shots on weak points. Timing is critical: using the cloak too early wastes its utility, while using it too late may not prevent damage. In squad play, coordinating cloak usage ensures that multiple teammates can escape pressure simultaneously.
3.Target the Weak Point:
Firefly's fuel tank, located on its underside, is its primary vulnerability. Hitting this weak point causes massive damage and can potentially destroy the drone in a single well-placed shot. Scoped weapons or controlled bursts are recommended, and squad coordination improves accuracy. One player can act as bait while another lines up the shot, turning a dangerous fight into a high-reward encounter.
4.Avoid Running in Open Fields:
Firefly is designed to track targets effectively, making running in open terrain a poor strategy. Partial cover such as low walls or scattered objects provides little protection. Raiders must seek hard cover and use buildings or vertical obstacles to break line-of-sight and force Firefly to reposition.
5.Deploy Lure Grenades:
Lure Grenades are a tactical distraction, temporarily drawing Firefly's attention away from priority targets. In high-pressure scenarios, these grenades can save teammates, create breathing room for repositioning, or reset Firefly's attack pattern. In coordinated squads, rotating lure usage ensures that Firefly cannot fixate on a single player for extended periods.
Pro Tip: In squad play, combining lure grenades with the Photoelectric Cloak allows players to control Firefly's aggression and dictate the engagement rhythm.
Comet:Behavior and Threat
Comet is a heavily armored, rolling machine that punishes grouping and poor positioning. Its high-impact explosions and self-destruct ability can wipe out squads in seconds. Unlike Firefly, Comet is slower but far more punishing in close quarters.
Key takeaway: Comet requires patience, positioning, and targeted fire rather than brute force.
Tactics for Survival
1.Trigger Weak Points from Distance:
Aggro Comet from afar to prompt partial armor opening, exposing its inner core. Concentrate damage on these openings before they close to maximize efficiency. Patience is key - players who attempt to brute-force attacks into armored plates often prolong the encounter unnecessarily.
2.Choose High Fire-Rate Weapons:
Automatic weapons excel against Comet's layered armor. They provide sustained damage, allowing players to strip plating effectively and capitalize on brief vulnerability windows. Slow, heavy weapons struggle to exploit openings, making high DPS sustained fire more effective.
3.Maintain Spacing:
Comet targets clusters for maximum damage. Maintaining squad spacing reduces exposure to explosive attacks, extends weak-point visibility, and minimizes area-of-effect damage. Proper positioning allows players to flank and exploit openings without being caught in a self-destruct or high-damage blast.
4.Remove Side Armor First:
Comet's lateral armor protects secondary weak points. Stripping these plates early exposes additional vulnerabilities, enabling sustained focused fire. During head-on charges, exploit frontal weak points, but avoid overcommitting; precision is more effective than reckless aggression.
5.Respect Self-Destruct:
Comet's self-destruct is lethal. Audio and visual cues signal imminent detonation. Immediate disengagement is critical to survival. Attempting to finish damage while ignoring the warning often results in squad wipes.
Pro Tip: Treat Comet encounters like a boss fight - patience, pattern recognition, and coordinated fire trump reckless damage attempts.
Solo vs Squad Strategies
Solo Play
Emphasize mobility and cover.
Rely heavily on Photoelectric Cloaks and Lure Grenades to manage aggro.
Focus on precision hits, as there's no team to split enemy attention.
Squad Play
Assign roles: one player draws aggro, another focuses weak points, others provide support and utility.
Maintain communication to coordinate positioning and utility usage.
Spread out to minimize Comet's AoE and manage Firefly's aerial pressure.
Common Mistakes: Fighting Firefly in open terrain, wasting shots on Comet armor instead of waiting for openings, clustering too tightly, ignoring weak points, and panicking during self-destruct sequences. Correcting these habits improves survival rates significantly.
Gear and Loadout Recommendations
Firefly and Comet reinforce the importance of utility alongside damage:
Carry at least one repositioning tool (Photoelectric Cloak, Lure Grenade).
Bring high-fire-rate weapons for sustained damage on armor and weak points.
Prioritize visibility, cover, and escape routes before engagements.
Prepare proactively rather than reacting during fights.
Pro Tip: Properly selected gear can reduce encounter difficulty dramatically and allow players to focus on precision and tactics instead of just raw DPS.
What Firefly and Comet Mean for ARC Raiders
These machines represent a shift toward behavior-driven combat. They teach players critical lessons: Firefly emphasizes precision and positioning, Comet emphasizes spacing and patience. Both encourage teamwork, smarter loadouts, and heightened situational awareness. Future ARC machines are likely to continue this trend, rewarding players who think strategically rather than simply firing faster.
Adaptation Is Survival
Firefly and Comet may seem overwhelming at first, but every attack pattern has a counter, every weak point a window, and every wipe a lesson. Surviving these encounters requires decision-making, preparation, and coordination. By bringing the right tools, prepare sufficient ARC Raiders Coins and ARC Raiders Blueprints/Items, using cover intelligently, targeting weak points, maintaining squad spacing, and respecting final phases, Raiders can not only survive but dominate these new nightmares. In the harsh world of ARC Raiders, mastery is the difference between successful extraction and becoming salvage.
MMOexp ARC Raiders Team


