You know that feeling. Third down. Opponent rolls out with a bunch set, drags your user into no-man's-land, then drops a post right over your hook zone. Or worse—they run inside zone five times in a row, and your DL just stares at the guard like it's a staring contest.
Stop bleeding yards. Nickel Double Mug out of the 4-6 Defensive Playbook isn't some pro-level rocket science. It's a battering ram that works against stretch, rollout, bunch, and dive—without leaving your secondary naked. And the best part? It takes about two minutes to set up, but once it clicks, your opponent will spend the whole game guessing which pressure is real.
Why Double Mug Hits Different in Madden 26
Forget the standard 2-4 Double Mug or 3-3 Odd. This version runs a 4 DN package with a linebacker rush twist that lets you reposition rushers and coverage players without stat penalties for being out of alignment. That's massive—because most “exotic” looks kill your pass-rush traits when you move guys around. Here, you keep the juice.
The front generates instant push. The linebackers can bluff blitz or drop into seams. And the safeties? They stay disciplined enough to punish deep shots. This isn't a gimmick defense—it's a high-floor, high-ceiling call that wins against both meta spammers and rhythm passers.
The Pre-Snap Ritual (Do This Every Time)
Before the ball snaps, lock in two non-negotiable adjustments:
Pinch your safeties-width and depth. This compresses the middle and takes away the easy over-the-middle throw.
Set your shell to Cover 2. Show one look, play another. Most quarterbacks will read that two-high and check into a run—right into your pinched front.
For your base playcall, roll with Cover 3 Sky. It gives you three deep defenders, a flat underneath, and a hook zone that sits right in the passing lanes. The front stays aggressive, the back end stays honest. That's the whole philosophy—pressure without exposure.
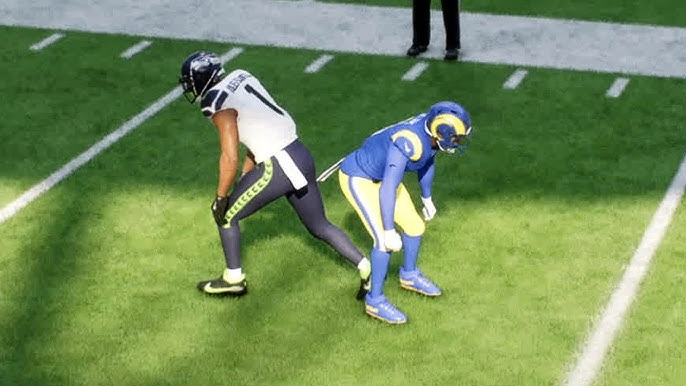
Passing Defense-Own the Middle, Kill the Rollout
Here's where most players lose. They chase the quarterback instead of squeezing the pocket.
Rule 1: Keep Contain active on both ends. Don't let the QB escape wide—force him to climb or throw from a messy platform.
Rule 2: User a linebacker directly over the center and show blitz. That single step forward freezes the RB in pass pro and makes the guard hesitate.
Rule 3: The opposite side runs a Cover 2 flat—outside corner presses the flat, safety rolls over the top.
When the opponent spams Spacing Switch or any bunch flood, drop your outside CB into a Hard Flat. That single adjustment erases the underneath crossing option and forces the QB to hold the ball an extra second—enough time for your mug front to eat.
If you see a post or deep cross developing, your user needs to drift to the center hash immediately. Don't chase the receiver—chase the lane. Once that throw window shrinks, the QB either checks down or eats a sack.
Hook Zone Depth-The 5-Yard Sweet Spot
Most players leave their hook zones at 10–15 yards by default. That's a death sentence against shallow crosses, swing routes, and comebackers.
Drop your Hook Zones to 5 yards. This keeps your underneath defenders glued to the stick level, shutting down those annoying second-cut routes that always seem to convert third-and-7. The deep safeties still cover the post, but now the middle of the field feels sticky instead of wide open.
Stopping the Run-Inside Zone and Off Tackle
Here's the myth: “Double Mug only stops runs if you send a mid-blitz.” False.
Against Inside Zone:
Align your user in the A-gap opposite the running back's set. Not head-up on the center—offset.
Leave your DL in their base alignment. Don't spread or pinch pre-snap—trust the mug front to eat double-teams.
The moment the RB takes the handoff, slip through that A-gap without engaging the guard. One clean step and you're in the backfield for a TFL.
Against Off Tackle / Stretch:
The zone structure holds the edge better than any blitz-heavy call. Your outside linebacker stays wide, your corner sets the force, and the safety cleans up.
No over-pursuit. No cutback lanes. Just a wall that moves with the ball.
This defense doesn't sell out against the run—it contains it, which is way more valuable in a game where one missed tackle turns into a 60-yard house call.
Why This Works in Real Online Games
The beauty of Double Mug is that it looks exotic but plays fundamental. You're not relying on crazy nano-blitzes or broken mechanics. You're reading the offense, adjusting your contain side, and letting your front four win one-on-ones.
And if your roster still feels thin at key spots—like a slow MLB or a weak safety—don't grind solos for three weeks just to upgrade one guy. A lot of competitive players quietly grab extra Madden 26 coins at MMOexp to fill those gaps fast, so they can run schemes like this without waiting for pack luck. Keeps your defense competitive while you focus on actual play-calling, not auction-house camping.
The Bottom Line-Simple, Aggressive, Reliable
You don't need 15 different defensive formations to win in Madden 26. You need one that answers bunch, rollout, inside zone, and deep posts without giving up explosive plays. Nickel Double Mug from the 4-6 book is that answer.
Master the contain, own the A-gap, keep your hook zones at 5, and trust your safeties over the top. The scheme doesn't care if your opponent is a meta-chaser or a dink-and-dunk grinder—it punishes both.
And if you're serious about building a full defensive roster around this system, don't sleep on your coin economy. Even a single elite edge rusher or a fast sub-linebacker changes the whole math. Plenty of grinders keep their buy Mut 26 coins at MMOexp so they can plug those final holes without burning real money or endless hours. Saves the sanity, saves the season.
Now go call that mug, pinch those safeties, and watch your opponent panic after three straight three-and-outs. The end zone looks a lot farther when they're staring at a brick wall.