Weekend Drop -













Meta Description:
Delta Force players can test a 200K SCAR-H budget build, optimized attachments, solo raid tactics, loot routes, and key lessons for SOLO Players.
Summary:
Delta Force shows that a roughly 200K SCAR-H build can remain competitive in raids, while SOLO Players can benefit from careful positioning, efficient looting, and disciplined fights.
Delta Force Budget Build: What Makes the 200K SCAR-H Work?
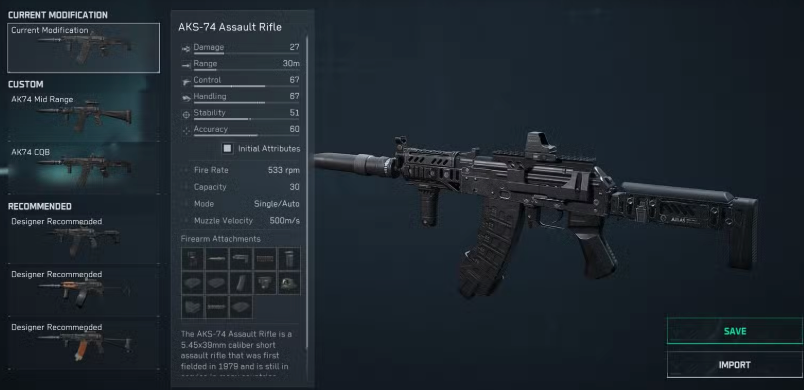
The featured Delta Force loadout comes from a community budget-build challenge where weapons must cost 250K or less. This particular SCAR-H setup costs around 200K, making it an attractive option for players who want solid raid performance without burning through their stash. For players looking to strengthen their resources before testing similar builds, buy Delta Force Tekniq Alloy can also be considered.
The main goal is straightforward: combine practical attachments with calibration settings that improve the weapon without pushing the total cost too high.
Recommended SCAR-H Setup
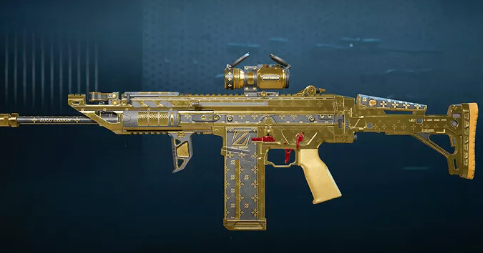
The build uses a combination of recoil-control and handling-focused components, including:
Steel Muzzle Brake
X25U Angled Combat Grip
Marksman D2 Rear Grip
Anchor Point Rail Stock
Russian Accuracy 2X Scope
SCAR-H Beaver Long Barrel
DD Python and KC Hound handguard panels
The calibration setup is equally important. Arrow weight is pushed right while length is pushed left, grip thickness is increased, rear-grip weight is pushed right, and stock weight is maximized.
For the optic, zoom is reduced while eye relief is increased. These adjustments help turn the inexpensive build into a more consistent raid weapon.
Quick Tip: A low-cost build is only valuable when its attachments and calibrations work together. Copying the parts without matching the calibration settings may produce a noticeably different feel.
SOLO Players Can Learn From These Raid Tactics
SOLO Players face a completely different risk profile because every engagement has to be managed without a teammate available for an emergency revive or covering fire.
The raid footage highlights several useful habits: repair before committing to a fight, avoid rushing enemies blindly, listen for movement, and use the environment to break lines of sight.
One particularly important moment comes during a tense fight involving an enemy using an arrow weapon. Instead of staying exposed, the player moves underneath scaffolding and searches for safer angles.
What Worked in the Raid?
The budget weapon proved capable of supporting aggressive plays, but positioning remained more important than raw weapon cost.
The run eventually produced 4 kills and approximately 2.8 million in loot value, demonstrating how a relatively inexpensive loadout can potentially generate a strong return when the extraction succeeds.
| Metric | Result |
| Build cost | ~200K |
| Maximum challenge budget | 250K |
| Confirmed kills in highlighted run | 4 |
| Loot value shown | ~2.8M |
| Playstyle | Solo / Tactical |
The key takeaway for Delta Force players is that expensive equipment does not automatically guarantee a successful extraction. Smart rotations and controlled engagements can have a much larger impact.
Delta Force: Loot, Extraction and Solo Risk Management
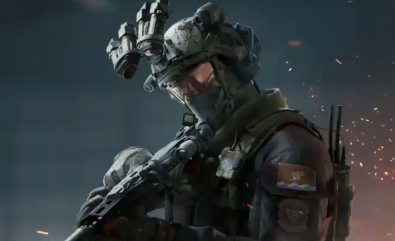
Another major theme from the gameplay is resource management. The player repeatedly weighs whether to continue looting or move toward extraction after securing valuable items.
That decision becomes especially important when the raid begins producing high-value loot. Carrying more valuables increases the potential reward, but it also creates a stronger reason for nearby players to hunt you down.
Three Rules for Better Solo Raids
1. Repair before major engagements.
Entering a fight with damaged equipment can turn a winnable encounter into a quick death.
2. Use cover instead of forcing fights.
Scaffolding, buildings and elevation can provide crucial protection when fighting multiple players.
3. Know when to extract.
Once the backpack contains valuable loot, surviving becomes more important than chasing another kill.
The video also touches on the risks of playing with unfamiliar teammates after a previous cheating-related incident. That experience explains why the creator increasingly favors solo matches and controlled gameplay.
For players researching Delta Force Tekniq Alloy, the broader lesson is that upgrading your resources should support a sustainable playstyle rather than encouraging unnecessary high-risk raids. Players who want to explore acquisition options can check Delta Force Tekniq Alloy.
Final Verdict
Delta Force continues to reward players who understand economy, positioning and risk management rather than simply equipping the most expensive weapon available. The ~200K SCAR-H proves that a carefully calibrated budget build can remain useful in serious raids.
TL;DR
The featured SCAR-H costs around 200K, staying comfortably below the 250K community challenge limit while offering a practical combination of attachments and calibrations. SOLO Players can maximize its value by prioritizing cover, controlled fights, efficient looting and timely extraction.
Would you take this 200K SCAR-H into your next raid, or would you spend more for a higher-end build?