Weekend Drop -













Summary
Looking for a low-effort Sorceress build that can comfortably farm Torment content without constantly casting skills? This Auradin-inspired Sorceress focuses on automatically triggering Blizzard through the Blizzard Enchantment, allowing you to clear open-world content, Nightmare Dungeons, Hordes, and even Torment 12 with minimal input. If you're searching for efficient farming while collecting Diablo 4 Items, this setup offers a relaxed alternative to traditional high-APM Sorceress builds.
Step 1: Understand the Core Build Goal
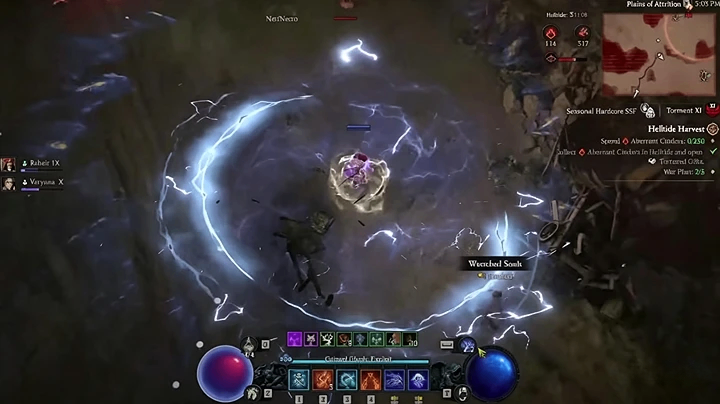
The build is designed around one simple objective: keep Blizzard Enchantment triggering automatically every 1.5 seconds.
Unlike traditional Blizzard Sorceress builds that require frequent casting, this version lets Blizzard repeatedly activate while you move through maps. During normal farming, enemies die as you walk past them, and bosses only require occasional manual Blizzard casts.
The build has been tested in:
Torment 10
Torment 11
Torment 12
Helltides
Nightmare Dungeons
Infernal Hordes
Undercity
With optimized gear, stronger Glyphs, and additional Transfigurations, performance can improve even further.
Step 2: Build Around Blizzard Enchantment and Permanent Barrier
Everything starts with Blizzard Enchantment.
The enchantment only reaches its fastest 1.5-second trigger rate when you maintain a full Barrier. Even dropping slightly below full Barrier significantly increases the cooldown, reducing both damage and consistency.
To maintain permanent Barrier, use this sequence:
Equip Temerity
Convert overhealing into Barrier
Roll Life on Hit on your weapon
Let summoned Wolves continuously generate Life on Hit
Keep Barrier full so Blizzard Enchantment continues triggering
This interaction is the foundation of the build and should never be skipped.
Step 3: Follow the Setup Sequence Before Every Run
Before starting a dungeon or farming route, activate your Conjurations in the correct order.
Cast:
Familiar
Hydra
Ice Blades
Lightning Spear
After the initial setup, Nago Rune automatically summons Wolves every five seconds.
Those Wolves continue attacking, generating Life on Hit, which refreshes your Barrier and keeps Blizzard Enchantment active.
There is one important exception.
After a zone transition, such as moving between Pit levels or entering another Helltide sub-zone, the Nago timer resets. If Wolves disappear, simply cast your Conjurations again to restart the automation.
Following this sequence keeps the build functioning smoothly during long farming sessions.
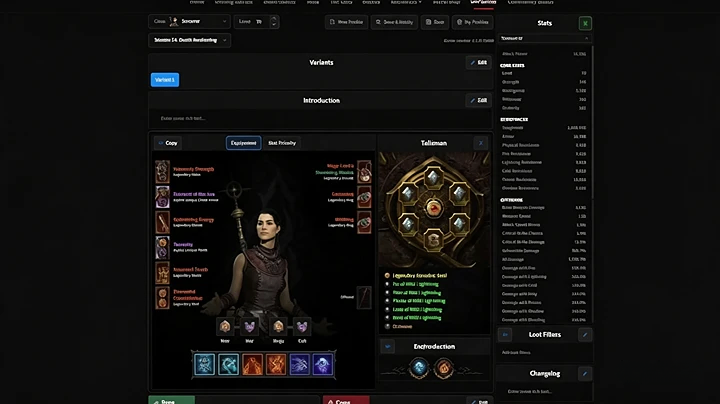
Step 4: Prioritize Survivability to Protect Your Barrier
Because losing Barrier also lowers your damage output, defensive layers are just as important as offensive ones.
The recommended setup includes:
Mage Lord's Aspect on the amulet for consistent 68% Damage Reduction
Heavenly Strength Aspect
Raymond of the Sea, which significantly extends Blizzard's damage duration and greatly increases overall damage
The guide favors Mage Lord's Aspect over Disobedience because it provides immediate protection without requiring stacks to build.
If you plan to play actively instead of farming semi-AFK, you can swap the amulet for:
Edgemaster's Aspect
Bloodmoon Idol
This simple gear change greatly increases damage while preserving the core playstyle.
Step 5: Keep Vulnerable Active Automatically
Season 14 reduced the effectiveness of Wolves for applying Vulnerable, so the build uses alternative sources.
Primary options include:
Cursed Touch
Shredding Blades
Lightning Spear
Since automatically triggered Blizzards can activate Cursed Touch, enemies frequently become Vulnerable without requiring manual actions.
If you want even faster Vulnerable application, placing Cursed Touch on the amulet increases its activation chance.
Maintaining nearly permanent Vulnerable greatly improves clear speed, especially against elite enemies.
Step 6: Optimize Gear Stats Instead of Attack Speed
This build values different stats than a traditional Sorceress.
Focus on:
Damage over Time Multiplier
Vulnerable Damage Multiplier
Life
Life on Hit
Masterworked DoT rolls
Prioritize Life on Hit on the weapon above everything else.
Large Life on Hit values help recover immediately after standing in poison pools, explosions, or other environmental damage. Maintaining Barrier also maintains your damage output.
On the other hand, the build does not require:
Critical Strike Chance
Attack Speed
Since Blizzard is triggered automatically, increasing casting speed provides very little benefit.
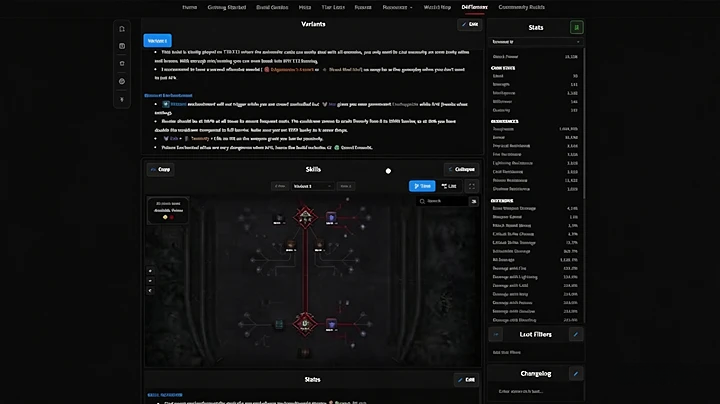
Step 7: Choose Runes and Set Bonuses That Support Automation
The recommended Rune setup includes:
Neo
N
Because the build maintains Barrier almost permanently, these runes automatically trigger Unstoppable for roughly five out of every six seconds.
This is important because Blizzard Enchantment stops activating while crowd controlled.
For players who actively cast skills, alternative runes such as Luck Rune for Challenging Shout can also work.
For equipment, use:
Wild Lightning Set
Oussie Vein Charm
The guide intentionally avoids defensive skills like Teleport or Ice Armor to maximize the hands-free playstyle, although options such as Tal Rasha Charm can be substituted if preferred.
Key Takeaways
Keep Blizzard Enchantment triggering every 1.5 seconds by maintaining a full Barrier.
Temerity and Life on Hit are mandatory components of the build.
Begin every farming session by casting Familiar, Hydra, Ice Blades, and Lightning Spear.
Remember to restart your Conjurations after zone transitions if Wolves disappear.
Prioritize Damage over Time, Vulnerable Damage, and Life on Hit over Attack Speed or Critical Strike.
Use Mage Lord's Aspect, Raymond of the Sea, and Wild Lightning Set to balance survivability with automatic damage.
Equip Neo and N runes to reduce downtime caused by crowd control.
Conclusion
This Auradin-inspired Sorceress offers a practical option for players who want efficient farming without constant skill rotations. By keeping Blizzard Enchantment, Temerity, Wolves, and Barrier working together, the build delivers reliable clearing across Torment 10–12 while requiring very little manual input. Although it benefits from strong endgame gear and Paragon progression, the gameplay loop remains straightforward, making it a comfortable choice for long farming sessions and efficient progression throughout Season 14.
If you're looking to further improve your setup or complete your equipment faster, you can also buy Diablo 4 Items to finish key gear pieces and reduce farming time.