Weekend Drop -














For a fresh level 30 Spearman in MapleStory Classic World, Polearm is a practical default: build its Mastery, unlock Booster, and train on monsters you can kill reliably before moving into harder maps.
Stay with Spear if you already have a strong weapon and invested skill points. Splitting your early SP between both families delays the improvements you need now.
Second job still relies on Power Strike and Slash Blast. Your immediate gains come from steadier damage, faster attacks, controlled grouping, and Final Attack's healing. A larger damage number means little if every refill leaves you unable to afford the next session.
Use the build below as a training recommendation for the launch-era second-job ruleset; Dragon Knight is outside this progression plan.
Polearm vs. Spear at Level 30
Polearm for Everyday Training
Polearm Mastery improves minimum damage and adds movement speed while you equip a polearm, reaching +20 Speed at rank 20. That helps when your route involves walking between groups, collecting drops, or covering an assigned platform without movement support.
Normal attacks favor swings, which use a polearm's stronger multiplier. Spears hit harder on stabs. Actual stats and attack speed still determine your kills; the animation advantage does not guarantee stronger damage on every hit.
Spear for an Existing Investment
Current Spear Mastery gives a chance to ignore the enemy's Weapon Defense, reaching 20% at rank 20. The old critical-rate bonus no longer applies. A 20% chance to ignore defense also does not mean every attack ignores 20% defense or deals 20% more damage.
Keep a good Spear if switching would consume your potion fund or strand SP in the wrong weapon family. Another player's preference does not justify a reset.
Your Situation | Recommended Choice | Reason |
Fresh second job, comparable weapons | Polearm | Movement speed supports regular training |
Strong Spear and existing Spear SP | Continue Spear | Preserve usable gear and skill investment |
Planning to alternate weapons | Commit to one first | Each family needs its own supporting skills |
Planning around Dragon Knight | Reassess when its live skills arrive | Test-era builds cannot guarantee future value |
In Classic World, your affordable weapon and current SP matter more than a predicted third-job ranking.
Spearman Skill Build for Levels 30-40
A Complete SP Allocation
This Polearm route includes one early point in Rush and Final Attack. Spear players replace the three weapon-specific skills with their Spear equivalents. It assumes one second-job SP at advancement and three per subsequent level, giving 31 SP through level 40.
Mastery 3 unlocks Final Attack; Mastery 5 unlocks Booster. Meet the prerequisite before placing the next point.
Character Level | Spend This Level | Mastery | Booster | Final Attack | Rush |
30 | Mastery +1 | 1 | 0 | 0 | 0 |
31 | Mastery +2, Rush +1 | 3 | 0 | 0 | 1 |
32 | Mastery +2, Booster +1 | 5 | 1 | 0 | 1 |
33 | Mastery +2, Final Attack +1 | 7 | 1 | 1 | 1 |
34 | Mastery +3 | 10 | 1 | 1 | 1 |
35 | Mastery +3 | 13 | 1 | 1 | 1 |
36 | Mastery +3 | 16 | 1 | 1 | 1 |
37 | Mastery +3 | 19 | 1 | 1 | 1 |
38 | Mastery +1, Final Attack +2 | 20 | 1 | 3 | 1 |
39 | Final Attack +3 | 20 | 1 | 6 | 1 |
40 | Final Attack +3 | 20 | 1 | 9 | 1 |
The level 40 total is 20 + 1 + 9 + 1 = 31. Mastery finishes at 38. Mastery 1 at level 30 favors damage stability without adding MP use. If immediate movement and grouping matter more, start Rush 1 instead, then put all three level 31 points into Mastery. Both routes converge at 31; use Rush sparingly at its early MP cost.
Why Mastery and Booster Come First
Mastery raises the damage floor. This helps when weak rolls leave monsters alive for another swing. Watch your usual finishing attacks after each rank increase instead of judging progress by your largest hit.
Booster 1 already gives two attack-speed stages for 100 seconds, costing 30 HP and 30 MP per cast. Further ranks extend duration and reduce the casting cost; they do not add more speed stages. Refresh it near expiry rather than repeatedly casting it between groups.
Use Final Attack Manually
Final Attack in the current release is a triggered active attack. Bind it alongside Power Strike and Slash Blast. Attack skills can enable it; you then press Final Attack against one enemy for damage and HP recovery.
For an isolated enemy: use Power Strike, use Final Attack when enabled if it helps finish the target or restore missing HP, then resume Power Strike. While several enemies remain grouped, continue Slash Blast unless healing is more urgent; consider Final Attack when one survivor remains.
At full HP, judge its damage value. Use it if it replaces attacks; otherwise continue clearing. You can try it on the next healthy target if it remains available, but do not delay useful damage just to save healing.
In the October 21 Grand Launch client, Final Attack's duration field increased from 30 to 60 seconds for both Spear and Polearm, matching the tooltip. Trigger it on a safe enemy first to recognize its ready state before relying on it during normal training. Do not assume a specific icon flash or color.
Keep Rush and Iron Will Secondary
Rush 1 costs 35 MP and has a two-second cooldown. Use it to gather reachable ordinary monsters, then clear with Slash Blast. It no longer pushes bosses, and repeated empty casts drain your MP reserve.
Iron Will adds personal defense and knockback resistance. This route postpones it; divert later SP only if interrupted attacks justify delaying Final Attack. Adapt to your Classic World training conditions.
Training Maps for Levels 30-40
Levels 30-33: Establish an Affordable Loop
Begin with Damp Tree-Forest if you need to rebuild supplies. Its Slimes, Octopuses, Jr. Neckis, and Dark Axe Stumps give you weaker targets to compare against harder hunting grounds. Test Jr. Necki accuracy separately; a lower monster level does not guarantee easy hits.
Clear a short section, collect drops, and repeat without chasing every monster across the map. Use Power Strike on isolated targets and Slash Blast on reachable groups. Add Rush only when gathering those targets saves enough movement or attacks to justify its cost.
If crowded, try Line 1 (Area 1) in Kerning City Subway. Later subway areas contain different enemies; confirm your kills and supply costs before settling in.
Levels 33-35: Test the Ant Tunnels
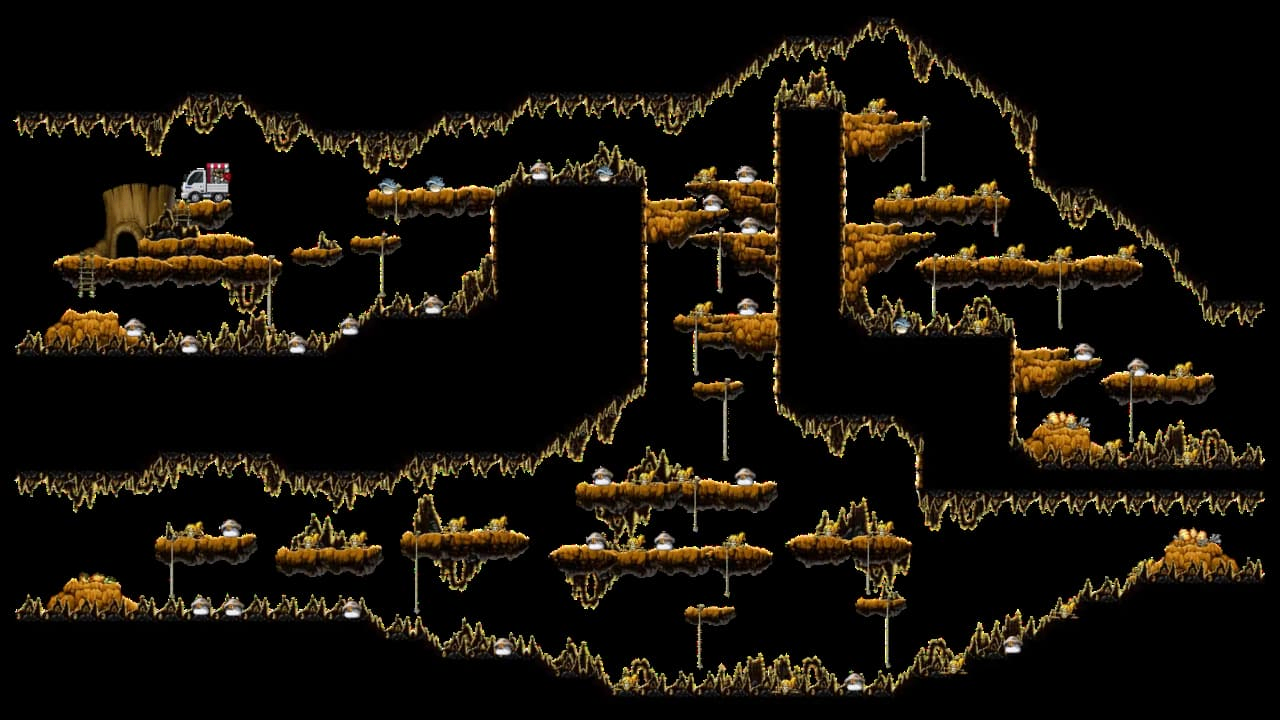
Try Ant Tunnel I, then compare Deep Ant Tunnel I or II if you can reach and handle them. These are separate maps, so check the name rather than following a vague instruction to train at ants. Deep Ant Tunnel I mixes mushrooms with Evil Eyes and Jr. Boogies; judge its harder enemies as well as its easiest ones.
Choose a manageable section. In a party, agree on platform coverage and compare your own EXP and potion use; more members do not guarantee better results.
If every nearby channel is crowded, return to your baseline map. Include channel searching in your session time.
Levels 35-40: Earn the Move Up
For Curse Eyes, test Tree Dungeon, Forest Up North VIII, connected to The Forest North of Ellinia. It contains level 33 Curse Eyes with 1,001 HP. Their level alone does not make them an efficient target for every newly advanced Spearman.
If Curse Eyes take four attacks while mushrooms take two, use mushrooms as your baseline and compare equal-length runs.
Stay at Curse Eyes only if the extra EXP justifies the potion loss within your budget. Those hit counts are an example to test, not fixed entry requirements.
Fire Boars are another trial option around Perion. Dangerous Valley contains both Fire Boars and Copper Drakes, so test the mixed encounter before committing.
Do not assume a map recommended to an Ice/Lightning Wizard will give a Spearman the same results.
Route | Equipment Readiness to Test | Return or Move On When |
Damp Tree-Forest / early subway | Starter weapon lands hits and supports supplies | Try Ant Tunnel when clearing leaves substantial idle time |
Ant Tunnel / Deep Ant Tunnel | Current weapon handles your section's mixed enemies | Return to baseline if misses or extra hits erase net income |
Curse Eyes | Current gear produces a worthwhile EXP gain over mushrooms | Return to ants if four-hit kills worsen the full-session result |
Fire Boars / Dangerous Valley | Gear handles Fire Boars and mixed Copper Drakes | Return if harder spawns stall clearing or exhaust supplies |
Fix Frequent Misses First
DEX affects Accuracy as well as equipment eligibility in Classic World. If Miss appears often, check total DEX and Accuracy with your normal gear equipped, then compare the target's level and avoidability.
Test a lower-level, easier-to-hit enemy. Compare affordable Accuracy or DEX equipment before assigning permanent AP; add DEX deliberately for your weapon and chosen target, then retest. Extra STR cannot fix a missed attack.
Save Mesos While You Train
Compare the Whole Fight
Basic attacks make sense when one finishes a nearly defeated monster. They can also work on sufficiently weak enemies. They become costly when saving one skill cast adds several contact hits and more HP potion use.
Compare skills with selective basic finishes on the same enemy. Include both HP and MP potions; a slower-falling MP bar alone does not prove savings.
Match recovery items to the HP or MP you normally need. Compare the shop cost per restored point, then account for wasted recovery when a potion exceeds your missing health.
Keep a potion large enough for dangerous damage spikes; the lowest nominal recovery cost is little comfort if it cannot keep you alive.
Run a 20-Minute Comparison
For a first comparison, track EXP gained and net HP/MP potion consumption over equal-length runs with similar gear, buffs, and party conditions. If one map clearly gives acceptable EXP while using fewer supplies, that is enough to choose a starting route.
Use the full calculation below when results are close or your potion fund keeps shrinking. Twenty minutes is a convenient window, not a promised farming rate.
1. Record EXP, wallet MapleStory Classic World Mesos, and each potion count.
2. Train with your normal rotation, including looting time.
3. Record the same values at the end, accounting for any level-up.
4. Sell ordinary vendor loot and value consumed potions at their replacement price.
5. Subtract potion and travel costs from collected Mesos and vendor income.
Keep rare drops and unsold trade materials separate. A listed market price is not spendable income until the item sells. If potions came from existing stock, still count their replacement cost. Do not subtract them again if your wallet comparison already includes restocking.
Record EXP, supplies, reliable income, and net Mesos for each map. Choose a sustainable Classic World route while funds are low; spend reserves on faster EXP only with a refill plan.
Gear Upgrades That Change Your Kills
Compare Weapons before Full Sets
Use the current item tooltip when comparing an actual weapon. Clean reference stats help identify candidates, but rolls and scrolls can change the equipment offered to you.
Level | Polearm Candidate | Clean W.ATK / Speed | Spear Candidate | Clean W.ATK / Speed |
30 | Mithril Pole Arm | 55 / Slow (8) | Forked Spear | 52 / Slow (7) |
35 | Axe Pole Arm | 60 / Slow (8) | Nakamaki | 57 / Slow (7) |
40 | Crescent Polearm | 65 / Slow (8) | Zeco | 59 / Normal (6) |
Mithril Pole Arm is a level 30 starting candidate. At 35, Axe Pole Arm requires Weaponcrafting 7, four Iron Ingots, three Mithril Ingots, 21 Screws, and a 9,000-Meso crafting fee. Compare the finished weapon's price with 4 × Iron Ingot price + 3 × Mithril Ingot price + 21 × Screw price + 9,000. Include any cost of reaching Weaponcrafting 7.
Owned materials still have resale value; use current prices, not a fixed market estimate. Before crafting, check the Free Market for a finished Axe Pole Arm with comparable stats. If its listed price is below your total material and crafting costs, taking the finished weapon can leave more Mesos for training.
Check STR and DEX before committing to an upgrade. For example, Axe Pole Arm requires 75 STR and 35 DEX; Crescent Polearm requires 85 STR and 40 DEX. Count equipment bonuses before assigning AP to meet the requirement.
Upgrade when it improves kill count or attack timing enough to justify the total cost. If your level 30 weapon still handles the route and an upgrade would consume refill funds, keep it and save. Compare with Booster active.
Scroll after Choosing Your Weapon
Scroll equipment you expect to keep after checking success rate, slot use, and failure consequences. Compare the next clean weapon's total cost first.
Donated or heavily improved gear changes damage comparisons. Judge a MapleStory Classic World upgrade by your own kills and refill balance.
Common Spearman Mistakes
Mistake | Practical Correction |
Investing in both Masteries immediately | Finish one weapon line before funding another |
Expecting an automatic Final Attack | Bind the current active skill and use it when enabled |
Casting Rush whenever available | Save it for useful grouping |
Chasing a busy map's reputation | Compare actual session results with your fallback |
Changing weapons without checking DEX | Count current gear bonuses before allocating AP |
Measuring profit before replacing potions | Include the supplies needed for another run |
If your Classic World build already differs, total the SP you have spent and work toward the next useful prerequisite. A few early points in another skill do not by themselves justify a reset.
Level 30-40 Quick Checklist
Before your next MapleStory Classic World session:
· Equip the weapon family supported by your Mastery.
· Follow the next level's SP allocation and check prerequisites.
· Keep Booster active and Final Attack accessible.
· Test hit consistency and usual attacks per kill.
· Use your fallback map when the preferred route fails.
· Account for potion replacement before spending on gear.
· Recheck the route after a meaningful skill or weapon upgrade.