Weekend Drop -













Summary
In NBA 2K27, shooting is governed by a "pure green window" mechanic—if you time your jump shot correctly within this window, the ball goes in every time. However, as our extensive testing of over 30,000 shots across ratings from 65 to 99 reveals, there's far more nuance to this system than a simple "green or miss" binary. Understanding these mechanics is crucial because the difference between a make and a miss often comes down to having the right attributes and badges—and if you're looking to quickly upgrade your build to hit those key thresholds without endless grinding, you can Buy NBA 2K27 MT Coins to accelerate your progress and get your player where they need to be. This guide breaks down exactly how three-point ratings affect your shooting, the key thresholds to target, and how to maximize your efficiency from beyond the arc.
How Shooting Actually Works
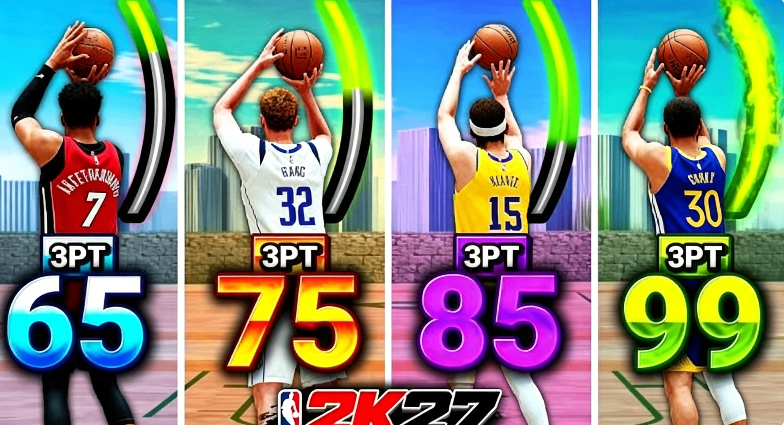
The pure green window in NBA 2K27 isn't a fixed, immovable block. Through our data analysis, we discovered that the green window doesn't sit in the same place for every repetition, and no two shot attempts start from an identical position. This creates a distribution curve that peaks in the middle and tapers toward the edges, rather than appearing as a flat block of greens. The curve shape is directly influenced by your three-point rating, with higher ratings expanding your margin for error.
What this means in practice is simple: the higher your three-point rating, the more forgiving the timing window becomes. You don't need to be pixel-perfect with your release—higher ratings give you more wiggle room.
Understanding the Raw Data
Our testing examined every 5-millisecond increment throughout the green window across all ratings from 65 to 99. The results clearly show that even low ratings can be effective if you're a skilled player who times shots well. As NBA 2K developer Mike Wang confirmed, higher-skilled players can shoot effectively with lower three-point ratings, while others may want to invest in higher ratings to increase their green window.
The visual data reveals several distinct zones:
Bright green center: The pure green window across every three-point rating
Dark green band: The area just outside the pure window, which expands only slightly as ratings increase
Blue and yellow bands: Where forgiveness truly comes into play, expanding significantly at higher ratings
Key Three-Point Rating Thresholds
65-74: The Foundation
At these lower ratings, you're working with a very narrow green window. While skilled players can still hit shots consistently, the margin for error is minimal. These ratings are viable for players who have mastered their timing but offer little forgiveness for slight mistimings.
75-82: The Build-Up
From the mid-70s up to the 82 three-point mark, we can start to see the green window gradually increase. This range represents the beginning of meaningful improvement, though the expansion is still modest compared to higher ratings.
83: The First Value Threshold
An 83 three-point rating becomes a decent value threshold as the window opens up slightly. More importantly, this rating unlocks the Bronze Limitless Range badge, which extends your effective shooting range and allows you to hit deep threes more consistently.
85: The Sweet Spot
This is where things get interesting. Right around an 85 three-point rating, we observe one of the biggest jumps in your green window—making 85 somewhat of a sweet spot in terms of raw value. Additionally, this rating unlocks Silver Dead Eye, a badge that activates when defenders close out on you, reducing the contest impact on your shot. This combination of expanded green window and badge access makes 85 an excellent target for most builds.
93: The Elite Threshold
A 93-point rating sees another decent increase in the green window, though not as dramatic as the jump at 85. However, the real value at 93 comes from the unlocks:
Access to the most powerful shooting takeovers
Gold Set and Fire (boosts catch-and-shoot opportunities)
Gold Arc Cadence (improves rhythm shooting)
This makes 93 an elite threshold for players who want to maximize their shooting potential without pushing all the way to 99.
95-99: The Hall of Fame Range
At 95 and 99 ratings, we only see the green window open up slightly. The major advantage here isn't the raw green window expansion—it's the access to Hall of Fame and Legend badges. These badges provide substantial boosts to your make percentages and can turn good shooters into unstoppable scoring threats. If you're investing this high, you're doing it for the badge tier access more than the raw attribute gain.
Badges: The Game-Changer
While raw three-point ratings provide the foundation for your shooting, badges will play a massive role in boosting your make percentages. When deciding which three-point rating to target, your badge unlocks should be the main factor in your decision-making process.
Consider these badge-specific thresholds:
83: Bronze Limitless Range
85: Silver Dead Eye
93: Gold Set and Fire, Gold Arc Cadence, top-tier takeovers
95-99: Hall of Fame and Legend badge tiers
Practical Recommendations
For Casual Players
Target 85 three-point rating as your sweet spot. You get a substantial green window jump, solid badge unlocks, and enough forgiveness to make shooting enjoyable without requiring perfect timing on every attempt.
For Competitive Players
Aim for 93 three-point rating. The elite badge access and takeover options at this level give you the tools to compete at the highest level while still leaving attribute points for other areas of your build.
For Dedicated Shooters
If your entire playstyle revolves around three-point shooting and you want every possible advantage, push to 95-99. The Hall of Fame and Legend badge tiers make a meaningful difference in high-pressure situations.
Conclusion
Our extensive testing of 30,000+ shots reveals a clear picture: three-point ratings in NBA 2K27 follow a pattern of diminishing returns, with specific sweet spots that offer exceptional value. The 85 rating stands out as the most efficient threshold, delivering a major green window jump and solid badge unlocks. The 93 rating represents the elite tier for competitive play, while 95-99 is reserved for players who want every possible advantage.
Remember: badges will significantly boost your make percentages and should be a primary consideration when choosing your rating. While grinding for the right badges and attribute points can take time, you can always rely on MT NBA 2K27 to help you acquire the resources needed to fine-tune your build more efficiently. Use this data as your foundation, then build your player around the thresholds that best fit your playstyle and skill level. And if you're looking for a trusted source to stock up on in-game currency, we highly recommend checking out MMOEXP—they offer reliable service to get you the MT you need, so you can focus on perfecting your shot and dominating the court.