Weekend Drop -













Summary
Building the right Trampler for a small crew in SAND: Raiders of Sophie requires balancing firepower, durability, and weight efficiency—so you can save your resources instead of needing to buy SAND: Raiders of Sophie Items to replace costly components. The royal chassis may seem appealing, but it is overkill for three players—it is too expensive, too heavy, and if you lose it, the cost is devastating. This guide covers a late-game build using the great chassis, which is more affordable, easier to maneuver, and in many ways more fun for small crews. This build is designed for front-facing combat with ramming as the primary offensive strategy.
Tech Tree Requirements
Before you start building, make sure you have unlocked the following tech tree nodes at tier three or four:
Armored Captain's Quarters
Tier 3 Maneuverability Engine
Metal Corridor
Long Motor Reactor
Great Chassis
Armored Cargo Hold
Tier 4 U-Shaped Armored Cargo Hold
Armored Artillery and Armored Corner Artillery Decks
Battering Ram
Tier 3 Pilot Bridge
Standard Vestel Tube
Having these unlocked at the correct tiers is essential for this build to function properly.
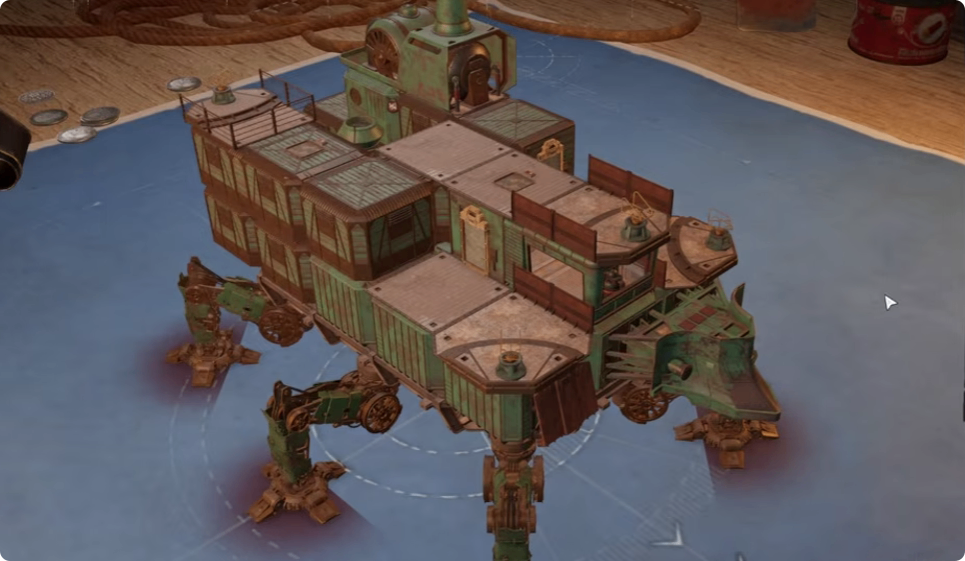
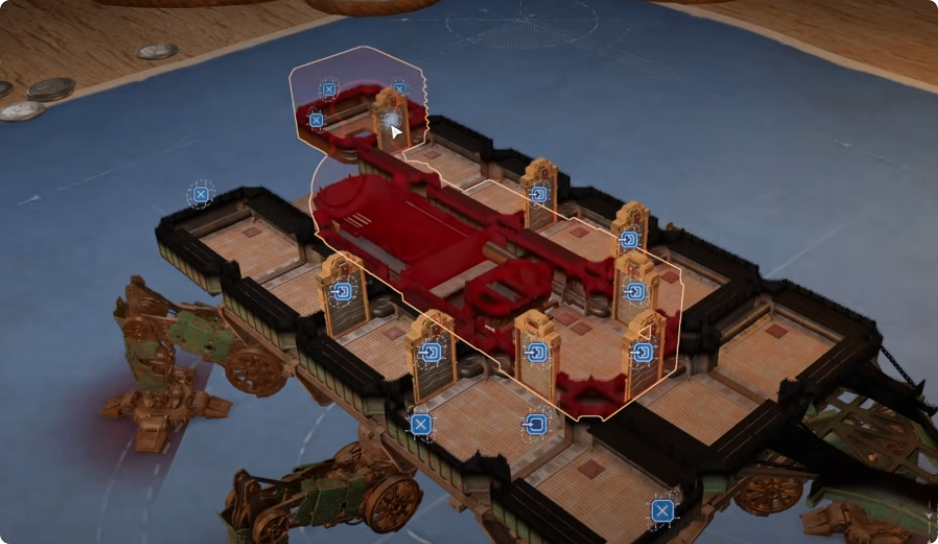
Blueprint Assembly - Layer One
Build the Trampler from the front to back, starting with layer one.
Step 1: Core Components
Place the U-shaped armored cargo bay at the front. Directly in front of it, attach the battering ram. Next to it, place a small cargo bay.
Step 2: Reactor and Corridors
Place the armored reactor (the long piece) behind the cargo bay. On one side, attach an armored auxiliary corridor. On the other side, attach an L-shaped armored cargo.
Step 3: Side Compartments
Place a small armored compartment on both sides. Then, place a large parallel cargo bay on both sides.
Step 4: Entrance
Place the tier 1 vestige tube at the rear as your entrance. Ensure it faces the correct direction—the metal plates must connect to the Trampler. If you get a structure error, flip the piece until the plates connect.
Step 5: Doors
Press T to access door settings and remove all open doorways, replacing them with actual doors. This improves the structural integrity of your Trampler.
Layer Two - Helm and Turret Decks
Step 1: Pilot Bridge
Place the pilot bridge (steering wheel) in the center of layer two.
Step 2: Turret Decks
On both sides of the helm, place armored turret deck corner pieces. Directly behind them on both sides, place a standard deck with no railings.
Step 3: Cargo Bay Setup
Directly behind the helm, place a regular L-shaped cargo bay (non-armored). Next to it, place a parallel cargo bay (non-armored).
Step 4: Crew Quarters
Place the armored captain's quarters on one side. On the opposite side, place a non-armored two-person crew cabin.
Step 5: Doors
Press T again and fix all doors to ensure proper access.
Correcting Layer One
Before moving to layer three, there is an important correction to make. In the very back of layer one, the two parallel cargo bays should be unarmored rather than armored.
The weight limit on the great chassis is tight, and unarmored cargo bays still have 7,000 HP—plenty for a front-facing build where you keep the front of your Trampler toward the enemy. Armored versions add unnecessary weight for minimal benefit in this configuration.
Layer Three - Engines and Cannons
Step 1: Turret and Floor
Place an armored turret deck at the front of layer three. Directly behind it, place a normal floor with no railings.
Step 2: Engine
Place the tier 3 maneuverability engine at the rear.
Step 3: Cannon Deck
Place a normal cannon deck in the very back.
Final Weight Management
After completing the build, you will have a small amount of extra weight to work with. You can add a pathway to all your cannons and engine, though this will max out your weight. Alternatively, consider adding armor plates to the front for additional protection. While they do not provide a massive boost, they are worth adding if you have the weight available.
Weapon Setup
Primary Weapons
Shotgun cannon on top - This is your main damage dealer against enemy hulls and decks
Two auto cannons in the front - Consistent DPS against enemy components
Emergency Backup
80mm cannon in the back - Useful in emergencies when an enemy gets behind you. Ideally, this cannon never gets used, but it is a good emergency button.
Combat Strategy
Ramming: The Meta in Small Crews
In small crew combat, ramming is extremely powerful. The great chassis build excels at this because of its front-focused design. Keep the front of your Trampler facing the enemy at all times. When you ram, the battering ram deals significant damage, and the armored front section helps you survive the impact.
Against Royal Chassis
Royal chassis are massive and do not take as much damage from ramming. Against a Royal chassis, your best bet is to shoot their legs and continuously maneuver around them. Do not try to out-ram them—they will win that exchange.
Crew Roles
This build is designed for a three-person crew:
Captain/Pilot - Steers the Trampler, keeps the front facing the enemy, and shoots the second 40mm cannon when possible
Gunner 1 (Shotgun) - Focuses on smoking the enemy hull and clearing decks using regular rounds
Gunner 2 (Auto Cannons) - Spams 40mm rounds at enemy legs and critical components
Positioning
Always present your front to the enemy. This protects your weaker rear components and maximizes the effectiveness of your ramming attacks. The unarmored cargo bays in the rear are less vulnerable because the enemy should rarely get behind you.
Summary
The great chassis, small crew Trampler is an affordable, maneuverable, and powerful late-game build for SAND: Raiders of Sophie, helping you conserve valuable SAND: Raiders of Sophie Items by reducing the need for frequent component replacements. It relies on front-facing combat, ramming, and coordinated crew roles to dominate engagements. The build prioritizes weight efficiency over maximum armor, making it faster and more agile than the royal chassis. With the right weapons and teamwork, this setup can handle most threats—including royal chassis, provided you use mobility and leg shots rather than trying to out-ram them. Build it, practice your positioning, and dominate the sands with your small crew.