Weekend Drop -













Summary:
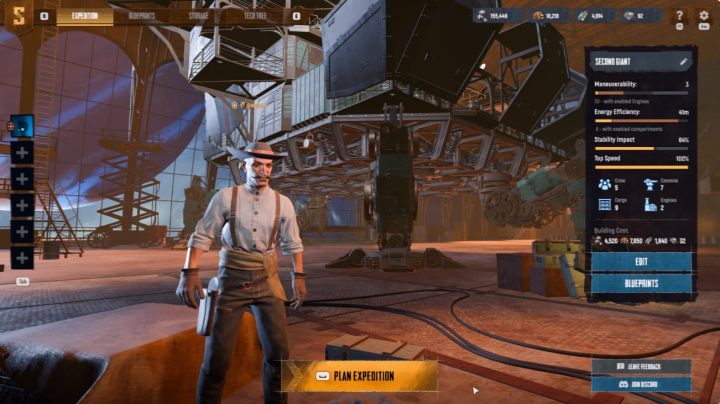
This SAND: Raiders of Sophie endgame Smoke Trampler build combines heavy Tier 4 armor, broadside cannons, strong reactor protection, and four-player specialization. With the right crew roles, this setup can survive long Trampler battles while maintaining constant pressure on enemy vehicles.
Introduction: Why This Smoke Build Works
The Smoke Trampler is designed for coordinated endgame crews rather than casual solo play. It requires a 5x5 Royal Chassis, high-tier compartments, and substantial armor investment. Its biggest strength is the combination of heavy protection, multiple broadside cannons, smoke utility, SAND: Raiders of Sophie Crown, and clearly defined crew responsibilities.
Unlike a traditional Trampler where everyone simply operates whatever weapon is available, this build depends on teamwork. Every player has a specific job, from driving and scouting to repairing critical compartments and maintaining nonstop cannon fire.
Step 1: Build the First Floor
Start in the Blueprint screen with the floor arrows positioned on the left side of your screen. Select the 5x5 Royal Chassis and begin constructing from the bottom layer.
The first row starts with four triangle frames, followed by a Tier 1 cannon. In the second row, place an L-shaped armored cargo compartment, a parallel cargo compartment, and another triangle foundation.
For the third row, use a wooden auxiliary corridor, a small armored cargo compartment, a large parallel armored compartment, and a U-shaped cargo section. The reactor is one of the most important components, so place the 1x3 armored reactor in its designated position.
Finish the first floor with an L-shaped small cargo compartment, a long parallel compartment, another small parallel compartment, and finally the Captain's Quarters.
One important correction is worth remembering: use a framed turret rather than a regular turret in the appropriate position.
Step 2: Add the Upper Floors
For the second floor, start with a framed armor plate directly above the cannon. Add the four-player crew quarters, followed by a parallel cargo bay and supporting frame.
Next, install two medium maneuverability engines. Their positioning helps maintain the Trampler's mobility without sacrificing too much internal protection. Finish this floor with another triangle frame.
The next level begins with a Tier 1 framed cannon. Add Tier 1 floors without railings above the supporting frame and behind the cannon. Finally, place the Tier 1 helm toward the rear.
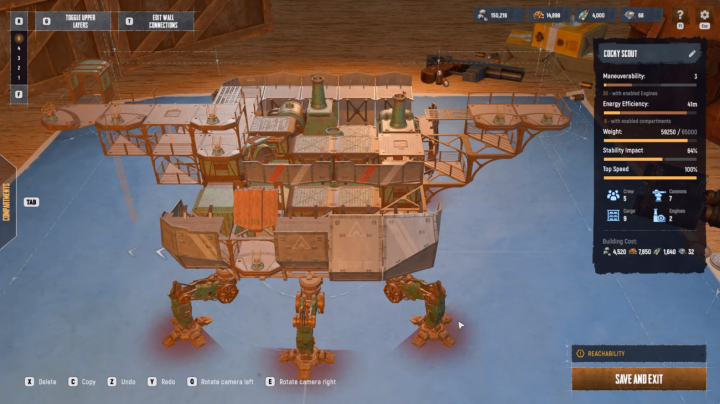
At this stage, the central body of the Trampler should be complete. The next priority is building the cannon wings.
Step 3: Build the Broadside Cannon Wings
The defining feature of this SAND build is its broadside configuration. Instead of concentrating weapons at the front, the cannons are positioned along the sides, allowing the crew to maintain heavy pressure while maneuvering around enemy Tramplers.
The wing construction uses a clever combination of corner frames and triangle frames. Place a corner frame, add a triangle frame above it, and repeat the pattern to create the wing's structural foundation.
Once the frame is complete, install a supporting frame beside the cannon and a floor without railings above it. Add two Tier 1 cannons and then a corner cannon toward the front.
A Tier 1 entrance behind the cannon improves accessibility, while a bridge gives the driver an easier route to the weapon platform during combat.
Repeat the same basic structure on the opposite side. Add two more Tier 1 cannons and another bridge. Once both wings are finished, the offensive foundation of the Smoke Trampler is ready.
Step 4: Maximize Tier 4 Armor Protection
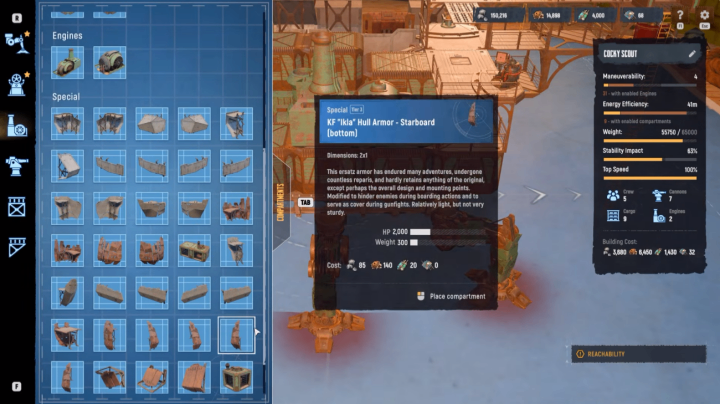
After completing the weapons and compartments, it's time to reinforce the Trampler with Tier 4 armor plates.
Start with the newer Tier 4 hull armor pieces around the upper sections. Hull Armor Port B and Hull Armor Port F provide additional protection, particularly against attacks coming from above and help shield the reactor.
The front should receive a Tier 4 corner armor piece, while additional Fort Stern armor pieces protect the cannon areas. The rear also needs multiple armor sections to prevent enemies from easily reaching critical compartments.
Armor selection around the cannons is particularly important. Certain slanted pieces may provide better deflection, but they can reduce the firing angle for the player operating the cannon. This build therefore prioritizes a balance between protection and weapon visibility.
Step 5: Optimize Door Connections
Door placement might seem like a minor detail, but it is critical to this build.
The bottom floor should remain relatively open because Player Four needs to move quickly between cargo compartments, the reactor, cannons, and defensive systems. An inaccessible storage compartment can remain protected behind an additional door, effectively acting as extra protection for the reactor.
Keep several interior routes open so the repair player can quickly evaluate incoming damage and decide whether to repair cargo, reinforce the reactor, fire a weapon, or activate a defensive dome.
Additional rear doors make it easier to reach the Captain's Quarters and cargo areas from above. On the second floor, only minimal door adjustments are required. Most importantly, do not remove the trap doors that provide access between critical sections.
Step 6: The Four Essential Crew Roles
The biggest advantage of this build is its four-player specialization.
Player 1 – Driver and Smoke Support
Player One is responsible for driving but also acts as the primary response player for boarding threats. Because the driver has a good view of the ladder, they should immediately call out enemies attempting to climb aboard.
The driver also operates the 70mm shotgun cannon loaded with smoke. When the crew reports that an enemy leg has been destroyed, the driver can quickly jump onto the smoke cannon, create cover, and return to the helm.
During extremely long battles, the driver can also use the 40mm cannon for additional DPS when movement becomes less important.
Player 2 – Main Cannoneer and Scout
Player Two focuses on the primary cannon battery, using a 40mm cannon and an 80mm cannon with proximity-fuse and EMP shells.
Their second responsibility is stopping boarders. If the driver calls out a boarding attempt, Player Two should immediately turn toward the ladder and eliminate the threat.
Before combat even begins, Player Two acts as the team's main lookout. They should watch for enemy players, assess the battlefield, and communicate tactical information to the rest of the crew.
Player 3 – Rear Cannon DPS
Player Three has a simple but extremely important objective: deal as much damage as possible.
Operating the rear 40mm and 80mm cannons, this player should maintain constant fire throughout the engagement. They should only stop shooting when there is an emergency or an immediate boarding threat.
Consistent cannon pressure helps prevent the opposing Trampler from recovering and gives the rest of the crew more time to handle repairs and defense.
Player 4 – Repair and Survival Specialist
Player Four may be the most important member of the entire crew.
Their job is to constantly monitor the Trampler's condition and repair damaged compartments. They should also maintain the reactor's energy supply, using energy rods whenever necessary.
During combat, Player Four may switch repeatedly between cannon fire, repairing cargo, checking the reactor, inserting an energy rod, and activating defensive domes. This requires excellent awareness and fast decision-making.
The open interior layout is specifically designed to make this player's job easier. With fewer doors blocking movement, Player Four can rapidly reach whichever section needs attention most.
Final Thoughts
This SAND: Raiders of Sophie Smoke Trampler build is not designed around one overpowered component. Its strength comes from the combination of broadside firepower, Tier 4 armor, reactor protection, smoke utility, cheap SAND: Raiders of Sophie Crown, and disciplined crew coordination.
The build is also not completely fixed. Armor placement, weapons, and internal layouts can be adjusted as players gain more experience and discover better ways to optimize the Trampler.
For organized four-player crews looking for a durable endgame Trampler build, however, this setup provides an excellent foundation. The key is communication: the driver controls movement and smoke, the front gunner scouts and protects against boarders, the rear gunner maintains DPS, and the repair specialist keeps the entire machine alive. When all four roles work together, this Smoke Trampler becomes a formidable force in prolonged battles.