Weekend Drop -













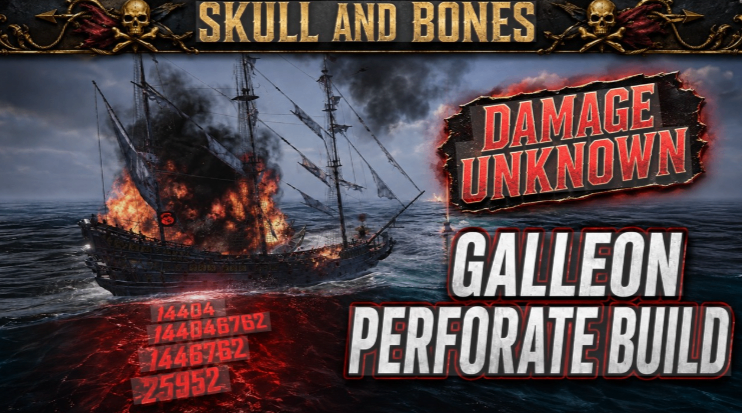
The strongest Galleon setup in Skull and Bones right now leans into flooding, piercing, and electric damage, and the new St. Elmo's Chains major furniture from the current Faction War season is the piece that ties it together. This guide breaks down the talent picks, weapon perks, and support modules used on a fully upgraded Legendary Galleon, including why Blight ammo, the Falaise demi cannons, and Nocturne Heart armor make the cut. It's built for endgame captains who already have Faction War access and want a repeatable loadout for world bosses and heavy naval fights, with clear direction on what matters most for the build to actually function.
Why This Build Works
This Galleon is built around three damage types working together: flooding, electric, and piercing, with fire and combustion filling in the gaps from secondary weapons. On this setup, the ship sits at roughly 116,523 hull health with 1,414 Armor, and its mitigation is weighted toward flooding (40%) and combustion (30%), with lower coverage against fire, piercing, toxic, and electric. That spread matters because it tells you what this Galleon is strong against defensively, not just offensively — it's a brawler, not a glass cannon. Players chasing a single damage-type spec, rather than a mixed flooding-electric approach, will benefit most from adapting the talent picks below—perhaps using some Skull and Bones Silver to cover respec costs—rather than copying them exactly.

Core Skill Tree Picks
The talent path runs through flooding, piercing, and electric nodes rather than a pure single-element route. Straight up the middle, the build takes Impetus Order, Relentless Force, Weakness Finder, and Firepower Order. In the middle tier, it grabs Vital Strike and Hard Munitions, skipping the projectile-speed nodes since this setup doesn't need them. Every demi cannon talent on the left side is taken, with only two picked up on the right. New players building their first electric-flooding Galleon should focus on the demi cannon side first, since that's where the core damage scaling actually comes from.
Front And Stern Weapons
The front slot uses a Blight weapon loaded with Rupturing, Toxic, Amplified Toxic, and Outbreak perks, running Caustic ammo. Landing 15 hits in a single volley increases the damage a target takes by 8% for 10 seconds, and if that target is poisoned, it takes 12% more damage from all sources — which is the reason this weapon holds the front slot. The stern weapon rounds out fire, combustion, and piercing coverage with Combustion, Lethal, Soul Mending, and Corpse Explosion perks; the exact stern weapon matters less than making sure it covers combustion and fire alongside the flooding, piercing, and electric focus elsewhere.
Broadside Demi Cannons
Both broadsides run Falaise demi cannons. Starboard carries Adept Rupturing, Soul Mending, Death Blow, and Lightning Strike; port carries Adept Rupturing, Lethal, Soul Mending, and Lightning Strike. The one non-negotiable pairing here is Rupturing with Lightning Strike — those two perks are what make the build's lightning damage work. Piercing damage from these guns is a bonus on top, not the main draw. Competitive players optimizing reload cycles should treat these two perks as the floor before adding anything else.
Auxiliary And Armor
The auxiliary slot uses Spirit Collar, chosen specifically because the Weeping Mother encounter is still active, running Rupturing, Hearty Buoys, Deadly Strike, and Enduring Embers. Armor is Nocturne Heart, with Armored Maintenance, Survivor, and Severe Damage Removal — the latter lets you hit the ability key to strip 40% of incoming damage, which is a meaningful survivability tool against the Herald of the Abyss. For players looking to experiment with alternative loadouts or fine-tune their resistances without sinking too much real currency, cheap Skull and Bones Silver offers an accessible way to cover respec costs and upgrade ancillary pieces.
Slot | Item | Key Perks | Role in Build |
Front Weapon | Blight (Caustic ammo) | Rupturing, Toxic, Amplified Toxic, Outbreak | Toxic + flooding pressure |
Stern Weapon | Combustion mortar | Combustion, Lethal, Soul Mending, Corpse Explosion | Fire + piercing coverage |
Starboard Broadside | Falaise demi cannons | Adept Rupturing, Soul Mending, Death Blow, Lightning Strike | Electric core |
Port Broadside | Falaise demi cannons | Adept Rupturing, Lethal, Soul Mending, Lightning Strike | Electric core |
Auxiliary | Spirit Collar | Rupturing, Hearty Buoys, Deadly Strike, Enduring Embers | Weeping Mother matchup |
Armor | Nocturne Heart | Armored Maintenance, Survivor, Severe Damage Removal | Boss survivability |
The main takeaway from this table: Rupturing and Lightning Strike repeat across almost every slot, confirming they're the backbone perks the rest of the build is built around.
St. Elmo's Chains Effect
St. Elmo's Chains is the newest major furniture from the Faction War reward track (item 13 on the timeline). It's what makes the flooding-electric combination click: dealing electric damage to a flooded target also deals 50% of that electric damage to other nearby targets within 150 meters, deals 50% more electric damage to flooded targets outright, and extends the flooded effect's duration by 10%. Support modules matter too — because this is a flooding build, a caustic-focused spell station is used, and because it's a lightning build, a Leaden Ball Array (6% faster reload on electric weapons) is preferred. Without it, an Expanding Corkscrew station is the next best option, and without either of those, plain powder cakes on both broadsides still work.
What Damage Types Does This Galleon Build Use?
The build focuses on flooding and electric damage as its core, with piercing as a strong secondary and fire/combustion filled in from the stern weapon. This layered approach is what lets St. Elmo's Chains trigger its bonus effects consistently rather than occasionally.
Is St. Elmo's Chains Worth Farming in the Current Faction War?
Yes, for anyone running a flooding-electric setup — it directly amplifies both damage types and spreads electric damage to nearby targets. Players not running flooding builds will get far less value from it.
Which Talent Nodes Matter Most for the Demi Cannons?
The demi cannon nodes on the left side of the tree are the priority, since that's where the electric and flooding scaling concentrates. Only two nodes on the right side are worth taking; the rest can wait.
What Should Replace the Leaden Ball Array If You Don't Have It?
An Expanding Corkscrew station is the next best reload-support option. If neither that nor a caustic ball station is available, standard powder cakes on the broadsides are a workable fallback.
Quick Tips
· Prioritize Rupturing and Lightning Strike perks before chasing anything else on the broadsides.
· Skip projectile-speed talent nodes entirely — they don't serve this build's mixed damage profile.
· Farm St. Elmo's Chains through the Faction War reward timeline before optimizing other slots.
· Use a Leaden Ball Array if possible; fall back to powder cakes only as a last resort.
Who Benefits Most?
· Advanced Players: Get a ready-made electric-flooding loadout that squeezes extra value out of St. Elmo's Chains.
· Returning Players: Learn what's changed with Faction War rewards and how the Galleon's mitigation spread should shape loadout choices.
· Solo Boss Hunters: Gain a survivability tool through Nocturne Heart's damage removal for fights like the Herald of the Abyss.
Captains who already favor flooding or electric weapons should adopt this loadout directly; those running different damage types can still borrow the Rupturing-and-Lightning Strike core while swapping in their own front and stern weapon choices.
![[Weapon] Atma's Toll](https://assets.mmoexp.com/images/202607/d19ecf02180aaf4b98e434b738c3dc61dd03360c.png)
![[Furniture] Physician's Ledger](https://assets.mmoexp.com/images/202607/b3955ff65a311b909a82f2f8790c08490d66ee8a.png)
![[Weapon] De Breker](https://assets.mmoexp.com/images/202605/ff55aae187f8eb5d895b6b0e74b5a022db1d6408.png)
![[Furniture] Royal Ramming Works](https://assets.mmoexp.com/images/202605/f9c582c68f7f9f8052f457f41ae489e4969c4b35.png)