Weekend Drop -













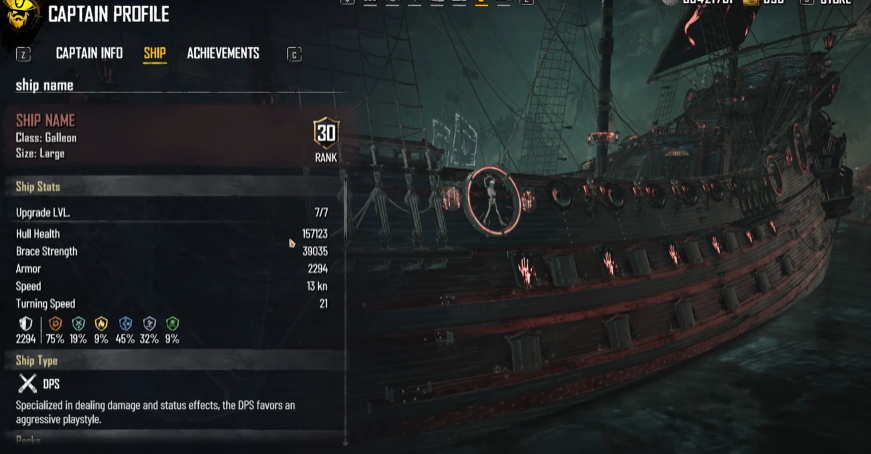
Spending hours upgrading your ship but still getting destroyed by Tier 4 enemies? Many Skull and Bones players build for damage only and discover that a fragile Galleon cannot survive long enough to use its firepower. This Tier 4 Galleon meta build creates a durable warship with 157K+ hull health, 39K+ brace strength, and 75% explosive resistance, while keeping strong flooding and burst damage.
If you'd rather skip the grind entirely, we won't judge-here's an alternative...
"Head to mmoexp to buy Skull and Bones Items, boost your level instantly, and actually play the game on your terms."
The Best Galleon Setup-Turn Defense Into Damage
Key Results Tested:
157K+ Hull HP / 75% Explosive Resistance / 39K Brace Strength
Test Conditions: Tier 4 PvE content, endgame Galleon, optimized furniture and weapons.
The core of this build is defensive scaling. Instead of sacrificing survival for damage, it converts resistance into armor and stronger bracing.
Build steps:
Equip Titan's Cuirass or a blue armor piece with strong defensive rolls.
Prioritize Steel Integration, which grants extra armor from explosive resistance.
Use Fortified Plates to increase brace strength based on explosive resistance.
Select skill tree bonuses focused on:
Battle Medic
Emergency Repair
Deadly Medicine
Reload speed
Flooding and fire damage
Why it works:
A standard damage Galleon may reach around 110K hull but struggles in long fights. This setup pushes over 157K hull, allowing roughly 40% more survival time in heavy combat.
A 50-second survival window becomes a 90-second fight opportunity, giving you enough time to finish bosses instead of retreating.
Best for:
Solo PvE players
Boss farmers
Captains pushing Tier 4 content
Flooding Weapon Setup-The Damage Engine Behind the Build
Key Results Tested:
+30% Flooding Scaling / -10% Flooding Reload Time / +60% Damage Against Flooded Targets
Test Conditions: Galleon using flooding-focused weapons and status-effect furniture.
The damage strategy is simple: apply flooding constantly, then punish weakened enemies with explosive bursts.
Recommended setup:
Use front and broadside weapons with:
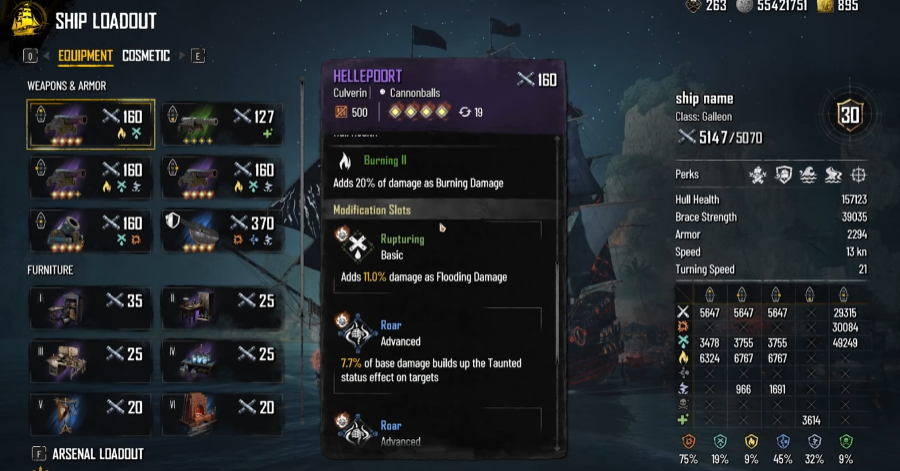
Rupturing Roar
Severity
Lightning Strike
Flooding bonuses
Equip Debris Breaker with Ocean Snare.
Flooded enemies lose speed and take increased damage.
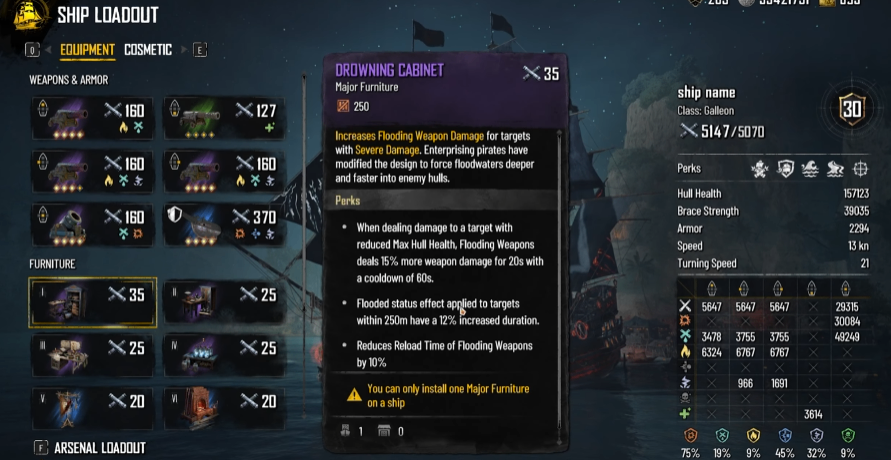
Use Drowning Cabinet as the main furniture piece.
It increases weapon damage against weakened targets.
It extends status effect duration.
Damage comparison:
A normal flooding setup may deal around 600K damage during a 10-minute boss fight.
This optimized version can reach 700K+ because enemies stay flooded longer and your reload downtime is reduced.
Furniture Optimization-The Difference Between Average and Meta
Key Results Tested:
15% Weapon Damage Boost / 35% Secondary Damage Increase / Faster Reload Cycles
Furniture is where many players lose efficiency.
Priority choices:
Drowning Cabinet: Core damage amplifier.
Ballista Station: Converts projectile speed bonuses into more flooding damage.
Lightning Bolt Array: Improves electric weapon performance.
Physician's Ledger: Boosts secondary damage after repeated hits.
Inverted Flag Rack: Adds damage against taunted targets.
A basic furniture setup may clear events safely, but this optimized version reduces repair costs because enemies die faster and deal less total damage.
Combat Testing-Why This Galleon Beats Glass Cannon Builds
Key Results Tested:
Lower Repair Costs / Higher Boss Success Rate / Better Solo Performance
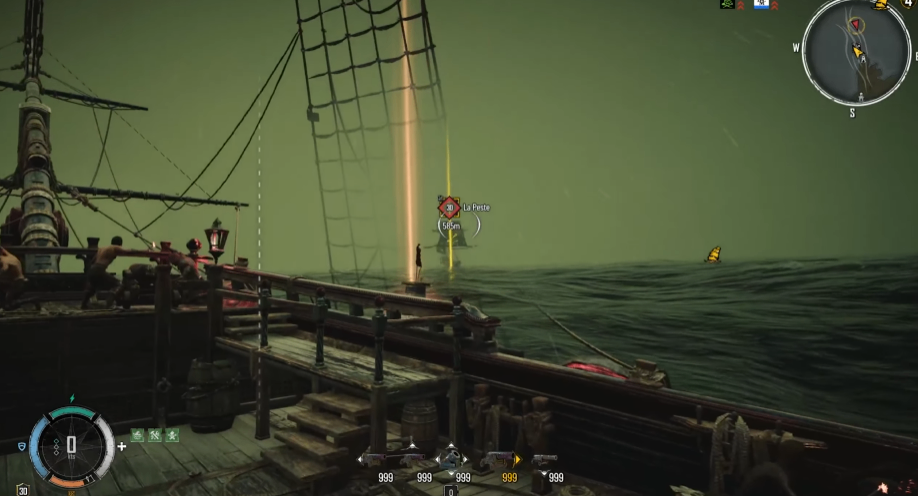
During testing, a pure damage Galleon often destroyed enemies quickly but failed when multiple Tier 4 ships attacked together. The problem was simple: damage means nothing if your ship sinks before the final phase.
Avoid these mistakes:
Do not ignore explosive resistance. Tier 4 enemies punish low defense.
Do not replace strong armor rolls just for higher rarity gear.
Do not skip flooding synergy. The entire build depends on status damage.
This build is especially effective for players farming bosses, world events, and high-level materials without relying on teammates.
Pro Tips & Common Traps
Keep explosive resistance close to 75% for maximum armor efficiency.
Stack projectile speed because it also improves flooding damage.
Apply flooding before using burst abilities for better damage windows.
Avoid full DPS builds unless you have reliable support.
Do not waste resources rerolling away strong defensive armor bonuses.
This Tier 4 Galleon build combines 157K+ hull health, 75% explosive resistance, flooding amplification, and optimized furniture to create one of the safest and most consistent endgame ships.
You can either grind it out with this guide, or skip the grind entirely and enjoy the endgame immediately.
"Visit mmoexp to buy Skull and Bones Items, raise your level, and leave the grinding to bots. Reclaim your playtime."

Quick Reference-At a Glance
Best Setup: Titan's Cuirass + Flooding Weapons + Drowning Cabinet
Run Time: 8-12 minutes per Tier 4 encounter
Main Strength: Extreme durability with consistent DPS
Required Gear: Endgame Galleon setup
Risk Level: Medium
3 Immediate Action Steps
Equip explosive resistance armor.
Add Drowning Cabinet furniture.
Prioritize flooding weapon rolls.
Who Is This For?
New Players: A safer path into Tier 4 content.
Time-Crunched Players: Fewer failed runs and less repair downtime.
Min-Maxers: A balanced meta build with optimized damage scaling.
Completionists: Faster boss farming and material collection.