Weekend Drop -













Are you still wasting silver on “meta” weapons that barely tickle endgame bosses? Frustrated that your DPS evaporates the moment a Megafort so much as looks at you? What if I told you that one single volley – not a full broadside, just one trigger pull – can casually drop 1.7 million grey damage while healing you for 20k HP per shot?
This isn’t a glitch. It’s the Sunkeeper Organ + Medic’s Book synergy, and it’s currently the most broken, brain-dead powerful setup in Season 2. Forget kiting, forget precision aiming. You hold down the trigger, you melt everything, and you don’t die. “Want to test these strats instantly? Grab your Skull and Bones Items at MMOexp and level up your game before the next patch hits.

The “Noob Trap” – Why You’re Building Wrong (And How to Fix It)
Key Takeaways:
· Healing weapons aren’t for support; they are your primary DPS.
· The “Bloody Musket” perk is a trap if you can’t land every shot.
· Your armor choice matters less than your furniture setup.
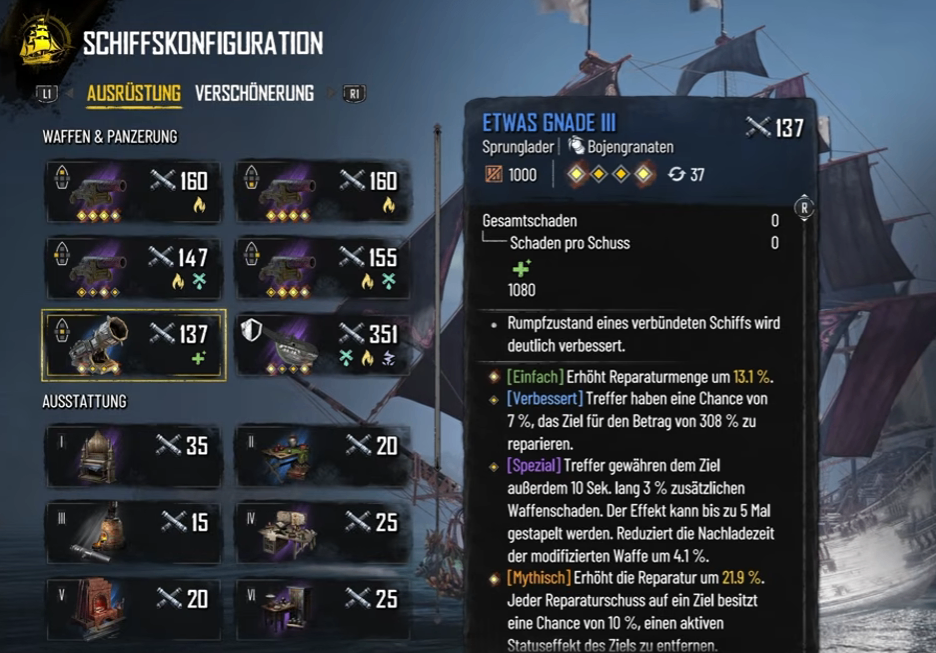
· Most players see “healing” and think “support.” That’s your first mistake. The Sunkeeper Organ and Medic’s Book don’t just heal; they convert that healing into raw, unblockable damage. The math is simple: each volley fires 17 shots. With the right build, each shot hits for 70,000 to 94,000 damage. That’s over 1.5 million damage per trigger pull – on grey numbers, not crits. Compare that to the previous “god-tier” Torpedo build, which maxed out at around 110k per shot. We’re talking a 700% DPS increase for the same button press.
Who This Helps: Grinders and PvErs who are tired of 20-minute boss fights. The Payoff: Save Time & Sanity.
The 1% Edge – Furniture That Multiplies Your Mayhem
Key Takeaways:
· Only your port and starboard slots matter – ignore front/back.
· “Torment to Hell” (Flooding) is non-negotiable for the 30% bonus.
· Projectile Speed is the hidden MVP stat.
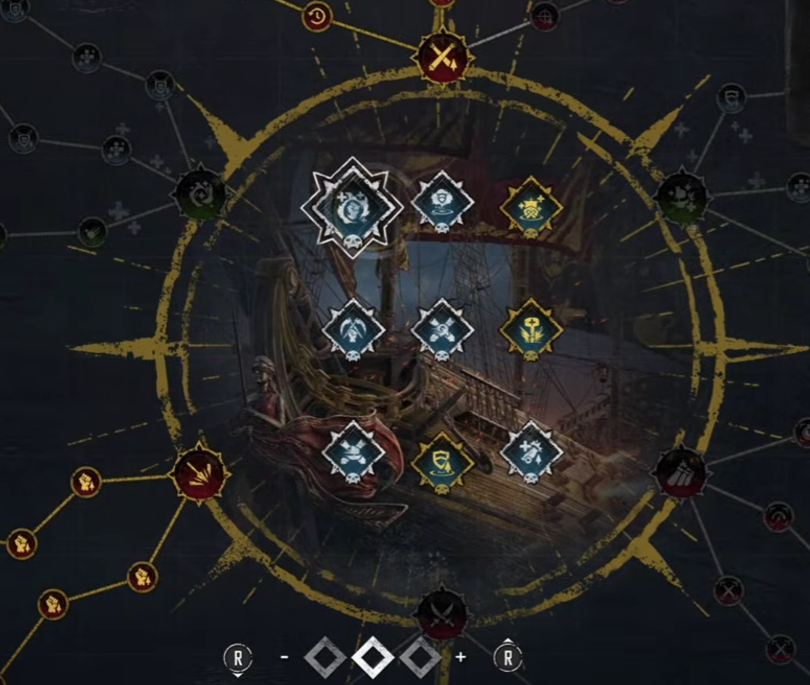
· Here’s where we get surgical. For your auxiliary slots, you want “Torment to Hell” with Flooding damage. It’s a straight 30% boost to your flooding procs. Pair that with “Caustic Splinter Rig” and “Guerilla Workshop” – the latter is mandatory because you’re only using your broadsides. I see so many players stacking healing bonuses on the mystic slot, but that’s a waste. You only equip the mystic piece for the 15% damage buff, not the healing. For armor, if you’re running high-risk content like the Shadow Beast or Kraken, swap Bloody Musket for “Battle Healer” or “Immortal Vessel”. Yes, you lose a bit of DPS, but a dead player deals zero damage. It’s better to survive and spam your 1.7m volleys.
Who This Helps: Hardcore Min-Maxers chasing world-record clears. The Payoff: Boost Win Rate in PvE.
The “Hold R2” Rotation – Gameplay for the Lazy Genius
Key Takeaways:
· Aiming is optional if you’re close enough.
· Against fast targets (like Li Tian Ning), drop “Bloody Musket”.
· This build works on the Junk and Sambuk, but the Galleon is king.
· You’ve just spawned Dirk. You hold down the trigger. He’s down in two volleys. That’s the rotation. There is no complex “weave” or “ability priority.” This is the beauty of the build. However, let’s talk about the 4% health cost per shot from “Bloody Musket.” If you’re fighting the Megafort or a stationary boss, you’re golden – you heal back 20k per hit, so you’re basically immortal. But if you’re fighting a Li Tian Ning (who zooms around like a caffeinated mosquito), you’ll miss shots. In that scenario, swap “Bloody Musket” for the flat damage of “Battle Healer” or the safety of “Immortal Vessel”. The build doesn’t break; it just becomes 20% safer. And for those wondering about next season? The Junk is coming. It’s a DPS ship. This exact build is about to get even more absurd.
Who This Helps: Casuals and PvPers who want maximum impact with minimum effort. The Payoff: Save Gold on repairs and consumables.
The Devil’s in the Details – Season Pass & Perks

Key Takeaways:
· Max out Calverine and Fire/Flooding damage in the Season Journey.
· Ignore the defensive options; you don’t need them.
· “Necrotic Heart” is a flex slot—use it only for resistance.
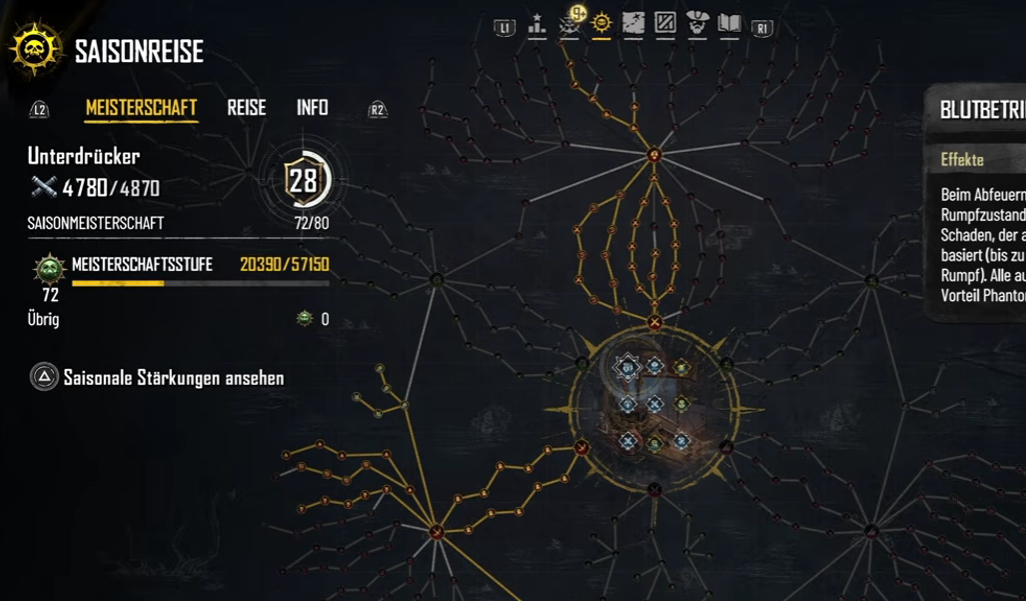
· Don’t sleep on the Season Journey perks. If you’re leveling up, put every point into Calverine Mastery and Elemental Damage. The defense tree is a noob trap when you’re healing 20k per shot—you simply don’t need the armor. Also, note the “Projectile Speed” node. It’s easy to ignore, but it tightens your spread, ensuring more pellets hit, which translates directly to more healing and more damage. The build currently has a “Problem” – the reload speed is actually faster than the need to aim, so you just hold down the trigger. If next season reduces reload times further, we’re looking at a monster.
Who This Helps: Everyone. This is the definitive Season 2 guide.
Ready to break the game? The golden rule is this: Heal = Damage. Stop chasing old metas. Slot your Organ, grab your Medic’s Book, and turn your brain off. The 1.7 million in damage speaks for itself. Next time you load in, don’t bother with complex rotations. Just find the enemy, hold the trigger, and watch the health bars evaporate. “Grinding till dawn? Smart players borrow power – buy Skull and Bones Items at MMOexp, save your sanity, and enjoy the real endgame.”
1. Quick Wins – Do This Now
· Swap your front/back weapons for pure defensive passives.
· Buy “Torment to Hell” (Flooding) for your Port/Starboard.
· Remove all healing furniture except the 15% damage mystic piece.
2. Bottom-Line Benefits by Player Type
· New Players: Skip the grind. One build covers all endgame content.
· Time-Crunched Gamers: Finish your weekly boss runs in 10 minutes.
· Hardcore Min-Maxers: The 1.7m grey damage is the new benchmark to beat.
· Social / Casual Players: Finally, a build where you don’t have to aim.
![[Weapon] Atma's Toll](https://assets.mmoexp.com/images/202607/d19ecf02180aaf4b98e434b738c3dc61dd03360c.png)
![[Furniture] Physician's Ledger](https://assets.mmoexp.com/images/202607/b3955ff65a311b909a82f2f8790c08490d66ee8a.png)
![[Weapon] De Breker](https://assets.mmoexp.com/images/202605/ff55aae187f8eb5d895b6b0e74b5a022db1d6408.png)
![[Furniture] Royal Ramming Works](https://assets.mmoexp.com/images/202605/f9c582c68f7f9f8052f457f41ae489e4969c4b35.png)