
Summary
Poison helps drain enemy stamina and disrupt bracing, while Storm Struck adds chain-lightning area damage and increases pressure on groups of enemies. This combination makes the Doom build particularly effective when fighting multiple targets during endgame events.
The broader Y3 progression has also made specialized weapons and deeper build customization more important, Buy Skull and Bones Silver with new gear and progression systems introduced throughout Year 3.
Secondary Weapon and Healing Setup
Survivability is just as important as damage when fighting World Tier 4 bosses.
For the secondary weapon slot, the recommended choices are Helleport and Soul Snatcher because of their Mending capabilities. The healing provided by these weapons can make a major difference during extended boss fights.
This is especially useful against difficult encounters where debuffs can quickly overwhelm a ship's defenses.
The Doom setup isn't designed simply to produce a huge damage number. Its strength comes from combining DPS, healing and defensive scaling into one large-ship loadout.
For the bow and stern, you have more freedom.
Long Guns and Ballistas are useful for breaking sails from a distance, while Demi-Cannons are better suited to players who want to constantly apply vulnerabilities and search for critical hits.
For auxiliary weapons, Little Grace III is the safer team-oriented option. Players focused purely on DPS can instead use a Rocket or Mortar, such as Le Flauve or Eye of Heaven, to add ranged damage.
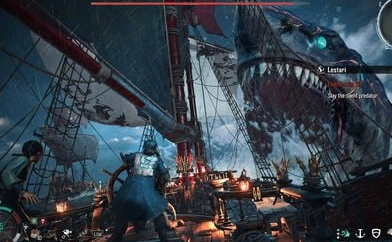
Best Armor and Furniture for the Doom Build
Armor selection is another important part of the Skull and Bones WT4 build.
Avoid hull armor with 0% base resistance, because mixed elemental damage can become extremely dangerous during high-tier encounters.
A balanced resistance profile is generally safer for difficult fights.
Two strong general-purpose choices are Immortal Vessel and Royal Custodian. However, specialized armor can be better against specific enemies. For example, Mantle of the Deep can be used against Kraken encounters, while Hayden's Guard is an option for fighting the Abyss Herald.
For Ascension Mods, prioritize bonus armor or bonus health when your goal is maximum sustain in solo boss fights.
Furniture should then reinforce your secondary-damage strategy.
The Doom furniture setup is especially valuable on the Junk or Corvette, while Rampant Carriage Hold can provide additional benefits for nearby allies, making it useful in group content.
The Junk is particularly relevant in Y3S2 because Ubisoft designed it as a large DPS ship capable of escalating its offensive pressure during extended fights.
Best Seasonal Mastery Nodes for Y3S2
The Seasonal Mastery Tree is where this Skull and Bones Y3S2 Doom build becomes much more flexible.
For the Culverin-focused version, prioritize the central nodes that increase your damage output and then invest remaining points into armor and health.
The build can also be adjusted when you change elemental damage.
For a Lightning setup using Heaven's Mandate, move your points toward dedicated Lightning nodes. Flooding builds can use a similar approach with Carinates, while Fire and Explosive setups can shift toward the appropriate elemental bonuses.
This flexibility is important because Y3S2 significantly expanded build customization and increased the number of mastery loadout slots, giving players more room to maintain different endgame setups.
One useful trick is to equip different weapon types across your ship's weapon slots.
For example:
Broadside: Culverin
Bow: Demi-Cannon
Port: Bombard
Stern: Long Gun
Auxiliary: Mortar
This helps activate the build's weapon-diversity damage bonus rather than stacking the same weapon type everywhere.
How to Trigger the Doom Build's Burst Damage
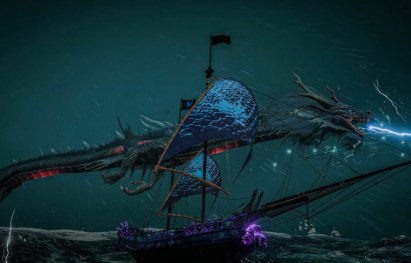
The most important part of the build is knowing when to activate the damage window.
Once you reach 10 Impetus stacks, fire your Auxiliary weapon.
This activates the build's critical-barrage window for the following eight seconds, allowing your attacks to deal extremely high burst damage.
That's the moment to unload your broadside weapons and focus the boss's vulnerable areas.
Against a World Tier 4 Elder Shadowbeast, this rotation can turn the Doom setup from a sustained-DPS build into a short-duration burst machine.
Elder Shadowbeast is part of the higher World Tier endgame structure, and Ubisoft has previously adjusted its damage and health specifically to improve the balance of the encounter.
Is the Skull and Bones Y3S2 Doom Build Worth Using?
Yes, especially if you're looking for a flexible large ship build for WT4 bosses and seasonal content.
Its biggest advantage isn't one specific weapon. It's the combination of rapid-fire Culverins, elemental secondary damage, Mending, defensive armor and a powerful burst window.
You can also modify the setup without rebuilding the entire ship. Swap mastery nodes when changing elemental damage, replace the auxiliary weapon depending on whether you're playing solo or with a team, Skull and Bones Silver and use specialized armor when facing specific bosses.
For players currently pushing Skull and Bones Y3S2 endgame content, this makes the Doom setup a strong starting point for a large-ship DPS build.
![Infamy Boost : [Infamy to Kingpin1]](https://assets.mmoexp.com/images/202507/d1db7ce0b05afb7d48cf0e4f2a3a7022e0eba069.webp)
![Infamy Boost : [After Kingpin1] 50000EXP](https://assets.mmoexp.com/images/202507/a57a61da7e37435d66288fb98e19af72d91be69e.webp)