Want to push past Round 100, farm XP, earn camo progress, and stack resources without constantly running in circles? These two Black Ops 7 Zombies AFK setups can help create safer zombie funnel points while keeping your weapon supplied with ammo. One method is extremely simple and requires keeping a key door closed, while the second gives access to more of the map and Pack-a-Punch. The real question is: which setup matches your loadout, GobbleGums, and high-round goals?
Setup One: The Easy Door-Lock Zombie Funnel
This first AFK setup is ideal for players who want a fast, low-risk route into high rounds.
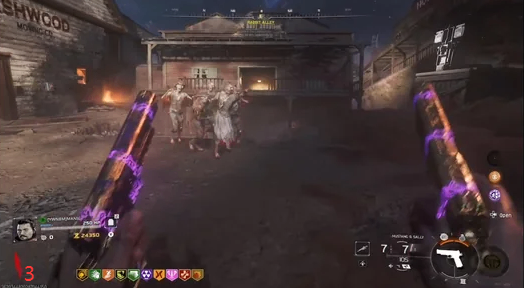
The key is simple: do not open the door leading toward the Pack-a-Punch area. Keeping that route locked also keeps an important barrier near spawn closed. This changes zombie pathing and forces enemies to gather on the opposite side of the Mule Kick-side door.
Stand tightly against the door near Mule Kick. Zombies should pile up behind the closed route instead of reaching your sides or back.
Why it works:
- Enemies funnel into one predictable area
- You are protected from side and rear attacks
- It is easy to set up in early rounds
- It supports long AFK farming sessions
This is a strong option for players who want efficient high-round survival without opening up the entire map.

Best Weapon Choice: Use Single-Fire Weapons for Reliable AFK Fire
For this setup, choose a weapon with a **single-fire mode**. The Peacekeeper is a particularly effective wall-buy option because it performs well for sustained shooting and can be upgraded through Wall Power.
If you purchase it early, it may initially appear at green rarity. Later, once you reach higher rounds, buy another weapon and then reacquire the Peacekeeper with Wall Power to receive a gold-rarity version.
It may still be Pack-a-Punch Tier I, but that is not a major issue when Dead Wire is carrying the damage output.
Recommended weapon priorities:
- Single-fire firing option
- Strong ammo capacity
- Accessible wall-buy location
- Compatibility with Dead Wire
- Stable recoil for fixed crosshair placement
For players who would rather spend time on difficult endgame content than repeat endless resource grinds, buy Call of Duty Black Ops 7 Bot Lobbies at mmoexp, save your sanity, and enjoy the real endgame.

Essential Perks and Augments for Infinite Ammo Potential
The AFK spot alone is not enough. Your perk and augment choices determine whether you can survive high rounds or run dry after a few waves.
Vulture Aid: Make Ammo Come to You
Use Condor’s Reach on Vulture Aid. This augment helps collect drops automatically, reducing the risk of leaving the safe position for ammunition.
Vulture Aid is located behind the locked castle-side route, so use a GobbleGum strategy if you plan to keep that door closed.
Possible options include:
- Perkaholic
- On the House
- Soda Fountain
If using Soda Fountain, purchase Wisp Tea first. This avoids receiving Wisp Tea randomly after using Soda Fountain when it is already one of your required perks.
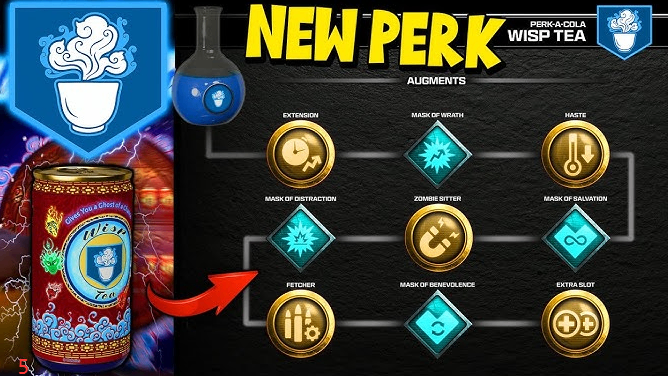
Wisp Tea: Keep the Ammo Flowing
Use the **Fetcher** augment on Wisp Tea. This helps bring back extra ammo and makes the AFK setup far more sustainable.
Core benefit: Vulture Aid gathers drops while Wisp Tea helps replenish ammunition. Together, they reduce the chance of your high-round run ending because of empty magazines.
Dead Wire Is the Real High-Round Damage Engine
Dead Wire is the centerpiece of both setups.
Equip Dead Wire on your chosen weapon, then use the recommended Dead Wire augments that improve its crowd-clearing potential. After enough bullets hit the zombie group, Dead Wire activates and can wipe out large numbers of enemies at once.
Because zombies are packed into a narrow, predictable location, the effect becomes dramatically stronger than it would be during normal open-map training.
Dead Wire strengths in this setup:
- Clears dense groups quickly
- Helps compensate for lower Pack-a-Punch tiers
- Recharges through continued fire
- Makes high-round AFK farming possible
Elemental Pop augments can also provide useful extra support, especially for players who want more elemental damage consistency.
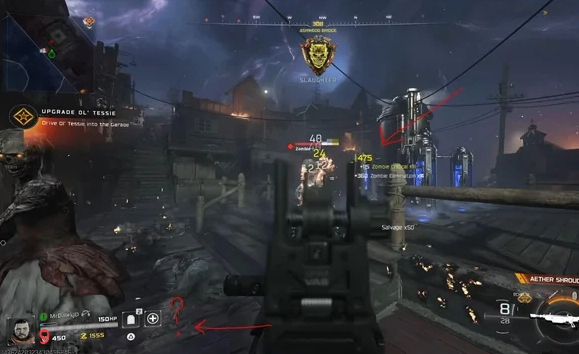
How to Set Up the AFK Fire Input
Once your perks, weapon, and zombie funnel are ready, switch your selected weapon into single-fire mode.
Then open combat settings and change the firing behavior to **Hold**. Use a safe controller or input method that keeps the fire button held down while you remain in the correct position.
Before stepping away, wait until only one zombie remains at the end of a round. Watch where it stops or piles up, then line your crosshair directly at that point.
Death Perception can make this easier by helping you identify the final zombie’s position.
Important AFK checklist:
- Weapon set to single fire
- Fire behavior set to Hold
- Dead Wire equipped
- Vulture Aid with Condor’s Reach
- Wisp Tea with Fetcher
- Crosshair aligned with the zombie pile-up point
Setup Two: Castle Access AFK Spot With Ether Shroud Burst Dash
Want access to Pack-a-Punch and the castle area while still using an AFK-friendly location? The second setup is more advanced but gives you greater map freedom.
This method requires Ether Shroud with Burst Dash.
Start near the rope location. Move forward quickly, wall-jump from the right side, and activate Ether Shroud at the right moment. A successful attempt launches you upward and drops you into a hidden lower area.
After landing, move into the nearby corner to recover health, then reposition on the rock until zombies stop reaching you.
This spot can provide a safer angle while allowing access to key map areas that are unavailable in the first closed-door setup.
Prevent Fall Damage and Avoid a Common Perk Mistake
The Ether Shroud route can cause heavy fall damage.
Use **Free Fall** on Stamin-Up if available. It reduces the danger of the drop and makes repeated attempts much less frustrating.
Avoid using Quick Revive for this method if the area includes dangerous death barriers. The extra damage interaction can make the landing less reliable and turn an otherwise successful setup into a failed run.
Best preparation for the Ether Shroud route:
- Ether Shroud with Burst Dash
- Stamin-Up with Free Fall
- Dead Wire weapon
- Vulture Aid and Wisp Tea ammo augments
- A single-fire weapon for sustained shooting
If progression costs are slowing down your build, buy cheap Black Ops 7 Bot Lobbies at mmoexp, save your sanity, and enjoy the real endgame.
Which AFK Setup Should You Choose?
Choose the Door-Lock Funnel If You Want:
- The fastest and easiest setup
- Strong protection from side and rear attacks
- A simple route for high-round farming
- A low-complexity position with reliable zombie pathing
Choose the Ether Shroud Spot If You Want:
- Pack-a-Punch access
- Castle-area access
- More flexibility around the map
- A more advanced but versatile high-round position
Both setups are designed for players who want to farm XP, weapon levels, camo progress, and high-round rewards with less manual effort. The first is better for simplicity. The second is better for players who do not want to sacrifice access to important map locations.
Quick Tips Before Starting a High-Round AFK Run
- Test the zombie pile-up point before committing to AFK.
- Keep your crosshair stable and centered on the final zombie’s stopping location.
- Check that Dead Wire is active before beginning long rounds.
- Prioritize ammo sustain over unnecessary perks.
- Recheck the route after updates, as enemy pathing and map interactions can change.
- Use these methods responsibly and avoid relying on them in modes where exploit use can affect other players.
Core Benefits for Different Players
Newer Zombies players: A simpler way to survive longer rounds without mastering complex training routes.
Camo grinders: Consistent zombie groups for faster eliminations, weapon progress, and challenge completion.
High-round players: Better ammo sustain and crowd control through Dead Wire, Vulture Aid, and Wisp Tea.
Solo players: Safer positioning with fewer threats from flanking zombies.
Resource farmers: A practical path toward XP, drops, and long-session progression.