Weekend Drop -














Summary
A successful DMZ run needs more than kills: complete the objective, keep the required items and leave through the correct extraction. This guide focuses on three situations from the supplied gameplay account—casino cash transport, a Dynamic Ops/HVT chain, and an underground mall filled with robots.
Use the mission tracker as the final checklist. A cleared room, a full backpack or an open vault does not necessarily mean the objective is finished.
| Activity | Main challenge | What to plan before committing |
|---|---|---|
| Casino heist | Protected interactions and carrying loot | Drill defence, the objective item and a shared escape plan |
| Dynamic Ops / HVT | Following changing objectives under time pressure | Required intel, target tracking and extraction equipment |
| Underground mall | Darkness, traps, cores and computer hacks | Visibility equipment, defensive roles and objective counters |
1. Prepare Your Loadout Around the Mission
A setup for open terrain may not suit dark corridors. Check the objective before deploying and divide jobs before anyone begins a drill, hack or other vulnerable interaction.
| Preparation priority | What to check | Why it matters |
|---|---|---|
| Weapons | A controllable primary; a suppressor when stealth matters | Avoid turning every approach into an extended firefight. |
| Armor and ammunition | Plate supply, ammunition and opportunities to restock | Drilling and hacking can keep the squad in one place. |
| Visibility | NVGs when recommended; the availability of suitable lighting | Dark rooms can conceal traps, enemies and objective items. |
| Extraction | The expected exit method and any required device or carried item | Not every mission finishes at a standard helicopter call-in. |
| Squad roles | Who interacts, who covers, and who carries important loot | Both players should not become occupied with the same menu. |
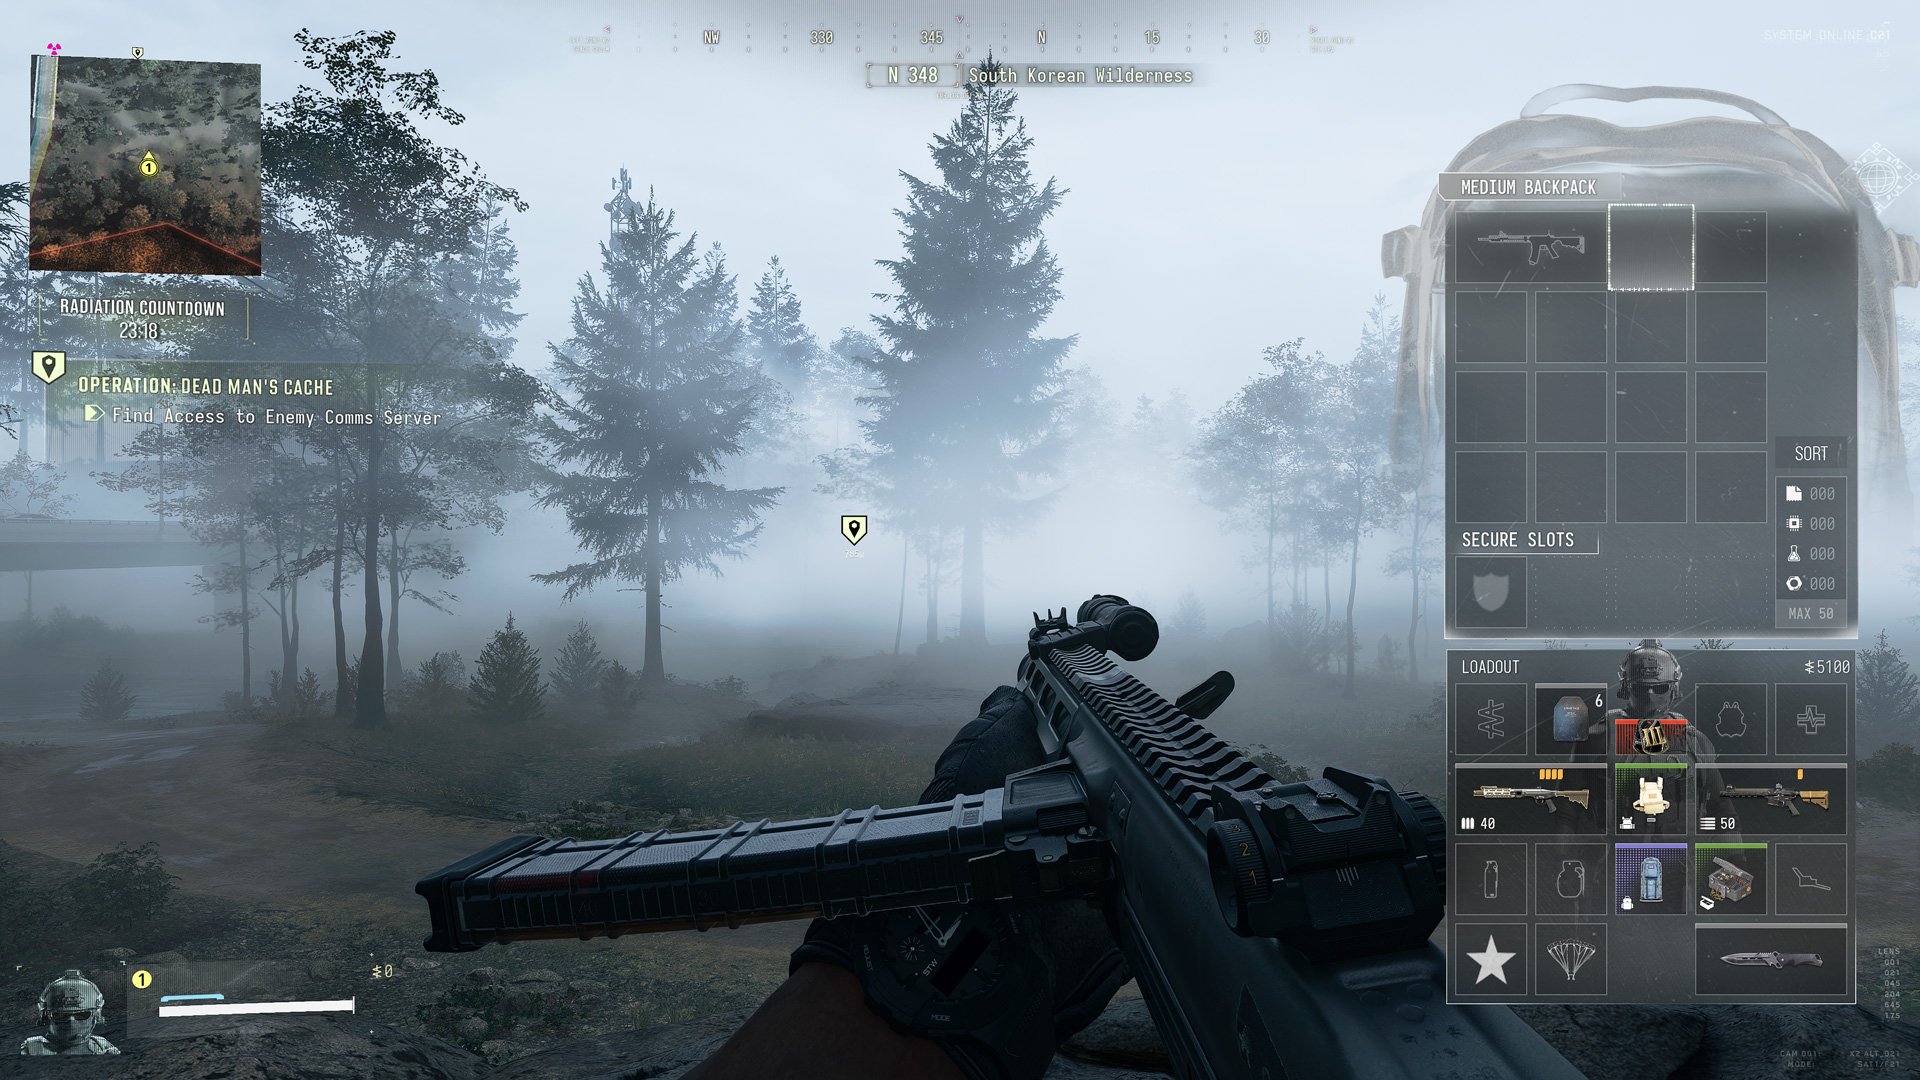
Recommended squad routine: the interacting player announces the start and completion of the task; the covering player watches the approaches. Swap roles when health, ammunition or positioning makes that sensible. This is a coordination method, not a fixed game requirement.
2. Casino Heist: Protect the Interaction, Then Move the Loot
The supplied run follows a generator, vault breach, cash collection and vehicle-loading sequence. The matching mission screenshots identify the casino activity as Operation Silent Ledger.
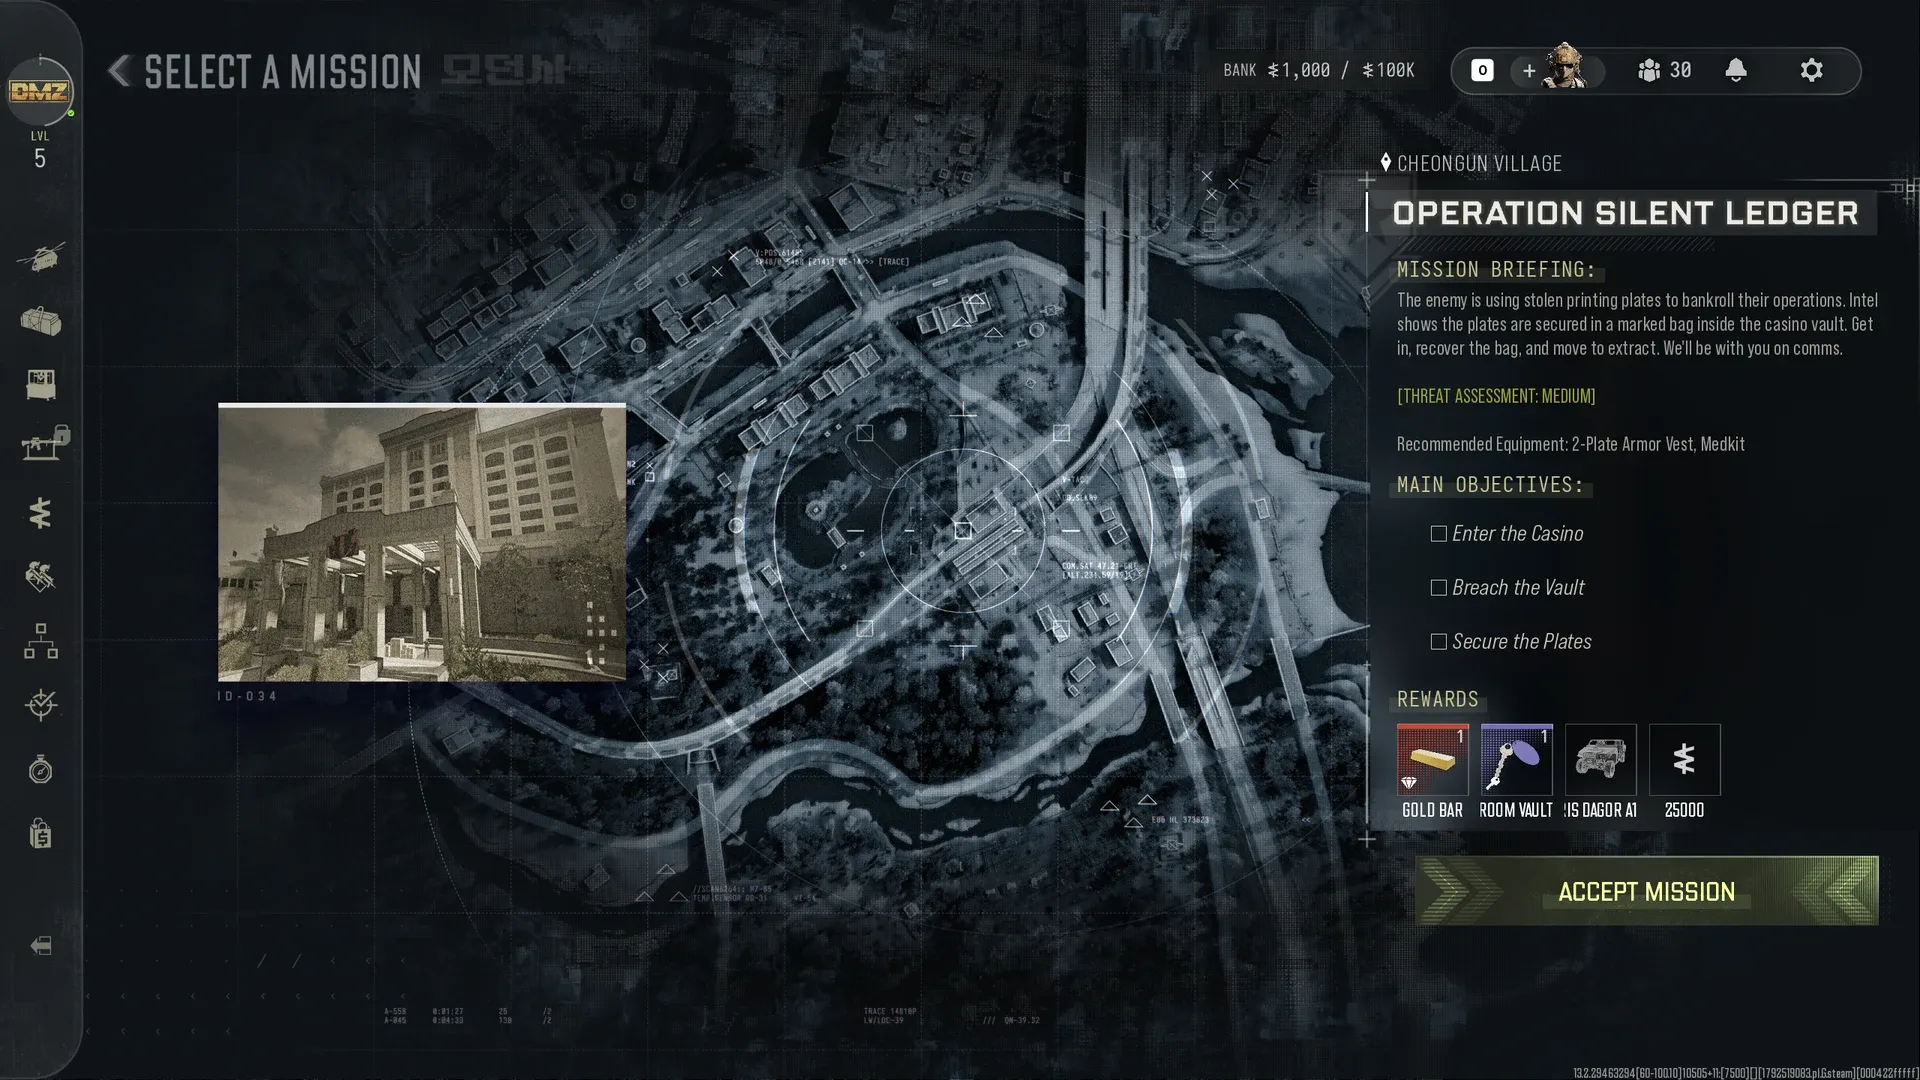
Screenshot check: Silent Ledger requires the printing plates. Cash bags are a separate optional objective. Recover the plates before optional hauling; loading a truck is not the final extraction condition.
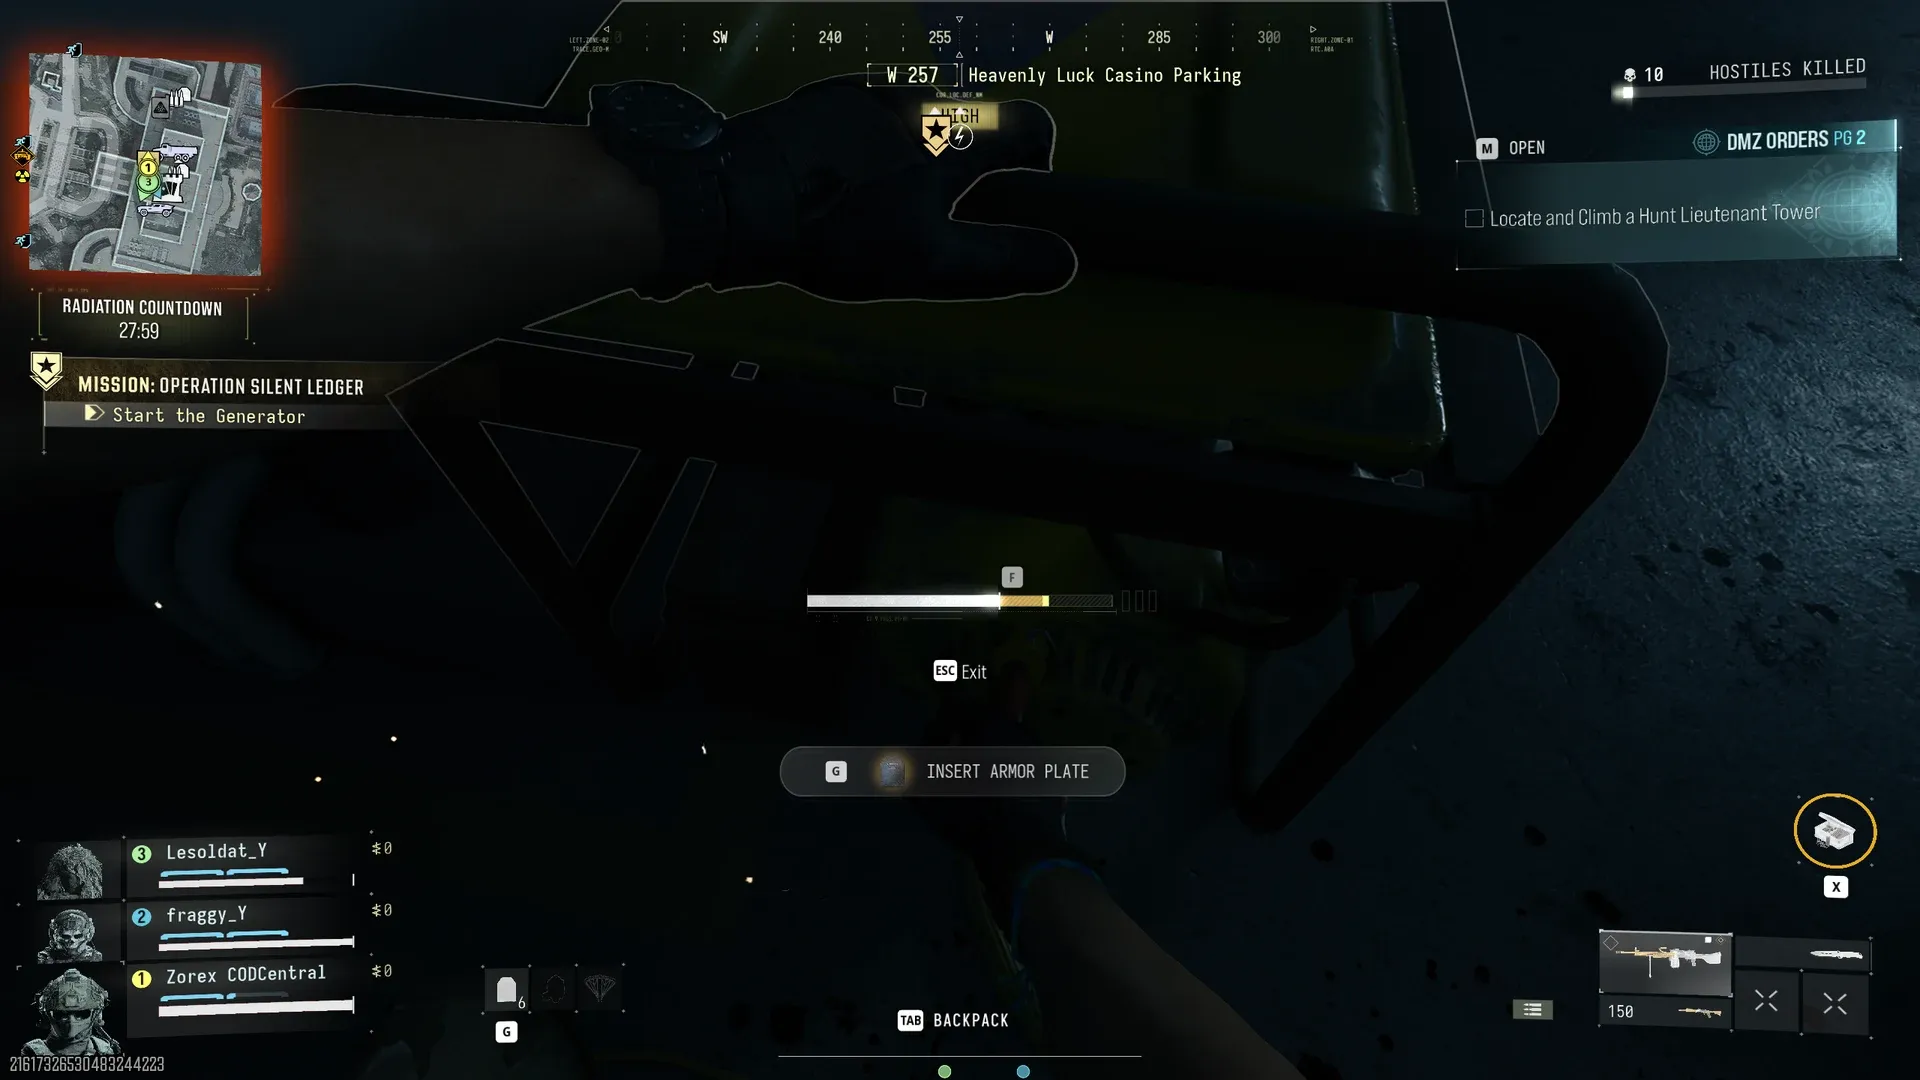
Step 1: Activate the Generator
Follow the marker into the casino and locate the generator. Clear the surrounding approach before interacting, then confirm that the objective changes. Keep one player free to watch the room and nearby corridors.
Step 2: Reach the Vault and Protect the Drill
Follow the updated markers to the vault. One player handles the drill while the other covers the entrances. Reload and replenish armor before starting the defence rather than waiting until enemies are already pushing.
Stay close enough to respond to the objective. Both players chasing an enemy into another corridor leaves the drill unprotected. The supplied account also describes increasing hostile pressure during prolonged combat; it does not establish a precise escalation formula.
Step 3: Secure the Required Item, Then Organize Cash Collection
Collect the mission item shown by the tracker first. For the cash run, tell teammates which bags have been collected and which remain. Do not mistake breaching the vault for completing the entire operation.
Decide how much optional hauling your squad can manage with its remaining ammunition, armor and time. A larger collection is not worth losing the completed objective.
Step 4: Load the Vehicle Under Cover
Move the chosen cash bags to the designated transport and cover the loading area. Keep the carrier and covering player close enough to assist each other. Check for rival players before moving between the vault and the vehicle.
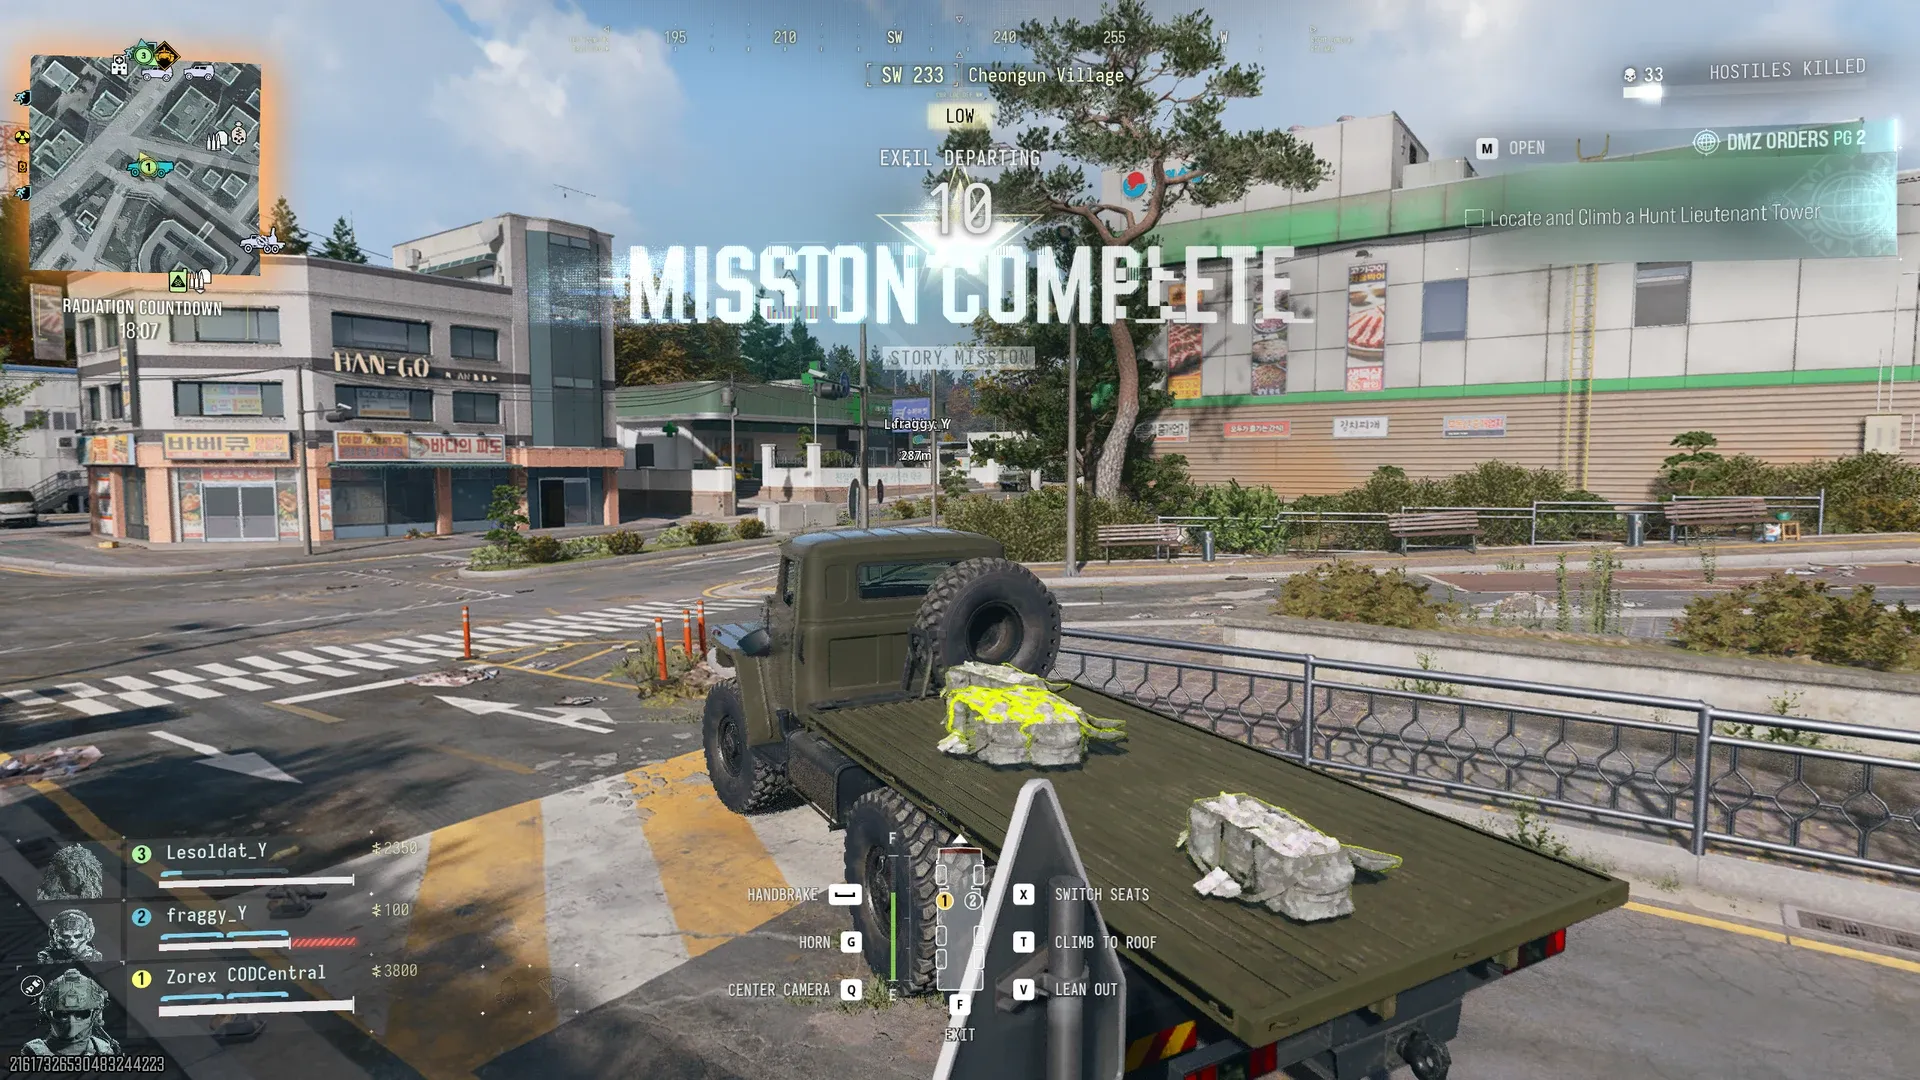
Step 5: Finish the Correct Extraction
Move the squad and required items to the marked exit. In the matched Silent Ledger footage, the plates leave by helicopter and cash bags are moved into it. The truck is transport—not the final extraction.
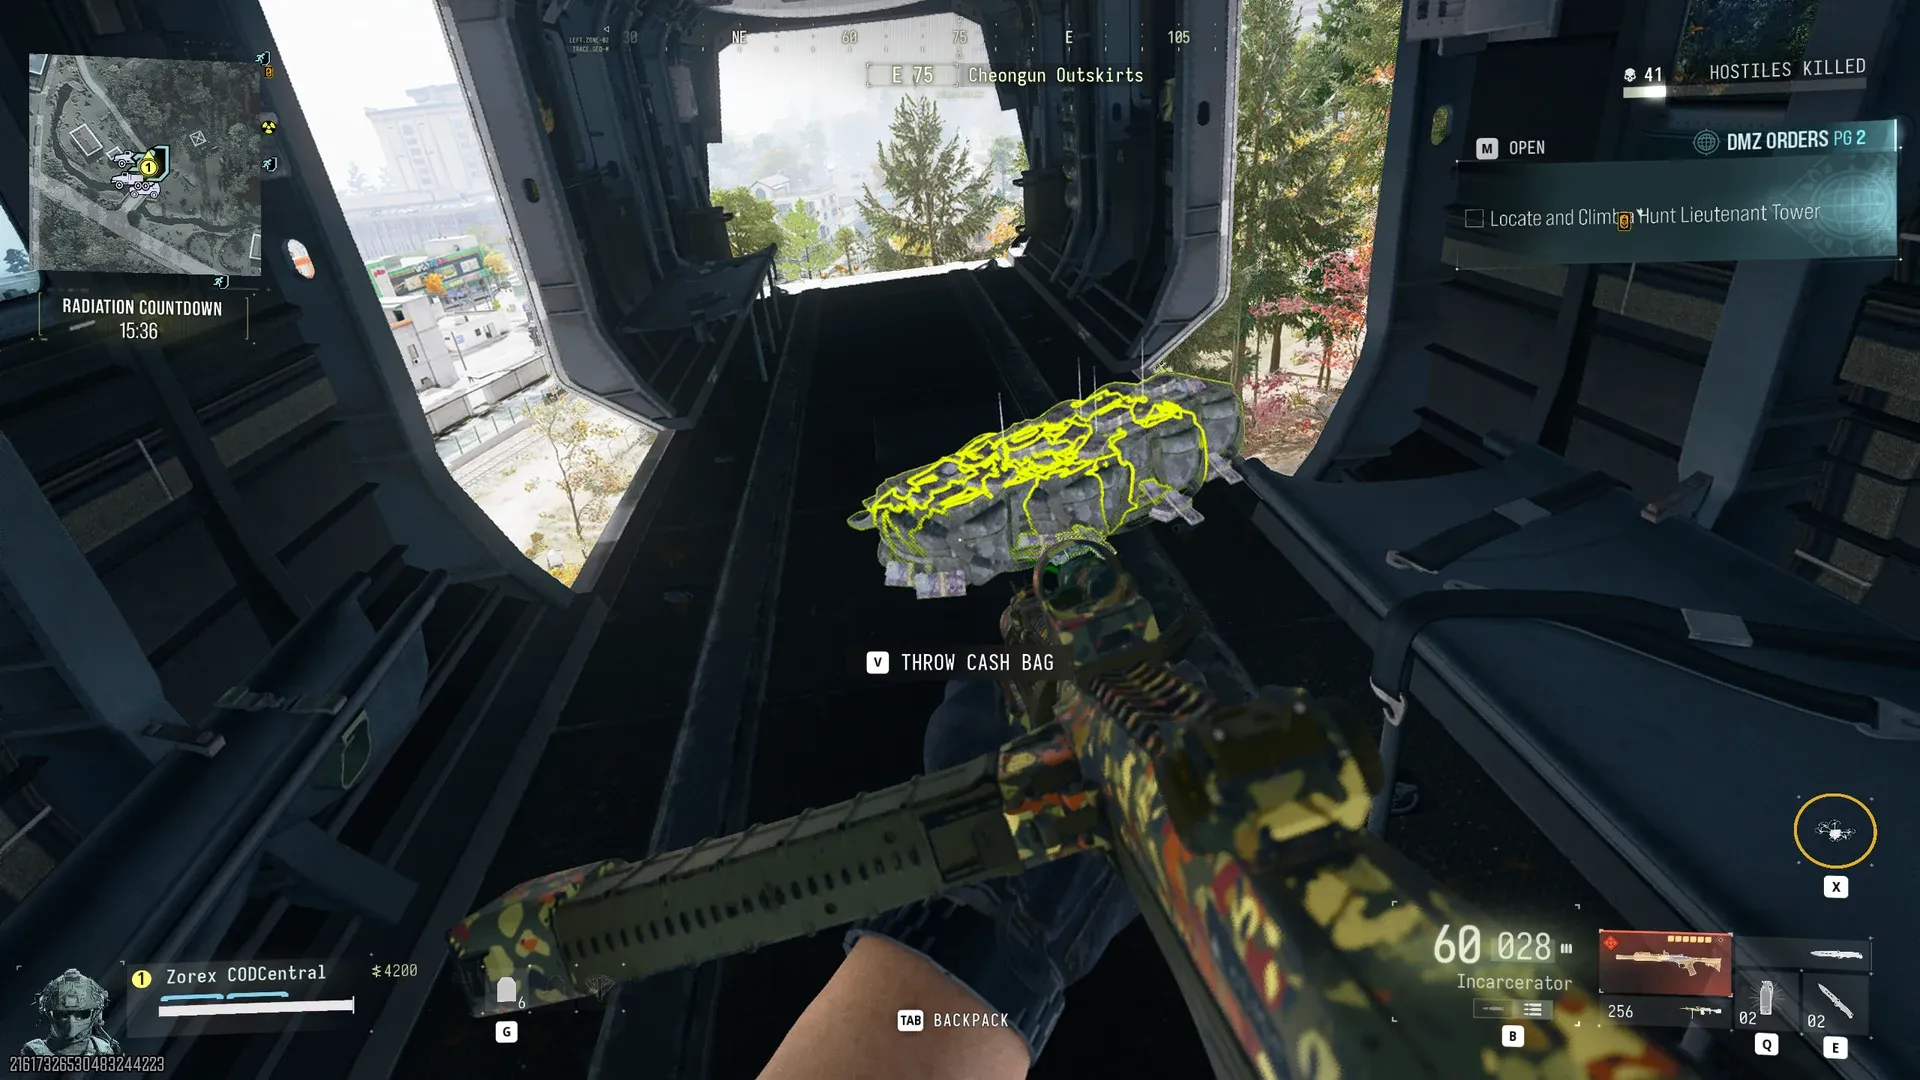
Do not leave a teammate behind with the haul simply because your own route is clear. Stay ready for threats along the escape sequence and verify extraction before treating the run as finished.
Casino priority: power → vault → mission item → optional bags → extraction.
3. Dynamic Ops: Follow the Current Objective, Not the Nearest Loot
The supplied Dynamic Ops sequence involves classified orders, a SAM-site objective, a device interaction, an item in a vehicle trunk and an HVT. Treat it as the route demonstrated in that account, not a universal sequence for every Dynamic Operation.
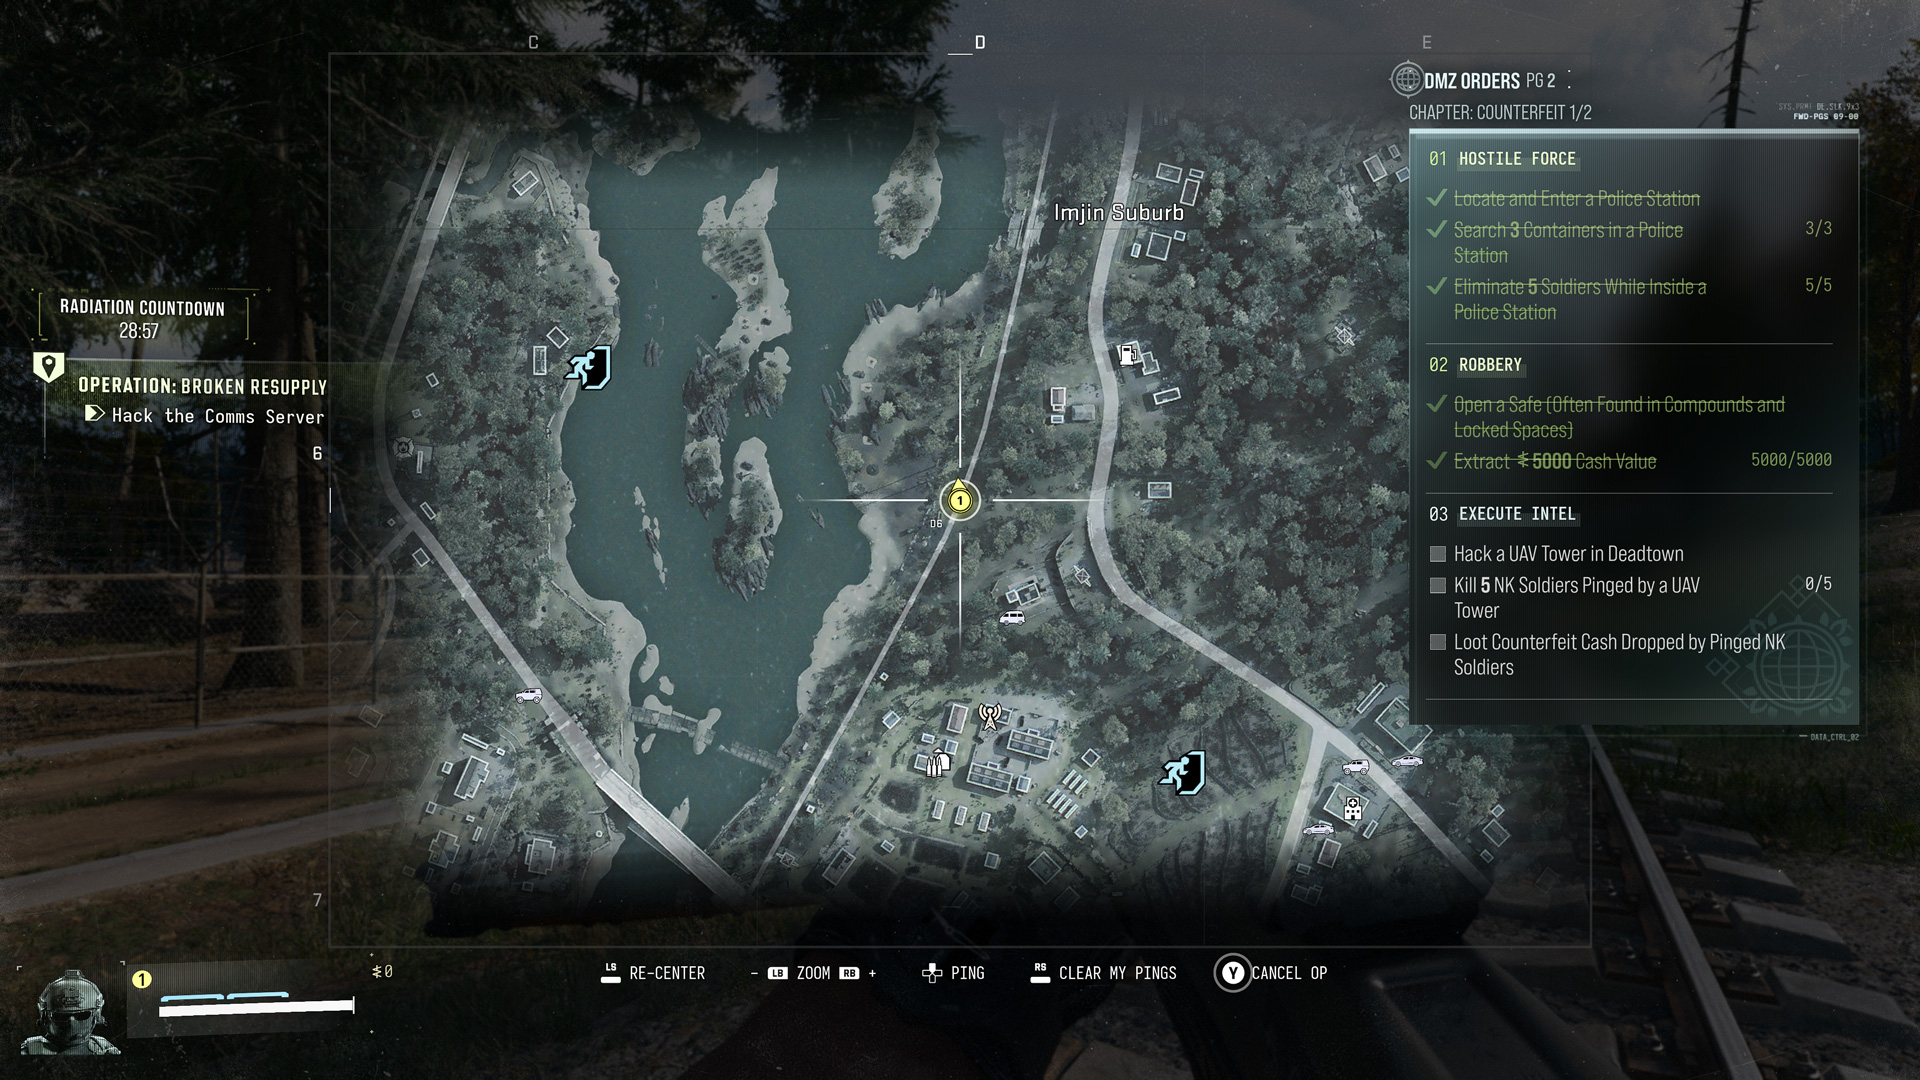
| Stage | Immediate action | Check before moving on |
|---|---|---|
| Locate the operation | Find the phone or marked objective. | The operation is accepted and its next step is visible. |
| Secure classified orders | Approach the target area and remove route-blocking threats. | You have the required information, not just nearby loot. |
| Complete the interaction | Hack, download or retrieve the marked item. | The tracker advances; take the required item from the vehicle when instructed. |
| Eliminate the HVT | Locate the real target and manage cover, ammunition and time. | The target objective registers as complete. |
| Extract | Use the mission's specified exit method. | Squad members and required items are ready for the sequence. |
HVT With Decoys: Spend Time Identifying, Not Spraying
The encounter in the supplied account includes decoys or clones and a visible laser. Those are encounter observations, not confirmed abilities shared by all HVTs. No matching image of that exact fight was located, so the map above is only an interface reference.
Call the target's last observed position, watch for its visible cues and preserve cover while reassessing. Avoid emptying magazines into uncertain targets. Have one player watch the mission timer so a chase does not become an uncontrolled detour.
Suppressed weapons can support a quieter approach, but they do not guarantee that enemies remain unaware. If contact escalates, regroup behind cover rather than allowing the squad to become surrounded.
Special Extraction: Verify the Prompt Before the Final Fight
The supplied run describes a Fulton-style device that deploys a crate and starts an extraction sequence near the squad. Check the mission's own interaction and proximity requirements. Do not assume that a device from a different mission follows an identical process.
Prepare the team and carried objective items before activating it. Remain available to defend the extraction until the completion state appears.
4. Underground Mall: NVGs, Working Cores and Lab Computers
The supplied underground sequence matches the Operation Shopping Hacks setting at NuriGO Mall. Its central checkpoints are visibility, robot encounters, four cores, five computer hacks, the final sample and extraction.
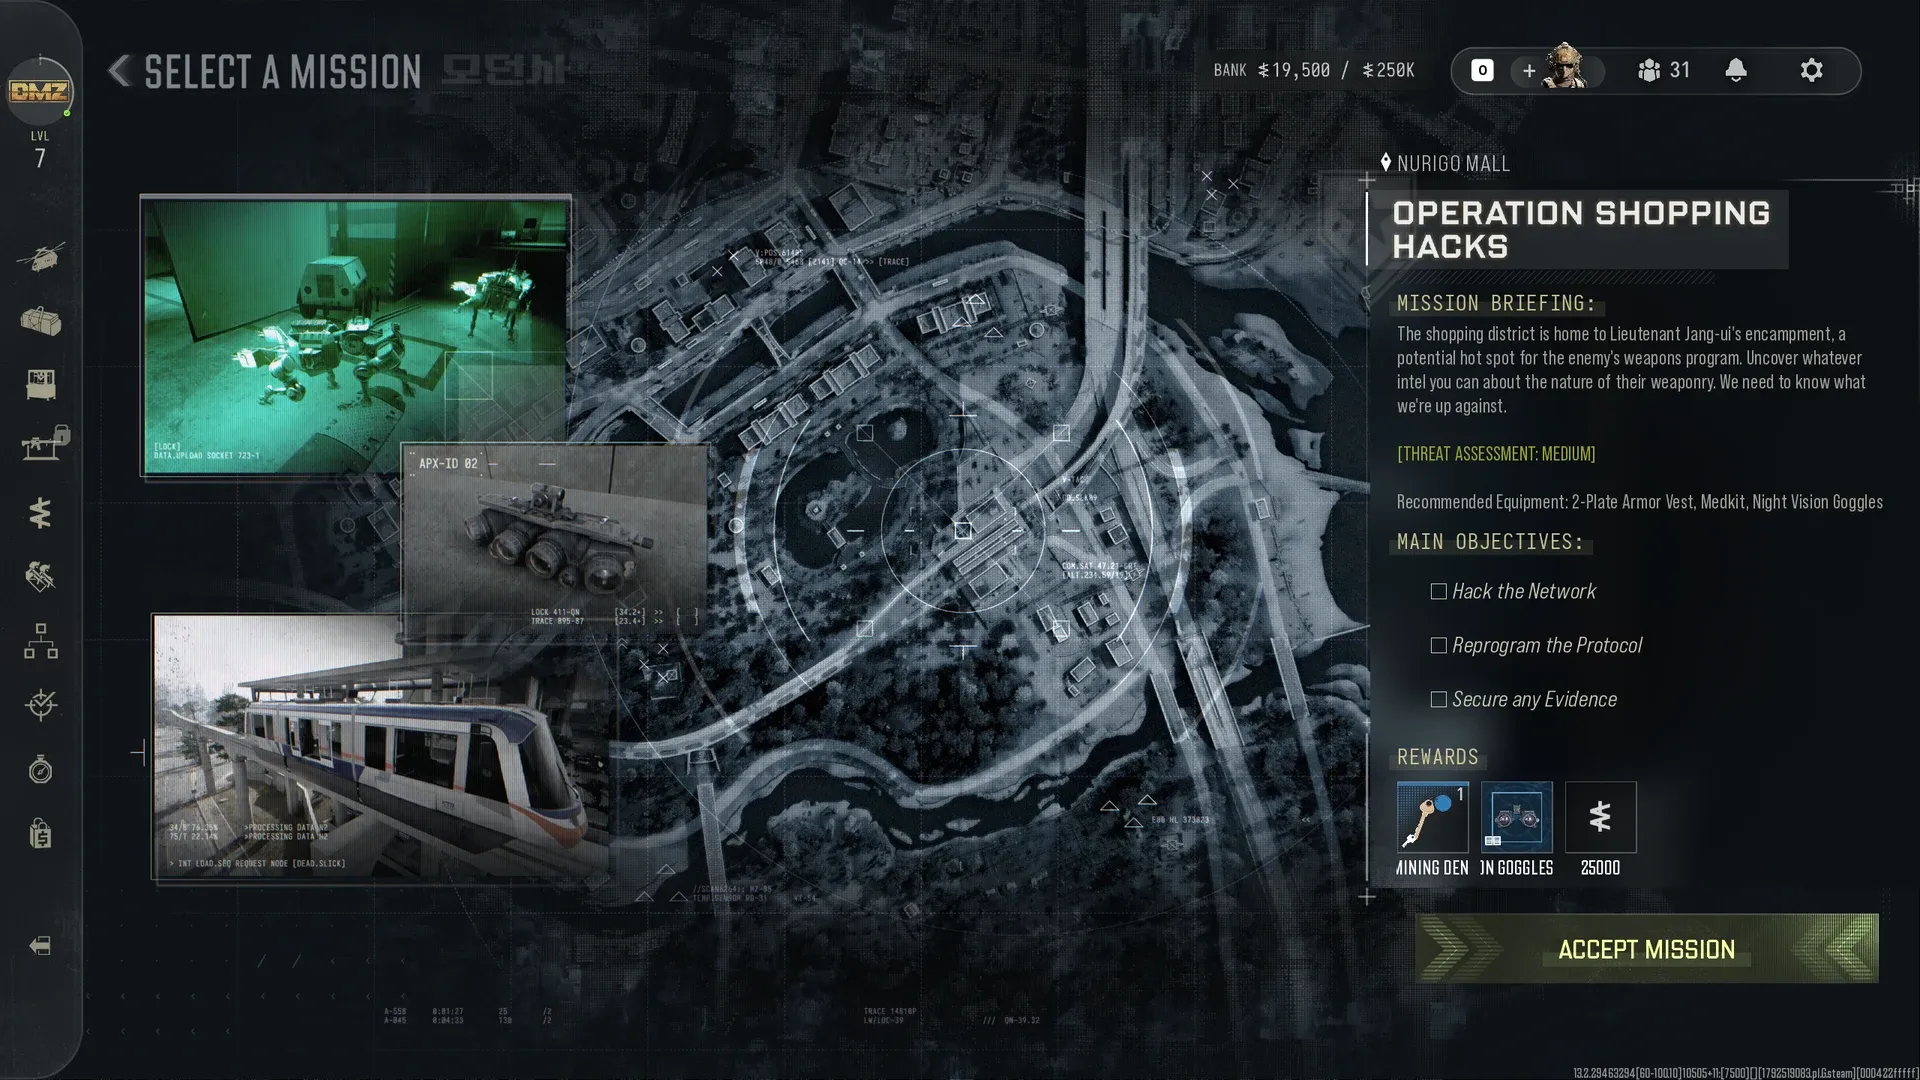
Step 1: Sort Out Visibility Before Entering
Check nearby equipment locations for NVGs before entering the dark area. The source account describes difficulty finding enough pairs, so confirm what each player actually has rather than assuming the whole squad is equipped.
If one player needs another light source, agree how to move together. Avoid pointing the flashlight into a teammate's view. In unfamiliar corridors, advance slowly enough to inspect doorways and floor-level hazards.
Step 2: Clear Immediate Threats Before Interacting
Watch for tripwires and robotic dogs. Create space when enemies push into the corridor; deal with immediate threats before starting a menu interaction or looting.
The supplied account also mentions an EMP-equipped robot variant. It does not give a universal weakness or exact damage threshold. Respond to the enemy in front of you rather than assuming every robot behaves the same way.
Step 3: Collect Four Working Battery Cores
The original article specifies four undamaged cores for the lab door. Check the item name and the terminal counter before assuming a robot kill advanced the objective.
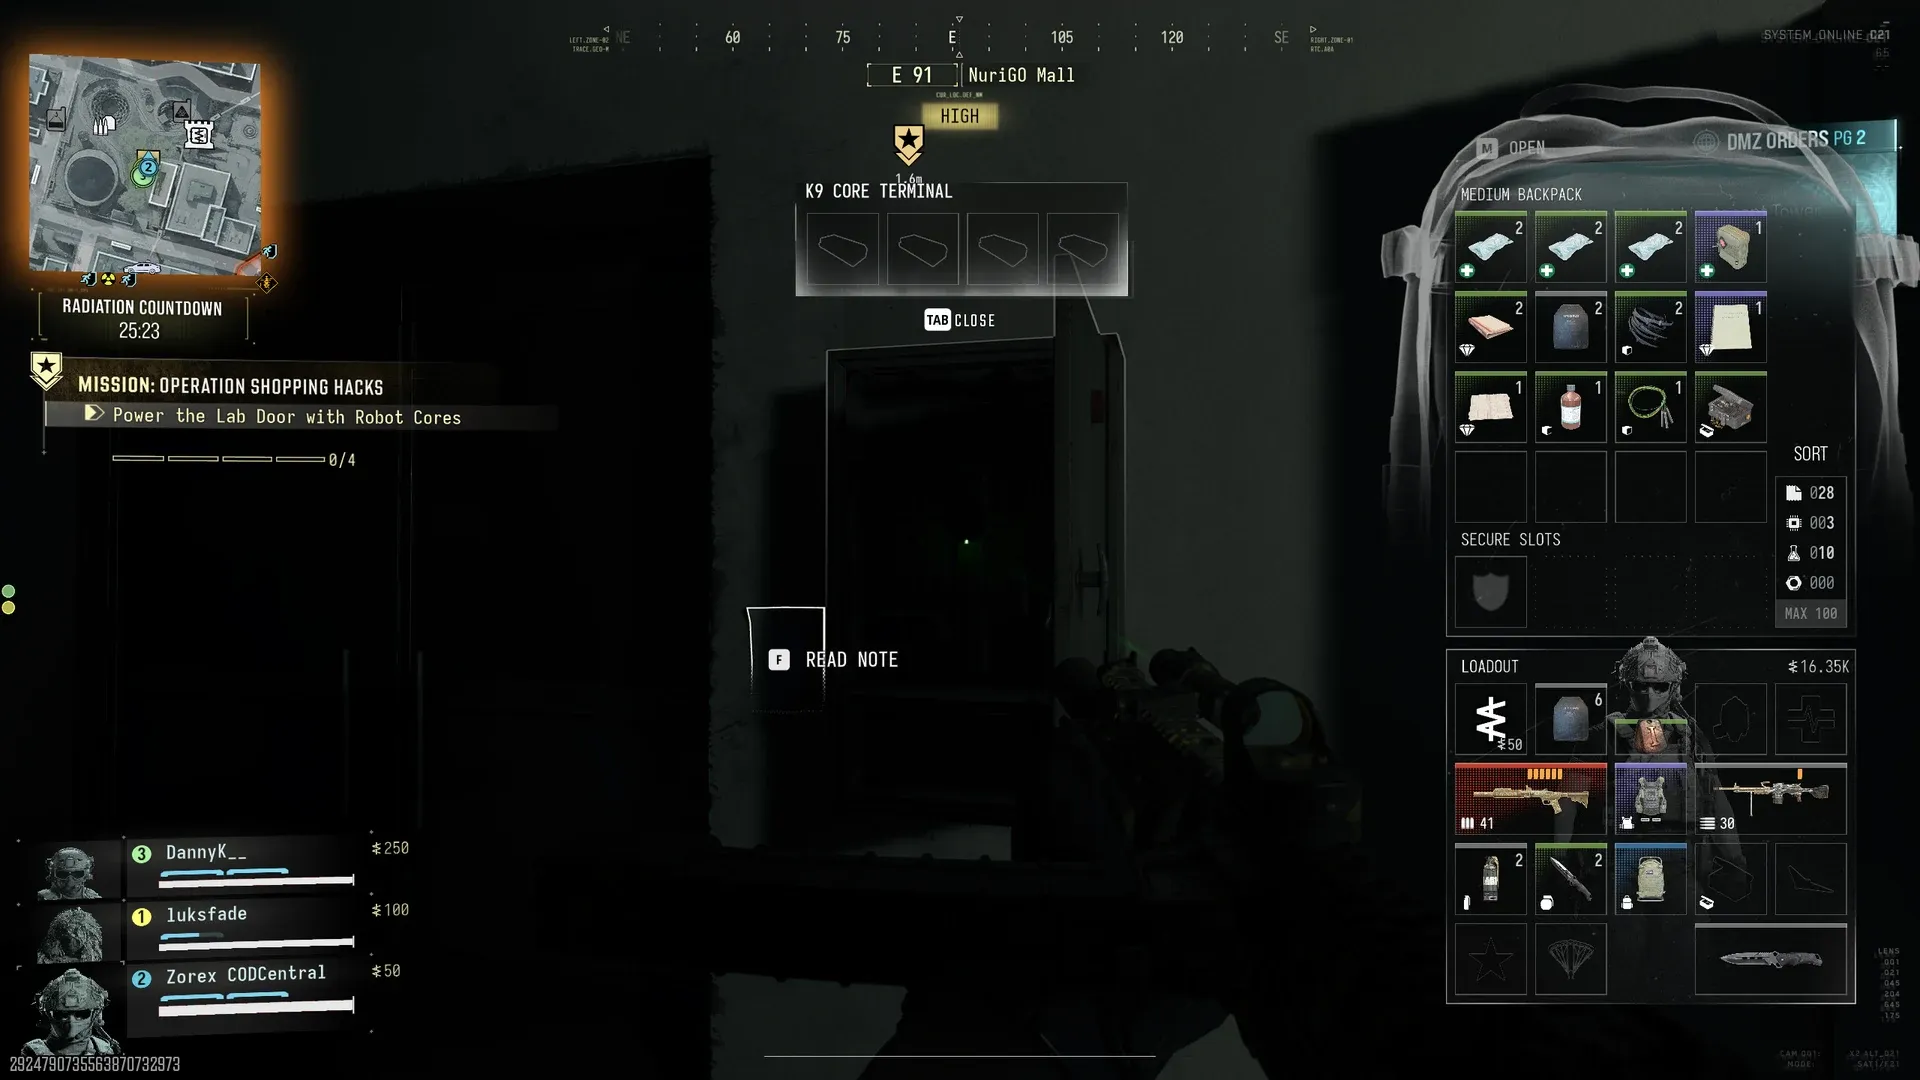
Image-backed clarification: the matched screenshots distinguish K9 Battery Core from Destroyed K9 Battery Core. The accompanying playthrough reports that retrieving a core before the downed robot explodes preserves the working version.
| Item shown | Visual identification | Lab-door use |
|---|---|---|
| Destroyed K9 Battery Core | Common label; the name includes “Destroyed” | Does not count in the matched playthrough. |
| K9 Battery Core | Blue Rare label | Required working core. |
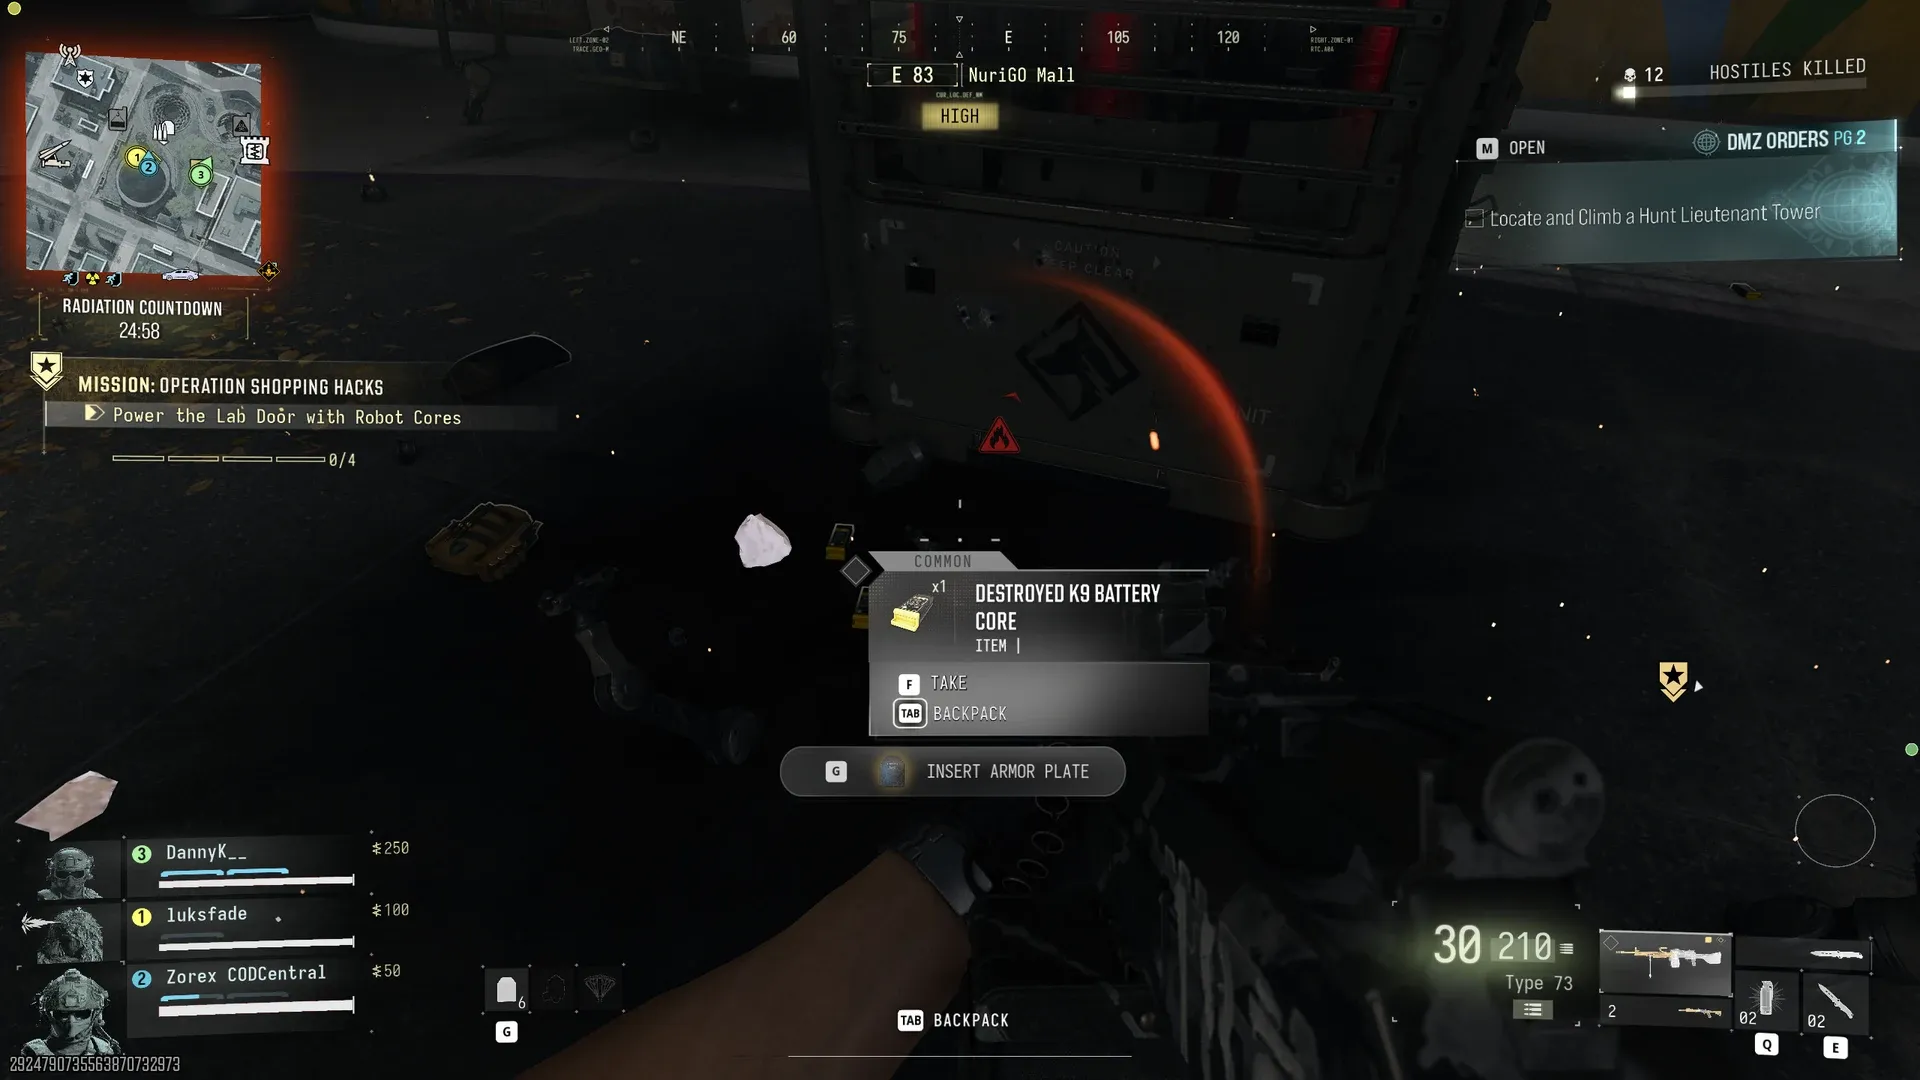
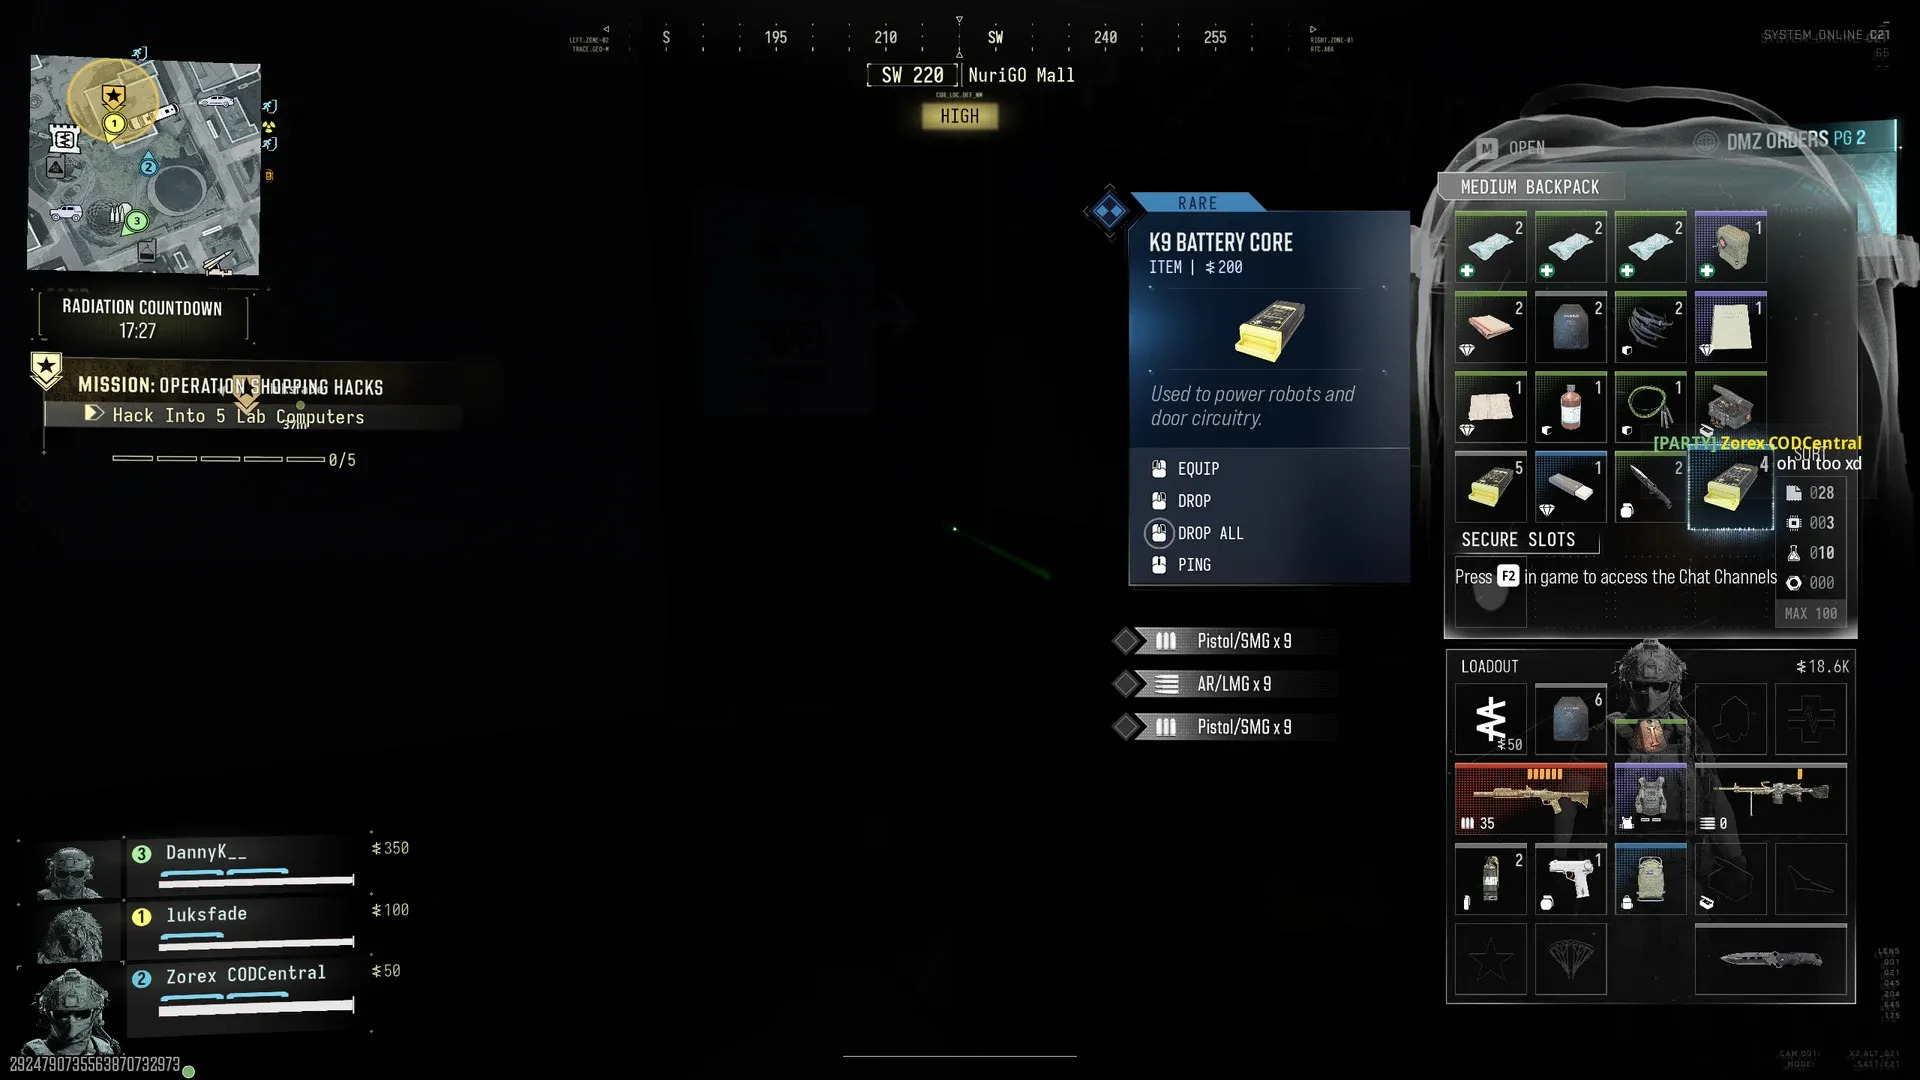
Cover the player collecting the item. Insert the required components and confirm the counter before trying to continue through the door. Do not fill the backpack with unusable cores simply because the icons look similar.
Step 4: Hack Five Computers—and Recheck Failed Ones
Assign one player to interactions and another to incoming enemies whenever the room allows. Move through all five computers, but keep looking at the objective: initiating every interaction is not the same as maintaining a completed breach.
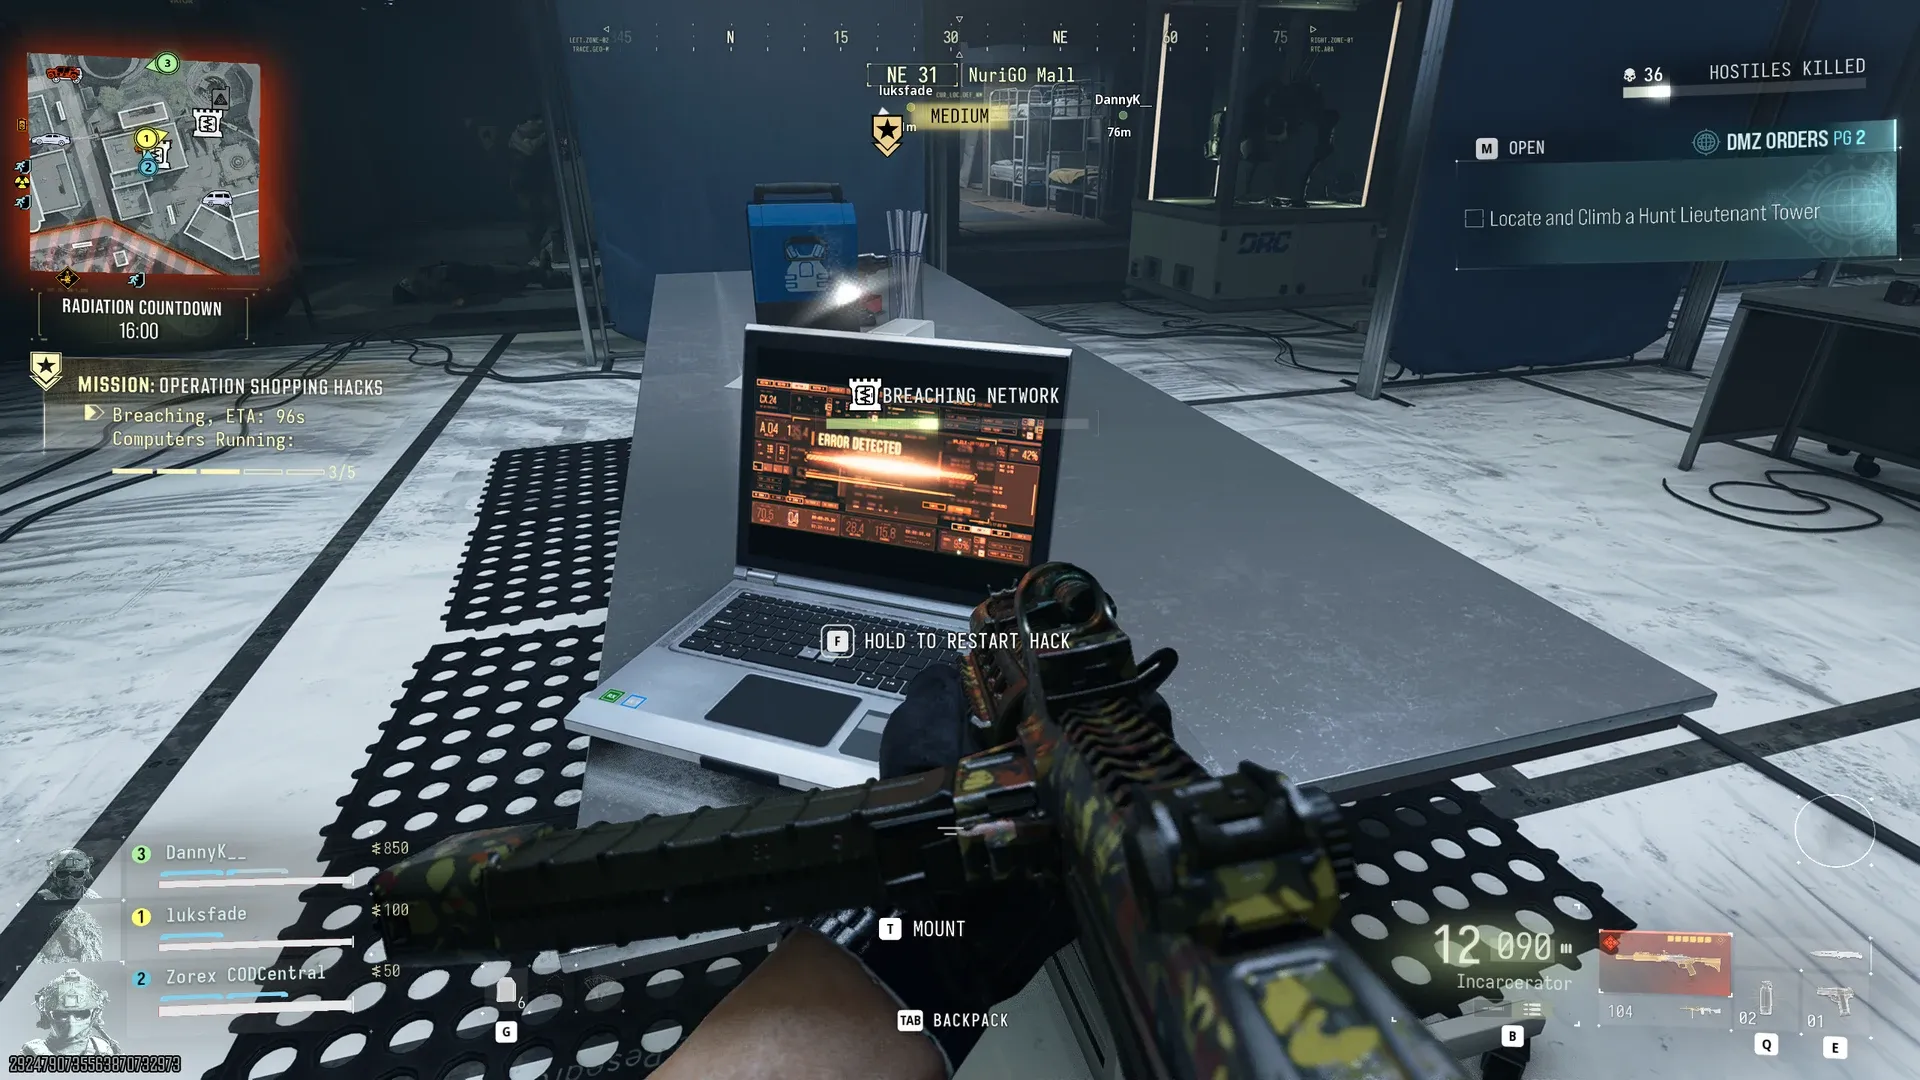
Screenshot check: the laptop displays ERROR DETECTED with a restart prompt. Recheck failed computers during the defence; the pictured countdown is one run's state, not a universal timer.
After an interruption, verify that the interaction registered. Do not leave the room merely because each computer was touched once.
Step 5: Collect the Sample and Take the Exit
The supplied account finishes with a bio-agent sample, followed by the rooftop extraction device. Confirm the objective item is secured, then keep the squad together for the escape.
The original write-up reports placing the sample in a secure backpack slot. This remains a source observation: the matched photos do not independently establish that sample's exact storage or protection rule. Use the current item prompt and do not assume the entire backpack becomes safe.
Mall priority: visibility → immediate threats → four working cores → five functioning hacks → sample → extraction.
5. Loot, Armor and Progression: Keep the Objective Ahead of the Backpack
Useful loot improves future runs only if you can retain it. Decide what you still need to complete the current mission before adding an optional fight or another room search.
| Priority | What deserves attention | Decision rule |
|---|---|---|
| Mission-critical items | Current intel, sample, plates or other required object | Confirm the exact item and objective state first. |
| Survival supplies | Armor, ammunition and recovery equipment | Keep enough to reach and defend the exit. |
| Usable equipment | Better carriers and suitable weapons | Compare the replacement before discarding your current setup. |
| Optional valuables | Cash and other loot not required for completion | Take them only when space, time and the route justify it. |
| Progression | Weapon levels, customization and operator development | Review the result after extraction instead of assuming an unlock. |
The supplied gameplay account mentions a purple carrier with regenerating plates. It does not establish that all purple carriers share that feature. Check the item's description rather than treating rarity as a complete explanation of its effect.
Likewise, this guide does not assign guaranteed HVT drops, payout amounts or Gunsmith unlock levels. Those details are not established by the uploaded mission article.
6. Common Mistakes and the Immediate Fix
| Mistake | Why it costs the run | Better next action |
|---|---|---|
| Fighting without advancing the objective | Uses time and supplies without finishing the task. | Clear the route and return to the tracker. |
| Entering darkness unprepared | Traps, enemies and interactive objects are harder to spot. | Check visibility equipment before going deeper. |
| Both players drilling, hacking or looting | Nobody watches the approaches. | Keep one player available to cover. |
| Chasing an HVT without watching time | The fight consumes the extraction window. | Assign a timer check and avoid unrelated detours. |
| Taking loot without planning the exit | Valuable items become a burden when movement is interrupted. | Choose the exit before loading more cargo. |
| Spending ammunition on every enemy | Leaves too little for the objective or extraction defence. | Prioritize immediate threats and mission blockers. |
| Leaving before confirmation | A missing item or incomplete interaction may invalidate the work. | Check the tracker, required item and extraction result. |
Final Extraction Checklist
Before committing to the exit, ask: Is the objective complete? Is the required item secured? Is every teammate ready? Does this mission use this extraction method?
Preparation, clear roles and disciplined objective checks matter more than an inflated kill count. Finish the run before turning its loot into a success story.