Quick Summary: Ever landed at the Wastewater Dump spawn point only to find every container empty? Wondering why your knife runs feel unlucky lately? Is Treasure Month secretly draining loot from the entire map? This guide breaks down a full solo, no-gunfight knife run route through the Wastewater Dump respawn point — covering sound-based enemy tracking, radiation zone timing, and exactly why your gold and red item drops have crashed this season. If you're farming Haki coins solo, this is the route to bookmark.
Why Your Loot Is Drying Up: The Treasure Month Problem
Something feels off this season, and it's not just bad luck. Testing across five or six accounts and nearly twenty matches shows small gold items are scarce and personal containers rarely produce red items. The culprit appears to be the Treasure Map event itself, which seems to be siphoning drops away from the rest of the map — while also scattering players into unpredictable movement patterns, making it far easier to accidentally cross paths mid-run.
Who this helps: Solo players confused about why their usual farming routes suddenly feel unproductive. If you've noticed weaker returns, this confirms it's a map-wide issue, not a personal streak of bad RNG — and it's time to switch to unconventional routes until the event period passes.
The Wastewater Dump Route: Where to Land and What to Check First
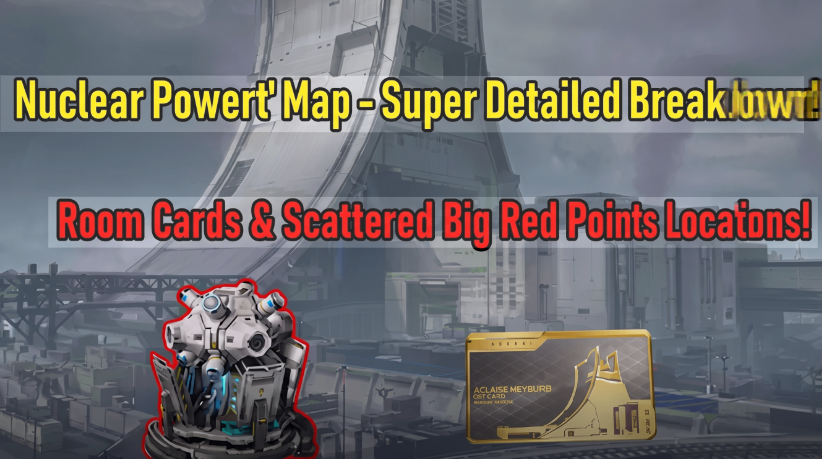
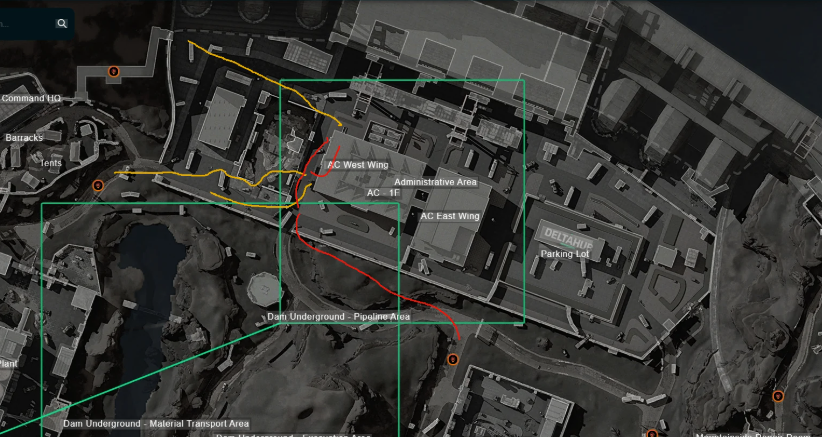
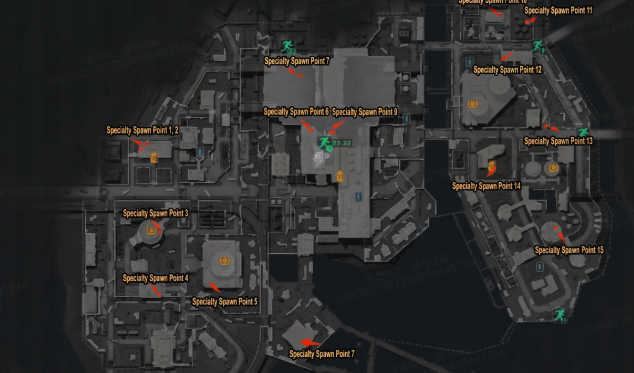
The wastewater dump respawn point sits in the negative polar area on the right half of the map. Two major safe rooms exist nearby — the pressurized water dump and the imitation star — with a nameplate leak room located on the seawater treatment platform. On landing, check gold and red spawn points immediately, along with any Delta Force Tekniq Alloy deposits, then clear the local area. Skipping a backpack at the start is a smart call this season, since overall output is low enough that backpack priority drops significantly; regular players you encounter later can supply one instead.
Who this helps: Players who want a repeatable opening sequence that doesn't waste early minutes hunting for gear that isn't dropping anyway.
Sound Discipline: How to Avoid Fights Without a Radar
This is the core skill of any knife run. Explosion sounds (like thrown C4) can reveal enemy direction, but should never be trusted alone — footsteps and leaking gas sounds matter just as much. A leak room that's still hissing gas after a full minute is a reliable signal it hasn't been triggered by another team, meaning it's safe to loot. Even bot activity can double as an early warning system: quiet, undisturbed bots usually mean no other squads have passed through yet.
Sound Cue | What It Tells You | Action |
Distant explosion/C4 | Enemy team direction, not distance | Check nearby red-item rooms cautiously |
Leaking gas still active | Room untouched | Loot immediately |
Bots inactive | Area likely clear | Proceed, skip re-checking |
Muffled gunfire through walls | Enemy nearby but not adjacent | Use scan skill before advancing |
Who this helps: Anyone who wants to survive Nuclear Power Plant without engaging in a single fight — this table alone can replace half your situational awareness training.
Core Reactor Push: Timing the Radiation Zone
Around the three-minute mark, gunfire near the water pile signals it's time to move — even if the sound is muffled by walls, the enemy usually isn't far. Using a scan skill before entering the radiation zone confirms whether the decontamination room is clear, preventing a fatal bottleneck. If radiation containers show no warning sound, they've already been used — don't waste time double-checking a zone that's already been cleared.
Weapon crates remain worth opening even mid-push, since their drop rate has stayed healthy this version even as ground loot cratered. The key spawning near the sarcophagus is worth a quick pickup if convenient, but not worth detouring for.
Who this helps: Mid-run players trying to decide when to commit to the core versus when to bail — this timing framework removes the guesswork.
Evacuation Math: When Low Drops Still Mean a Good Extract
By the time gold items finally start appearing, it's often right before extraction — a pattern worth remembering: don't panic if your run looks 'empty' through the middle stretch. Getting scanned near the extract point isn't an automatic retreat trigger either; identifying the scout's direction first (in this case, confirmed far away near the stone coffin) can save an unnecessary abandonment of a solid haul — even if that haul mostly consists of cheap Delta Force Tekniq Alloy rather than high-tier loot. This particular run closed out at 1.26 million Haki coins despite the rough drop environment — proof that a disciplined route still pays even during a bad loot cycle.
Who this helps: Players tempted to rage-quit a run early because early containers looked empty — patience through the middle stretch really does pay off near extraction.
Quick Tips Before Your Next Run
· Skip the backpack at spawn this season — it's not worth the early detour.
· Trust footsteps and gas sounds over explosions alone.
· Weapon crates > ground loot right now — prioritize accordingly.
· Don't panic-extract after a scan; confirm enemy direction first.
· Expect gold/red drops to cluster near the extraction phase, not the early game.
Who Gets the Most Value From This Guide
Player Type | Core Benefit |
Solo knife runners | A full, repeatable low-risk farming route |
New players | Clear sound cues to avoid fights entirely |
Grinders chasing Haki coins | Understanding why drop rates feel low (it's not you) |
Players annoyed by random teammates | A solo-only strategy that needs zero coordination |
FAQ: Delta Force Community Hot Topics
Q: Delta Force Season 11 full leaks — what's new with Operators, Hound, and the .50 sniper rifle?
A: Leaks point to new operator kits alongside Hound and a heavy-hitting .50 caliber sniper rifle entering the meta. Expect shifts in long-range engagement strategy once these land, though official patch notes should be checked for exact stats.
Q: What are the predictions for 5v5 Search and Destroy mode and operator pairings?
A: Early speculation favors operators with strong scouting or entry-denial kits pairing well in structured 5v5 rounds, since map control matters more than in open-world modes like Nuclear Power Plant.
Q: Where are the AZ3 Nuclear Plant high-value loot spawn points, and how do I survive radiation zones?
A: Focus on the wastewater dump, pressurized water dump, and imitation star safe rooms, plus the seawater treatment platform leak room. Always scan before entering radiation zones and treat unused radiation containers as your cue to move fast.
Q: How can beginners quickly earn 10 million tokens using the Auction House and Black Market?
A: Consistent knife running (like the route above) plus reselling excess purple/blue gear through the Auction House can stack tokens steadily, especially during low-drop periods when even modest gear becomes valuable.
Q: Any tips for no-damage speedruns against core bosses like Hudson and Saeed?
A: Sound-based positioning (as covered above) transfers directly to boss encounters — knowing enemy direction before engaging is the same skill that keeps you damage-free against scripted bosses.
Q: What are the best optimized settings in 2026 for FPS and footstep clarity?
A: Prioritize audio clarity settings and frame stability over max visual fidelity — footstep and gas-sound cues (critical to routes like this one) are far more useful than extra graphical detail.
Q: How do I improve long-range gunfight win rate with sensitivity tuning and remapping?
A: Lower sensitivity for controlled long-range tracking pairs well with remapped quick-scan bindings, letting you check surroundings (as emphasized throughout this route) without breaking aim discipline.
Core takeaways by player type: Solo grinders get a proven low-risk route; new players get a sound-cue survival framework; token farmers get context on why the market feels tight; and competitive players get transferable positioning skills for boss fights and PvP alike.