
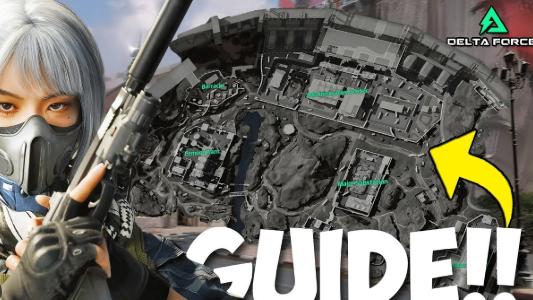
On Zero Dam, knowing the 14 spawn points can completely change how you approach the opening. Two western/eastern building spawns are guaranteed to contain squads, while the remaining spawns are distributed randomly. That means you can often predict where nearby enemies are likely to move and choose between an aggressive push or a safer loot route. If you want to spend less time grinding and more time building your stash, Delta Force Items or look for cheap Delta Force Tekniq Alloy when you need extra resources for progression.
The Spawn Logic: Two Rules You Should Never Forget
Zero Dam has 14 total spawn points, split evenly between the western and eastern sides of the map, with the central Administrative Building acting as the dividing line. Two locations are especially important: West Building Spawn #1 and East Building Spawn #1 always receive a squad.
The other 4–5 squads are randomly distributed among the remaining spawn locations, creating roughly 15–18 players per match. Knowing this gives you an immediate advantage because you can estimate where the closest teams are coming from instead of treating every direction as equally dangerous.
Value for You:
Best for: Tactical players and PvP enthusiasts.
Gain: Faster threat identification and fewer surprise encounters.
Administrative Building: High Loot, High Drama
The West Building #1 and East Building #1 spawns are among the most dangerous openings. Both can put you close to the Administrative Building within roughly 30 seconds, where multiple safes and valuable loot can attract several squads.
If you spawn nearby, you have two choices: commit to an aggressive push and fight for premium loot, or pause briefly to listen for footsteps and gunfire before committing. The Administrative Building can pay off massively, but rushing in blindly is a fast ticket back to the lobby.
Value for You:
Best for: Aggressive PvP players and confident squads.
Gain: Early access to high-value loot while reducing unnecessary fights.
West Side: Loot Fast, Then Rotate
Spawning around Cement Plant and Dormitories gives you access to a strong collection of loot points, including 19 fixed resource locations and a hacker computer on the second-floor platform.
The Barracks, by comparison, has only five fixed loot locations. If you land there, loot quickly and listen carefully for gunfire around the pipeline. Your goal isn't to spend five minutes searching every corner—it’s to grab enough gear and identify nearby threats before rotating. buy Delta Force Tekniq Alloy from MMOexp to level faster and stay ahead.
Value for You:
Best for: Casual grinders and players building up from weak gear.
Gain: Faster early loot and safer movement toward stronger areas.
East Side: Control the Power
On the eastern side, the Main Substation is a major resource hotspot with 13 fixed loot points, making its safes particularly attractive. That also makes it a natural PvP magnet.
The Visitor Center has around 10 fixed loot points and offers a more moderate alternative. After looting, watch rooftops and elevated positions carefully—players love using these angles to catch rotating squads off guard.
Value for You:
Best for: Loot-focused players and calculated PvPers.
Gain: Better resource efficiency without blindly entering the biggest fights.
The “Don’t Fight Everyone” Rotation
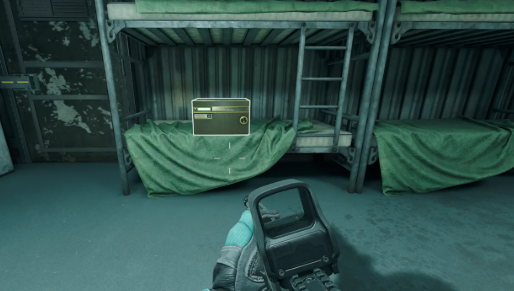
Not every raid needs to become a deathmatch. If your starting gear is weak, consider avoiding the Administrative Building and taking an outer rotation instead.
A safer western route starts around the Cement Plant, moves around the Administrative Building through the container area, and eventually approaches the Main Substation or Visitor Center. You may sacrifice some premium loot, but you gain something more important: survival time.
Be especially careful around the container-side path leading toward the bridge. Multiple firing angles can turn it into a brutal choke point. Taking the alternative bridge route can dramatically reduce your exposure.
Value for You:
Best for: Solo players, budget runners, and survival-focused squads.
Gain: More successful extractions and fewer unnecessary PvP losses.
Extraction Rules: Know Your Exit Before You Loot
Zero Dam has several extraction options with different requirements. Besides fixed exits on the eastern and western sides, you can encounter random southern extraction points near Cement Plant and Visitor Center, a backpack-drop maintenance tunnel north of Barracks, a paid extraction point south of the central mountain, and an industrial elevator north of the Administrative Building that requires a switch.
The important lesson is simple: plan your extraction before your backpack is full. If you wait until the final minutes to figure out where you're going, you may end up crossing the most dangerous section of the map while carrying your best loot.
Value for You:
Best for: Extraction-focused players and high-value loot runners.
Gain: Better exit planning and fewer raids lost after successful looting.
Small Clues Can Reveal a Big Threat
Zero Dam rewards players who pay attention to environmental clues. If you hear AI voices or gunfire around the Administrative Building, there’s a good chance a real player squad has entered the area.
The East Building manager’s room is another useful warning sign. If the door is unexpectedly closed, don't assume it's random. Treat a closed door as a potential ambush and clear the area carefully before walking inside.
Value for You:
Best for: Stealth players and cautious solo operators.
Gain: Better threat awareness and fewer deaths to campers.
Closing: Win the Raid Before the First Bullet
Zero Dam isn't just about having better aim. Understanding the 14 spawn points, predicting enemy movement, choosing the right loot route, and planning your extraction can determine whether a raid becomes a huge profit or another wasted deployment.
Don't blindly rush toward the loudest gunfight. Read your spawn, listen for nearby squads, loot according to your gear level, and always know where you're extracting.