Weekend Drop -













Still farming Andariel and Mephisto on repeat because you don't have Enigma? Tired of spending 5–10 minutes per run just because your build lacks Teleport? Looking for ways to farm runes, gear, charms, and crafting materials without burning through your time or your coin stash? You actually have plenty of efficient alternatives. From the Cow Level and Tal Rasha's Tombs to The Pit and Chaos Sanctuary, these areas can deliver serious loot without requiring Teleport. If you're looking to buy D2R Ladder Items or find D2R Items while building your early-season character, spending wisely can also speed up your progression.

Cow Level — Go Big on Mob Density
The Secret Cow Level remains one of the strongest farming options when you don't have Enigma. Its enormous monster density makes it excellent for farming Runes, Runeword bases, Charms, Jewels, Gems, and general loot.
Even better, Cows don't have elemental immunities, so almost any build can farm them effectively. The downside? You need to find Wirt's Leg before opening the portal, adding roughly a minute to each run.
The area is Level 81, so it cannot drop every top-tier item. For example, Tyrael's Might and Andariel's Visage are unavailable here. Cows also have high health, so strong AoE damage is highly recommended.
Value for You:
Best for: Javazons, Hammerdins, Fire Sorceresses, and AoE-focused builds. You gain: huge mob density and excellent farming efficiency without needing Teleport.
Tal Rasha's Tombs — Simple Routes, Tons of Targets
Tal Rasha's Tombs are another great option because you can start directly from the Canyon of the Magi waypoint. You don't need to waste time searching for the area entrance, and the tomb layouts are relatively straightforward.
Monster density is high, making the tombs useful for general loot and experience. You can also fight Duriel at the end, although his overall drop quality isn't particularly impressive.
These are Level 80 areas, meaning they cannot drop every item in the game. Enemy immunities are also diverse, covering almost every damage type, so builds without a way to handle immunities may struggle.
Value for You:
Best for: versatile builds and players farming both XP and gear. You gain: straightforward routes with dense packs and minimal backtracking.

Travincal — The 30-Second Gold Mine
If speed is your priority, Travincal is hard to ignore. The map is completely fixed, the route is extremely short, and experienced players can clear the Council in roughly 30–60 seconds.
The Council can drop Rings, Amulets, Jewels, Gold, and Runes, making this one of the best locations for early-season wealth generation. While the Council cannot drop every top-tier item, its unusually strong Rune farming potential makes it extremely valuable when your character is still gearing up.
The catch is their damage. Council members hit hard, so high resistances and strong survivability are essential unless you can delete them before they retaliate.
Value for You:
Best for: fast farmers, Barbarians, and Hardcore players. You gain: extremely short farming cycles and excellent opportunities to build your Rune stash.
Eldritch, Shenk & Pindleskin — The Easy Starter Route
This fixed route is one of the most beginner-friendly farming loops in the game. Start at the Frigid Highlands waypoint, head north for Eldritch, then move south toward Shenk.
After Shenk dies, nearby monsters can be caught in the resulting explosions. Return to town, head to Nihlathak's Temple, and finish with Pindleskin.
The entire route takes around one minute and doesn't require elite gear. Monster density isn't spectacular, but the consistency is the real selling point. It's especially useful for characters that have just entered Hell difficulty and need quick XP, gear upgrades, and reliable progression.
Value for You:
Best for: fresh Hell characters and undergeared builds. You gain: fast, repeatable experience and loot with minimal gear requirements.
The Pit — Your Level 85 Jackpot
Located in the Tamoe Highland, The Pit is a Level 85 area, meaning its monsters can drop every item in Diablo 2 Resurrected. That's a major advantage over lower-level farming zones.
You can start from the Outer Cloister waypoint and follow the road toward The Pit. Once the road splits, one path heads toward the Black Marsh while the other leads directly toward the entrance. Finding it typically takes less than 30 seconds.
The layout is easy to learn, backtracking is limited, and the monsters are relatively manageable. The second level also contains several Elite packs and a Sparkling Chest, adding even more loot potential.
Value for You:
Best for: players chasing high-end gear and Runeword bases. You gain: access to the full item pool without relying on Teleport.
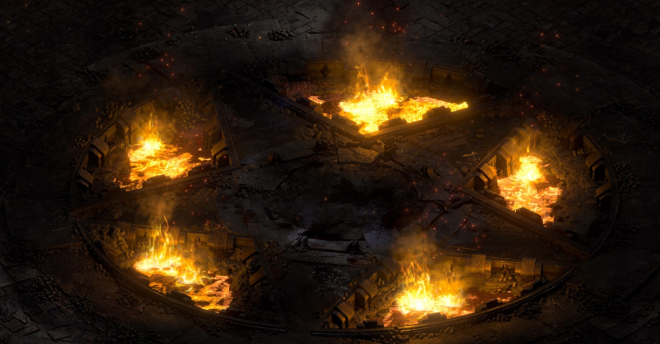
Chaos Sanctuary — The Endgame Farming King
For players who can handle tougher enemies, Chaos Sanctuary is arguably the most rewarding destination on this list. It's a Level 85 area, allowing monsters to drop every top-tier item in the game.
The layout is fixed, so once you learn the route, you can repeatedly clear it without wasting time figuring out the map. The nearby River of Flame is also Level 85 and can be farmed alongside it.
Elite density is excellent, while Ghost-type enemies have an increased chance to drop Runes. Diablo himself isn't particularly difficult once your character is properly geared, although the Seal bosses have more limited loot tables.
The biggest drawback is difficulty. Chaos Sanctuary demands stronger gear and good resistance, so it's better suited to established characters than fresh Hell builds.
Value for You:
Best for: geared endgame farmers and high-level characters. You gain: access to every top-tier item plus excellent opportunities for high-value Rune drops.
Final Takeaway
You don't need Enigma to farm efficiently in Diablo 2 Resurrected Season 15. The Cow Level offers unmatched mob density, Travincal delivers incredibly fast Rune farming, The Pit provides a full Level 85 loot table, and Chaos Sanctuary combines elite density with some of the best endgame rewards available.
The key is matching the location to your build. Don't force yourself into slow Teleport-dependent farming routes when these six alternatives can keep your runs fast and productive. Build your gear, target the areas that fit your strengths, and turn every run into meaningful progress.