Weekend Drop -













Summary
Struggling to push higher Pit levels because your gear lacks Greater Affixes, perfect rolls, or expensive upgrades? In Diablo 4 Season 14, the Horadric Cube allows players to build powerful equipment even from blank 900 Item Power Ancestral items. This guide explains the full crafting process step by step, from weapons and armor to rings and amulets, helping you create optimized gear without relying only on leaderboard-level drops.
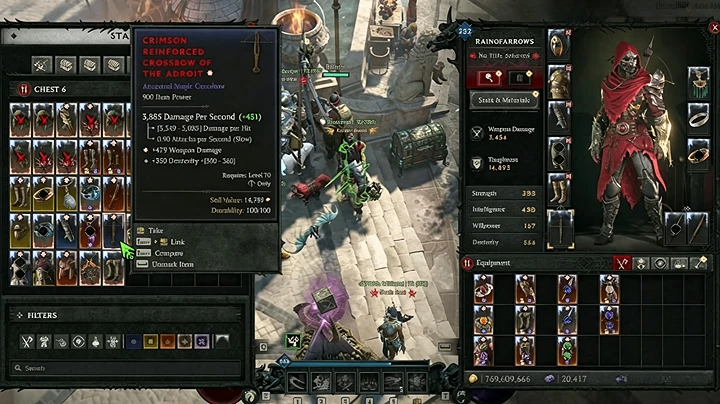
Horadric Cube Crafting: How to Upgrade Blank Gear Correctly
Many players assume that perfect gear requires finding already completed Greater Affix items. While strong base items make the process easier, the Horadric Cube crafting system allows you to transform ordinary Ancestral equipment into endgame-ready pieces.
The important part is understanding the correct order of operations.
A common mistake is adding every possible modifier immediately and then discovering that important stats cannot be rerolled. Before crafting any item, decide which stats are mandatory, which ones can be replaced, and when you should use Masterworking, Tempering, Enchanting, and Transfiguring.
Zero to Hero: Preparing Materials Before Crafting
Why preparation matters
The biggest limitation when crafting multiple items is not the gold cost. It is the amount of crafting materials, especially Tuning Prisms and Forgotten Souls.
Before starting a full gear project, run Nightmare Dungeon Escalations with Material Reserves. These activities provide:
Tuning Prisms
Forgotten Souls
Obols
Gold
Additional crafting resources
Having enough materials prevents you from stopping halfway through an upgrade.
How to prepare your base items
The ideal situation is starting with items that already contain useful Greater Affixes.
For example:
Greater Affix Cooldown Reduction on helmets
Greater Affix Maximum Resource on chest pieces
Greater Affix Critical Strike Damage on offensive items
However, this guide focuses on blank Ancestral items so the complete process is easier to understand.
Weapon Craft
Why the weapon should be crafted first
Your weapon determines your base damage scaling. A bad weapon damage roll reduces the effectiveness of every offensive ability.
Start by adding defensive value first, then build damage multipliers.
How to craft the weapon
Use a Protector's Tuning Prism to add Maximum Life.
Use Focus Reroll until you get a high Maximum Life value.
Add an Aggressive Tuning Prism for Weapon Damage.
Continue rerolling until Weapon Damage reaches a strong roll.
Add another offensive modifier and aim for Critical Strike Damage Multiplier.
Add an Adept Tuning Prism for Core Skill bonuses.
Core Skill bonuses are valuable because they function similarly to an overall damage multiplier.
If an unwanted modifier appears, avoid destroying the Weapon Damage roll. Instead:
Enchant the unwanted stat into a replacement option.
Select “No Change” to protect important stats.
Continue rerolling other modifiers safely.
After the main stats are finished:
Masterwork before Tempering.
Aim to hit Weapon Damage or Critical Strike Damage during Masterworking.
Add Critical Strike Chance through Tempering.
Apply the correct Aspect.
Add two sockets.
Only then use Transfiguring.
Do not rush the final Transfigure step. A bad result can remove valuable bonuses.
Helm Craft
Why the helmet requires careful planning
For many builds, the helmet controls resource management and cooldown uptime.
The important stats are:
Maximum Resource
Cooldown Reduction
Maximum Life
How to craft the helmet
Add a Resourceful Tuning Prism.
Reroll until Maximum Resource reaches around 18–20.
Add a Pragmatic Tuning Prism for Cooldown Reduction.
Aim for at least 7%, preferably 8%.
After obtaining resource and cooldown:
Add Maximum Life.
Replace unwanted defensive stats through Enchanting.
Add Dexterity if the build benefits from main-stat scaling.
For Masterworking, focus on Cooldown Reduction.
A slightly lower Maximum Life roll is usually acceptable if it allows your cooldown to reach the required breakpoint.
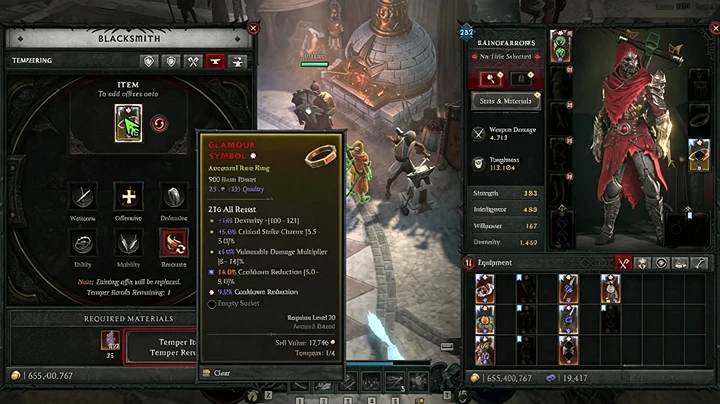
Ring Craft
Why rings are important
Rings provide some of the strongest offensive scaling, but they are also difficult because multiple damage modifiers compete for limited slots.
Some builds also require unique upgrades, such as Scoundrel's Kiss.
How to craft rings
For a normal offensive ring:
Start with Cooldown Reduction.
Add offensive Tuning Prisms.
Prioritize:
Critical Strike Damage Multiplier
Critical Strike Chance
Vulnerable Damage
Dexterity
If the first offensive roll is poor, remove the modifiers and start again rather than wasting resources trying to repair a bad foundation.
After the stats are ready:
Temper Cooldown Reduction.
Masterwork and target Cooldown Reduction bonuses.
Add the correct Aspect.
Use Transfiguring carefully.
For resistance setup, avoid using Diamonds everywhere. In many cases, using Rubies on rings provides stronger elemental resistance value.
Pants Craft
Why pants are different
Pants focus heavily on survival. Damage is meaningless if your character cannot survive high-level Pits.
The main targets are:
Maximum Life
Armor
Resistance to All Elements
How to craft pants
Add Maximum Life or Armor first.
Use a Chromatic Tuning Prism.
Add resistance modifiers.
Add another resistance.
Remove unwanted resistance types until Resistance to All Elements reaches a high roll.
Repeat the process until you get a strong Resistance to All Elements value.
Then:
Add Dexterity or another useful stat.
Enchant Dodge Chance into Armor if needed.
Temper Maximum Life.
Masterwork after securing the correct Temper.
Remember, Maximum Life Temper values can exceed Greater Affix Maximum Life values, so securing the Temper first is usually better.
Glove Craft
Why gloves are difficult
Gloves need multiple offensive modifiers while also requiring cooldown management.
The goal is usually:
Critical Strike Damage
Vulnerable Damage
Cooldown Reduction
Core Stat
How to craft gloves
Add the strongest offensive modifier first.
Add Cooldown Reduction.
Add Core Stat because it provides broad damage scaling.
Replace weak modifiers through Enchanting.
If you cannot obtain ideal Critical Strike Damage, start with a glove that already has useful Greater Affixes.
Then:
Masterwork before Tempering.
Target Cooldown Reduction.
Add offensive Temper effects.
Apply the required Aspect.
Amulet Craft Secret
Why amulets are the hardest item
Amulets combine multiple important stats:
All Skills
Maximum Resource
Cooldown Reduction
Offensive modifiers
This makes them one of the most expensive pieces to perfect.
How to craft the perfect amulet
A blank amulet can actually be easier to control.
Follow this sequence:
Add a Core Stat.
Add another Core Stat.
Add a third Core Stat.
This setup can produce All Skills.
If All Skills appears:
Remove unwanted affixes carefully.
Keep All Skills.
Add Maximum Resource using a Resourceful Tuning Prism.
Add Cooldown Reduction.
The final offensive stat can become:
Critical Strike Chance
Critical Strike Damage
Vulnerable Damage
Afterward:
Masterwork before Tempering.
Prioritize Cooldown Reduction.
Add the final Aspect combination.
For some builds, adding a second Aspect through the Kaliaan Tuning Prism provides additional power.
Chest Craft
Why chest pieces require correct ordering
Chest pieces combine resource management and defense.
Important stats:
Maximum Resource
Maximum Life
Resistance to All Elements
How to craft chest armor
Add Maximum Resource first.
Add Maximum Life or Armor.
Add Resistance modifiers.
Remove and reapply Resistance to All Elements until the roll is high.
Avoid Masterworking before securing important resource stats.
If you accidentally boost the wrong stat during Masterworking, you may need to spend additional materials correcting it.
After completion:
Temper Maximum Life.
Apply Aspect.
Add sockets.
Transfigure only after confirming every stat.
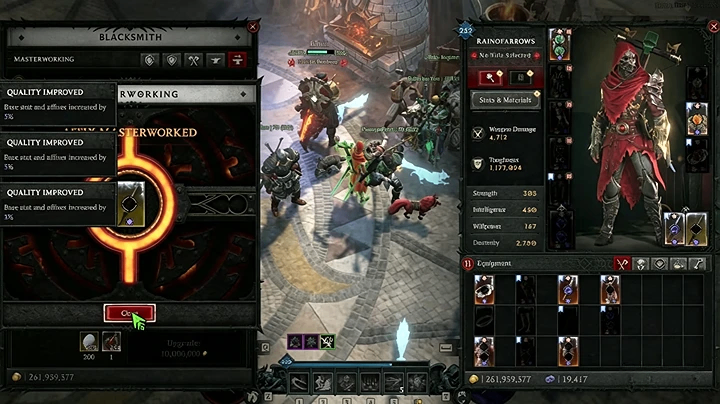
Final Weapon Setup and Pit Speedrun Preparation
After completing the armor pieces, finish your remaining weapons.
For offhand weapons:
Prioritize Maximum Life.
Avoid unnecessary Weapon Damage if your main weapon provides it.
Look for damage multipliers:
Critical Strike Damage
Vulnerable Damage
Cold Damage
Dexterity
Finish with:
Masterworking.
Tempering Critical Strike Chance.
Applying the correct Aspect.
Adding sockets and Gems.
With a complete crafted setup, even without perfect Greater Affix bases, a properly optimized character can reach extremely high damage values and clear high-level Pits efficiently.
Incorrect or Correct Methods
Incorrect Method
Masterworking before deciding important stats.
Tempering before securing important affixes.
Transfiguring too early.
Starting with weak item bases and wasting resources fixing them repeatedly.
Correct Method
Decide required stats first.
Protect valuable rolls.
Masterwork when only the important stats remain.
Temper after securing the correct foundation.
Transfigure as the final step.
Players who want to skip some farming time may look for additional resources through options like buy Diablo 4 Items, but understanding the crafting process remains important because even strong items need proper optimization.
Key Takeaways
Blank Ancestral items can become endgame gear with the correct crafting order.
Always identify your mandatory stats before rerolling.
Masterworking and Tempering order can save hundreds of millions of gold.
Cooldown Reduction, Maximum Resource, and damage multipliers are the most valuable targets for many builds.
Do not rush Transfiguring because it can damage an otherwise perfect item.
Conclusion
Diablo 4 Season 14’s Horadric Cube system gives players a reliable path from basic Ancestral gear to powerful endgame equipment. The process requires patience, but following the correct sequence for weapons, armor, rings, gloves, and amulets allows you to build strong characters without depending entirely on lucky drops.
Start with the items your build needs most, protect important rolls, and gradually upgrade each slot until your gear reaches its final form.