Summary
Many players copy an Immortal Barbarian build only to find themselves running out of Fury, dying during boss fights, or missing critical stat breakpoints. The problem is usually not the build itself, but incorrect gearing, stat allocation, or setup choices. This guide walks through the recommended Tanky Build, explains the essential breakpoints, and covers every important decision—from Aspects and Expertise to Glyphs, Mythics, Talismans, and weapon selection. If you're looking to optimize your Diablo 4 Items and create a reliable Whirlwind Barbarian for Torment 12 farming, this guide provides the complete setup in the correct gameplay order.
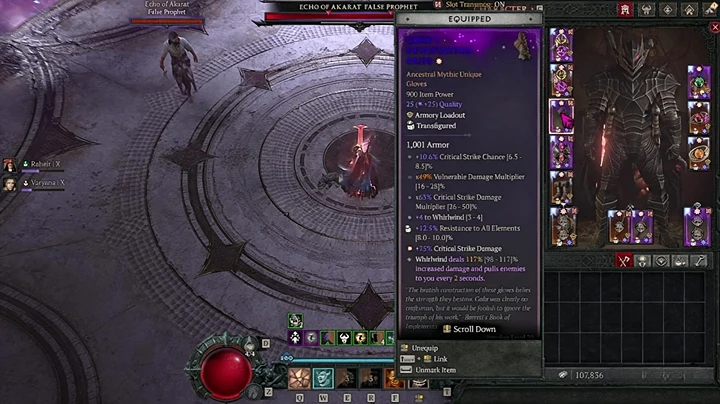
Step 1: Start with the Recommended Tanky Build
For most players, the recommended setup is the Tanky Build using Aspect of Heavenly Strength together with Melted Heart of Selig.
This version offers the best balance between survivability and damage for Torment 12. It allows comfortable farming while remaining extremely durable in most encounters. Alternative versions such as Rage of Harrogath or the Azurath Freeze setup are primarily intended for high Pit pushing rather than everyday farming.
The core mechanic is simple:
Equip Melted Heart of Selig
Keep your Life fixed at 473
Redirect incoming damage into your Fury pool
Stack enough Toughness to survive sustained damage
Do not add Life affixes to gear, Charms, or Paragon unless absolutely required. Any additional Life reduces the effectiveness of the setup.
Step 2: Reach the Required Stat Breakpoints
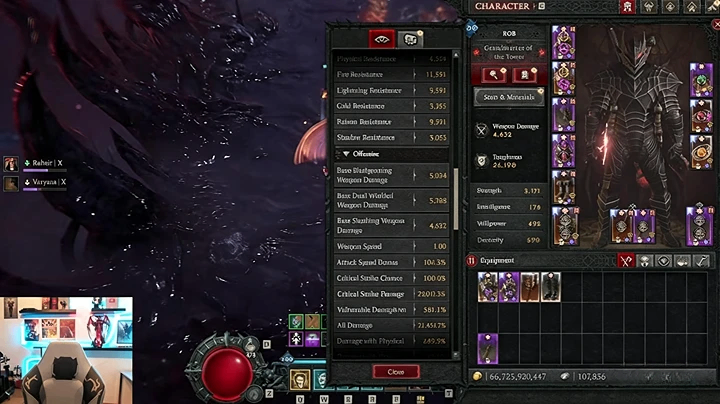
Once the core gear is equipped, focus on hitting the recommended stat benchmarks.
Defensive Targets
473 Life
Around 600 Fury (700–800 is also viable depending on setup)
Approximately 50,000 Toughness unbuffed
Around 100,000 Toughness when fully buffed
150–190 Fury Generation while Wrath of the Berserker and Rallying Cry are active
Offensive Targets
Minimum 75% Critical Strike Chance on the character sheet
Around 15,000 Critical Damage with Grandfather
Around 10,000 Critical Damage without Grandfather
At least 400 Vulnerable Damage
25–31 ranks of Whirlwind depending on available Fury
These values provide a practical balance between damage output and survivability instead of chasing perfect endgame rolls.
Step 3: Configure Your Gear Correctly
Best Aspects
Amulet
Always use:
Anger Management
Boots
Choose based on your goal:
Accursed Touch for permanent Vulnerable uptime
Battle Mad for higher damage
Movement Speed Aspect for speed farming
When using Battle Mad, only the second damage bonus is important. The bleed-related text can be ignored for this setup.
Expertise Slot
Assign:
Whirlwind → Mace
Expertise Slot → Two-Handed Sword
The Polearm Expertise currently does not interact correctly with Dust Devils, making the Two-Handed Sword the preferred option for applying Bleeds and enabling cooldown resets.
Step 4: Optimize Paragon, Glyphs, Talismans & Charms
Glyph Priority
The default recommendation remains Flawless Technique because of its additional Critical Strike Chance.
Alternative choices include:
Might for easier gameplay without potion management
Undaunted for additional Damage Reduction
Iron Glyph for extra survivability
Force of Nature for larger Dust Devils and improved quality of life
Weapons Master for additional Fury
Decimator for high-end Pit pushing
Choose the alternative only if your existing gear already satisfies your Critical Strike requirements.
Talisman & Charms
Maintain enough Maximum Resource while avoiding any bonus Life affixes.
A practical setup is:
Two Martial Skill bonuses
Remaining bonuses invested into Maximum Resources
This generally produces around 700 Fury while maintaining 27 Whirlwind ranks, although 31 ranks is possible with stronger gear.
Step 5: Maximize Damage Through Weapons and Attack Speed
Attack Speed directly improves Whirlwind.
Higher Attack Speed means:
Faster spinning
More hits
More Dust Devil triggers
Higher overall DPS
For maximum performance:
Use a Mace for Whirlwind
Use a Two-Handed Sword only if visual preference matters
Weapon Damage should only be prioritized on the weapon actually assigned to Whirlwind. Additional Weapon Damage elsewhere provides significantly less value.
Step 6: Loot Filter and Mythic Priority
A strict loot filter greatly reduces unnecessary drops during endgame farming.
Recommended progression:
Beginner filter
Generic Endgame filter
Generic Whirlwind Barbarian filter
Uber Strict filter for optimized farming
For Mythic items, prioritize them in this order:
Melted Heart of Selig
Grandfather
Starless Skies
If Grandfather is unavailable, Fortify Aspect is a reasonable temporary replacement.
For Glyph leveling, prioritize Twister Glyph as early as possible. It provides one of the largest multiplicative damage increases available to the build and significantly boosts Dust Devil damage.
Step 7: Know When to Use Alternative Setups
The Tanky Build is recommended for nearly all players because it offers consistent survivability and smooth farming.
Switch only when your goal changes:
Rage of Harrogath → High Pit pushing
Azurath Freeze Variant → Specialized endgame pushing
Heavenly Strength → General Torment 12 farming, bosses, and everyday gameplay
Even with the Immortal setup, remember that certain boss mechanics remain lethal.
Examples include:
Mephisto's beam and bite attacks
Lilith's platform destruction
Mechanics that bypass Melted Heart of Selig
The build is extremely durable but should not be treated as completely invincible.
Key Takeaways
Build around Melted Heart of Selig and maintain exactly 473 Life.
Aspect of Heavenly Strength is the recommended choice for Torment 12 farming.
Aim for approximately 600+ Fury, 75%+ Critical Strike Chance, and 400+ Vulnerable Damage.
Assign Whirlwind to a Mace while using Two-Handed Sword Expertise.
Level Twister Glyph first and prioritize Melted Heart of Selig, Grandfather, then Starless Skies.
Switch to Rage of Harrogath or Freeze variants only for specialized high-tier pushing.
Conclusion
The Immortal Barbarian remains one of the strongest and most comfortable endgame builds despite previous balance changes. Rather than chasing maximum damage immediately, prioritize the correct Life value, Fury pool, Toughness, and gear configuration. Once the key breakpoints are met, the build becomes significantly more reliable in Torment 12 farming while still delivering excellent boss damage. If you're planning to further optimize your equipment, many players also choose to buy Diablo 4 Items to complete their ideal endgame setup more efficiently.



![[Carry Run] 100K Obducite (Need to pick by yourself)](https://assets.mmoexp.com/images/202603/f0a58fe810e59a7f689a15954c2507518b5cc3f5.png)