Weekend Drop -













Summary
Alright, Diablo players. If you're looking for one of the best leveling builds for Season 15, you've come to the right place. The Warlock is the class everyone's going to be playing, and this build will carry you from the very start all the way up to Tormented 12 content. It's fantastic, super easy to play, and requires minimal button-pressing once you get the key pieces online. If you're eager to skip the early grind and jump straight into the action, you can always buy Diablo IV Items from trusted platforms to secure those crucial uniques and aspects—but this guide will show you how to earn everything through smart farming if you prefer to go that route.
Let's break down exactly how to build it, what gear to chase, and how to transition from a manual-casting setup to a one-button powerhouse.
Build Overview: Why This Works
This build revolves around Fiend of Abaddon—a massive demon that one-shots almost everything in your path. Once fully online, it becomes a true one-button build: you summon Abaddon, ride the demon dog (Abodian), and let the automation do the rest .
The reason this build is so strong in Season 15 comes down to two things:
Hellhound's Sabatons – updated this season to automatically cast all your equipped fire skills
New demonic soul splinters – provide massive damage ramping when enemies (or your own minions) die
Note: This build requires you to obtain the Ultimate skill first. You can't play it at level 1, but once you start filling out your skill points and reach Fiend of Abaddon, you'll breeze through content.
The Core Mechanic: Fiend of Abaddon
Your primary damage dealer is Fiend of Abaddon—the giant demon that swings and one-shots everything. But there's an important distinction:
Fiend of Abaddon = the damage-dealing ultimate
Abodian = the dog you ride
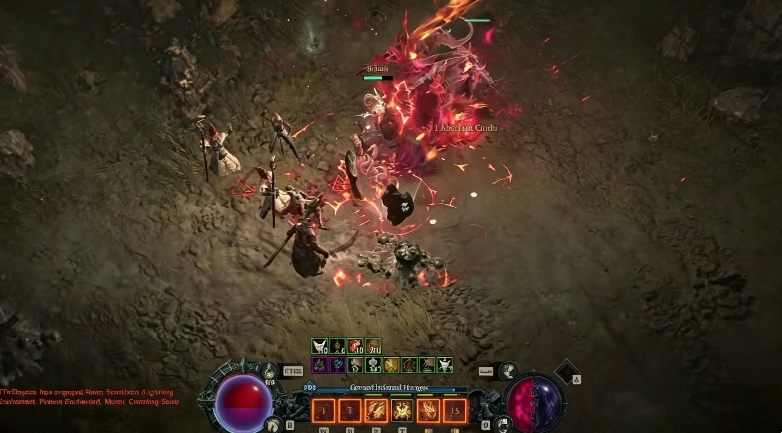
When you ride Abodian, it pushes all your buttons for you. All you do is walk around and watch things die .
Resource Management: Dominance vs. Wrath
The Warlock has two resources :
Wrath – your primary resource (affected by resource bonuses)
Dominance – your secondary purple resource (NOT affected by generic resource bonuses)
This is important to remember when gearing and socketing. Only bonuses that specifically mention Dominance will affect your ultimate uptime.
The Key Item: Hellhound's Sabatons
This is your number one priority. These boots are what transform the build from manual-casting to fully automated.
What They Do
Abodian deals 80-100% increased damage
After Command Abodian ends, you're connected with a fire chain that deals damage periodically
Grants 25% movement speed for 10 seconds after the skill ends
Season 15 Buff
In Season 15, Hellhound's Sabatons have been updated to automatically cast all of your equipped fire skills. This is the main reason we want to get these boots ASAP—they eliminate the need to manually press any other buttons .
Where to Get Them
Best source: The Beast in the Ice boss (target farm with Distilled Fear)
Alternative: Belial, Lord of Lies (modify his hoard to include Beast's loot pool)
Horadric Cube: Transmute common boots using the Upgrade to Unique option
Leveling Phase: Before You Get the Boots
Before you acquire Hellhound's Sabatons, you'll need to manually cast your abilities. Here's how to handle the early game:
Early Skill Setup
Levels 1-15:
Use Command Fallen as your generator—it provides solid Wrath generation and applies Hex
Use Molten Bomb (Basic skill) sparingly for resource generation
Don't spam abilities—you'll run out of Wrath quickly
Levels 15+ (Orbital Scream unlocked):
Blazing Scream becomes your main damage dealer—it casts a demon skull that orbits you
Once you unlock the Orbital Scream variant, the skull orbits automatically, and you no longer need the Basic skill for resource generation
What to Cast Manually Before the Boots:
Bombardment – press it once to get 5 stacks; refreshing it extends the duration
Dark Prison – manually cast if you don't have the Prid rune to auto-activate it
Rampage – use sparingly; it spends Dominance and applies Eviscerate bleed to elites and bosses
The Dominance Node
In the very beginning, put one point into the Dominance node on your Paragon board. You need this to maintain 100% uptime on your ultimate until you get the boots . Once you get Hellhound's Sabatons, you can unspec this point—you won't need it anymore because the boots handle the resource generation automatically.
Paragon Strategy (Early):
Ignore glyphs until you unlock the Paragon board
Rush to the Death Aura node – this is your most important early Paragon target
While not in demon form, you gain 2% of your maximum Dominance every second – this gives you the resources you need to cast your ultimate
To Mount or Not to Mount?
When leveling, mount up and dismount immediately—you don't want to stay in demon form. This triggers the resource generation bonus without committing to the form. The goal is just to activate the bonuses from your gear and skills .
Endgame Phase: One-Button Automation
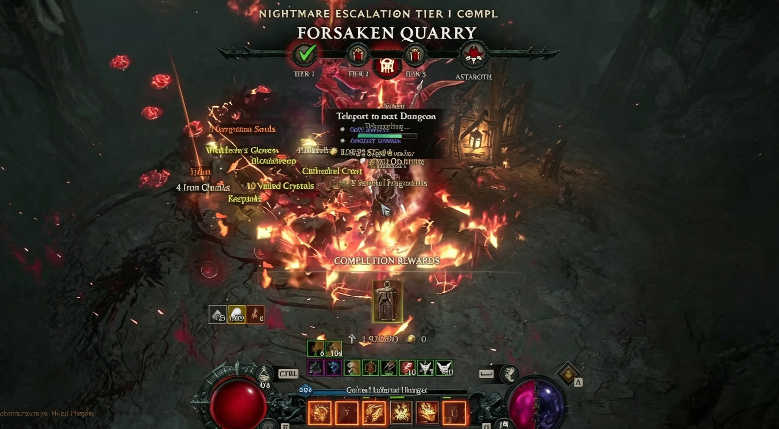
Once you have Hellhound's Sabatons, everything changes:
All fire skills are automatically cast – no more manual button pressing
All you need to do is press Summon Abaddon (first skill on your bar, looks like a paw print)
Once summoned, the skill changes to riding Abodian
Ride the dog and walk through enemies – everything dies
In-Geom is a fantastic addition here—it gives you infinite cooldown reduction, ensuring 100% uptime on your Hellhound's Sabatons effect .
What You DO NOT Need
Cooldown Reduction – it doesn't help the build because the skill won't reset until it actually ends
Attack Speed – your minions do the work; don't waste stats on this
Starless Skies – you don't manually cast skills, so this ring is useless for this build
Skill Tree Breakdown
Endgame Skill Setup (Post-Boots)
Skill | Why We Take It |
Fiend of Abaddon | Main damage dealer – your ultimate |
Bombardment (maxed) | Summons additional demons; important for soul splinter procs |
Dark Prison | Auto-cast via Prid rune; applies crowd control |
Sigil of Chaos | Makes enemies volatile; provides extra damage |
Command Fallen | Early generator—can be dropped once you have the boots |
Important Skill Variants
Vanguard Shard – makes Fiend of Abaddon a Hellfire skill and provides damage emanation (like an Andariel's effect that radiates around you)
Skull Splitter (currently bugged) – should shoot smaller skulls for extra damage when minions or enemies die
Why Everything Must Be Hellfire
In Season 15, Hellfire is the meta. All your skills should be converted to Hellfire type via the Vanguard Shard and other class mechanics to benefit from the new demonic gems and seasonal buffs .
Gear & Stat Priorities
Priority Gear
Slot | Item | Why |
Boots | Hellhound's Sabatons | Build-enabling; must-have |
Helm | Leoric's Crown | Socket with Crit/Attack Speed gem |
Weapon | In-Geom | Infinite cooldown for boots; can also put in talismans |
Ring | Stone of Jordan | Massive survivability; matches all resistances to fire resistance |
Amulet | Moloch's Bleeding Flames | Huge bonus damage + core stats |
Offensive Stat Priority
Maximum Life
Willpower
Critical Strike Chance (you only need about 10% at endgame—Leoric's gives ~80% base)
Critical Strike Damage
Vulnerable Damage
Fire Damage
Defensive Stats
Maximum Life
Armor
Fire Resistance (if using Stone of Jordan, this becomes all resistances)
Masterworking Tip: Prioritize critical strike chance on your masterworking rolls. One Greater Affix with proper masterworking will usually cap your crit chance .
Legendary Aspects
Aspect | Use |
Edgemaster's | More damage (works because you don't cast) |
Crushing | Alternative—slightly less uptime |
Diabolical Armor | Damage reduction (pants slot) |
Demonic Aspect | +65% demonology damage when hitting with demonology skills |
Soul Splinters (Gems)
Black Soulstone (Stone of Sin) – damage ramps up when enemies die; your own minion deaths also count
Crit + Attack Speed – socket in Leoric's Crown
Damage Reduction – loses movement speed but you have enough from boots
Vulnerability on Touch – source of vulnerability; can also use Lucky Hit chance
Paragon Board Strategy
Endgame Paragon Path (to T12)
Eldritch Sight – more damage to vulnerable targets
Demonologist – instant big damage; requires greater demon stone (always active)
Fathomless (Death Aura) – defensive; stacks well with Stone of Jordan (twice as strong as Tyrael's Might for resistances)
Demonic Spectrals – additional damage
Hellforge – more damage with volatility skills
Greater Hex – bonus damage when applying vulnerability
Eliminators – more demonology damage
Note: You can run Tyrael's Might if you want even more tankiness, but most players prefer damage .
What to Transition To After T12
Once you've hit T12 and want to push further, consider these builds:
Build | Best For |
Hell Fracture | Way more DPS; speed farms faster because it hits everything behind you too |
Blazing Stream | Pit 150 – highest DPS in the game |
Apocalypse | Good, but clunky compared to auto-walking builds |
These builds are already uploaded and ready for you to transition into .
Final Summary
The Warlock Hellfire Abodian build is one of the best leveling experiences in Diablo 4 Season 15. Here's the TL;DR:
Phase | What to Do |
1-15 | Use Command Fallen + Blazing Scream; manually cast abilities |
15-70 | Orbital Scream variant; look for Hellhound's Sabatons |
After Boots | ONE BUTTON: Summon Abaddon, ride the dog, watch everything die |
Post-T12 | Transition to Hell Fracture, Blazing Stream, or Apocalypse |
The key is getting Hellhound's Sabatons as fast as possible—they transform the build from a manual-casting setup into a fully automated death machine. Combined with the new demonic gems that ramp damage on kills (including your own minions dying), this build will carry you effortlessly through endgame content. And if the RNG grind wears you down, you can always check for Diablo IV Items for sale from reputable sources—MMOEXP is one option worth exploring if you're looking to save time and get back to the action sooner.