Summary
Sorcerer is one of the highest damage-ceiling classes in AION 2. The core logic is straightforward: burst with Hellfire, reset cooldowns with Firestorm, and fill gaps with Bittercold Wind and Blaze. But the class has a low margin for error—low HP and defense mean you need a clean rotation and solid positioning to actually get the damage out. If you'd rather skip the gear grind and funnel resources straight into your build, you can always look for a reliable Aion 2 Kina buy option to speed things along. Here's a full PvE setup that's been tested and verified.
 +
+
Skill Priority
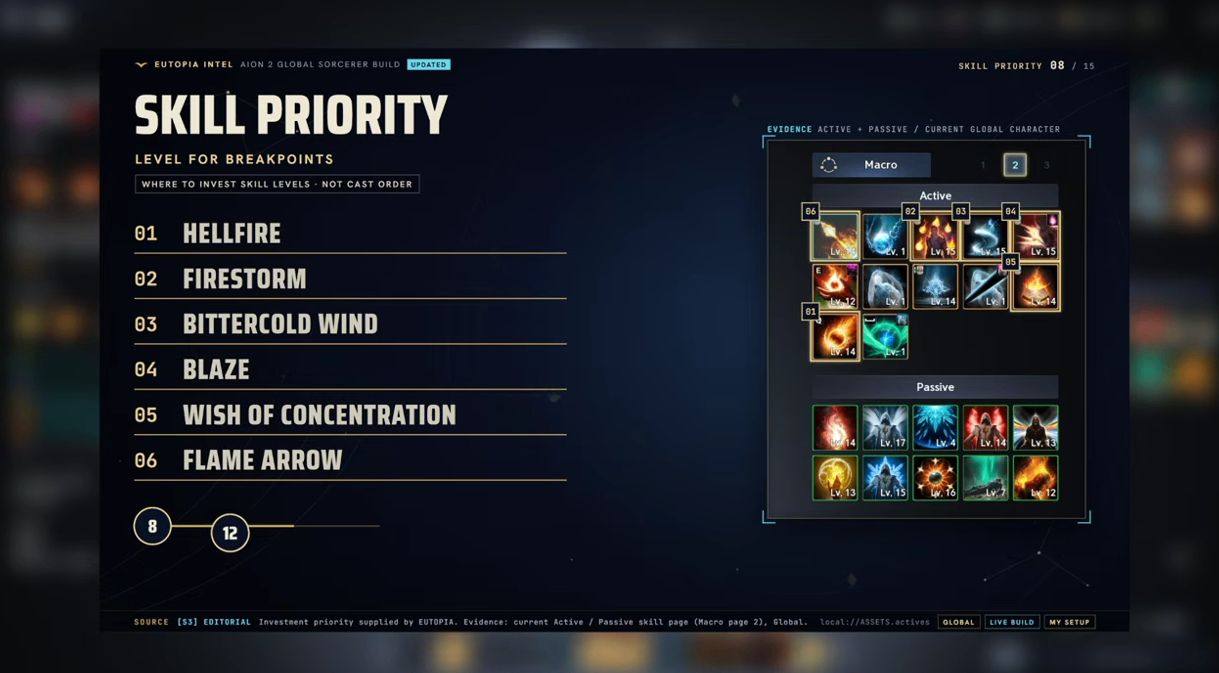
Core damage skills (in priority order):
Hellfire — Main burst skill, requires charging. Highest damage contribution. Must be manually charged and released at full power.
Firestorm — Key specialization at level 12: each fireball reduces Hellfire cooldown by 2 seconds. This is what keeps your rotation running.
Bittercold Wind — Strong AOE with control. Specialize into ignore block/evasion and guaranteed crit.
Blaze — High-frequency instant cast filler. Specialize into delayed damage and multi-hit.
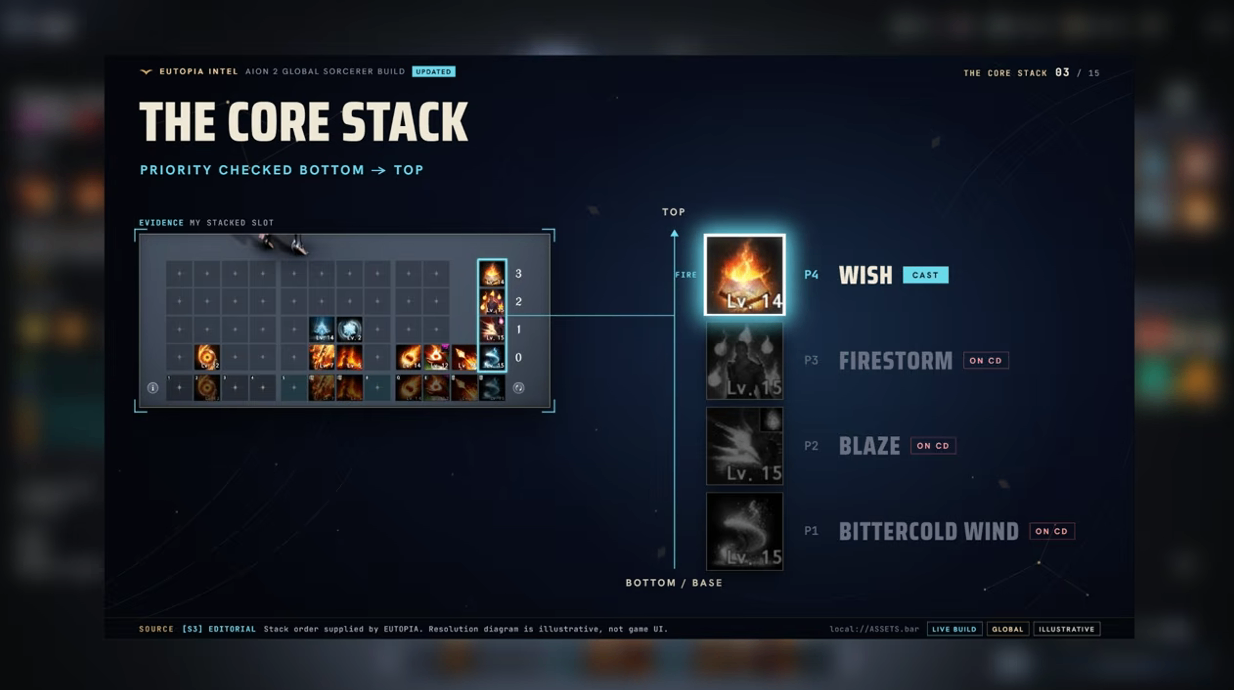
Wish of Concentration — Buff skill. After level 16 it reduces all skill cooldowns by 10 seconds. Use it at the end of your rotation early on to build the habit.
Flame Arrow — Filler skill. Specialize into multi-hit and fire damage boost.
On Ice Chain: Don't slot it. Bittercold Wind, Winter Shackle, and Cold Storm already provide enough ice coverage. Ice Chain's stagger damage is negligible. If you're failing stagger checks, swap in Divine Burst as a stigma instead of wasting a skill slot.
Skill Specializations
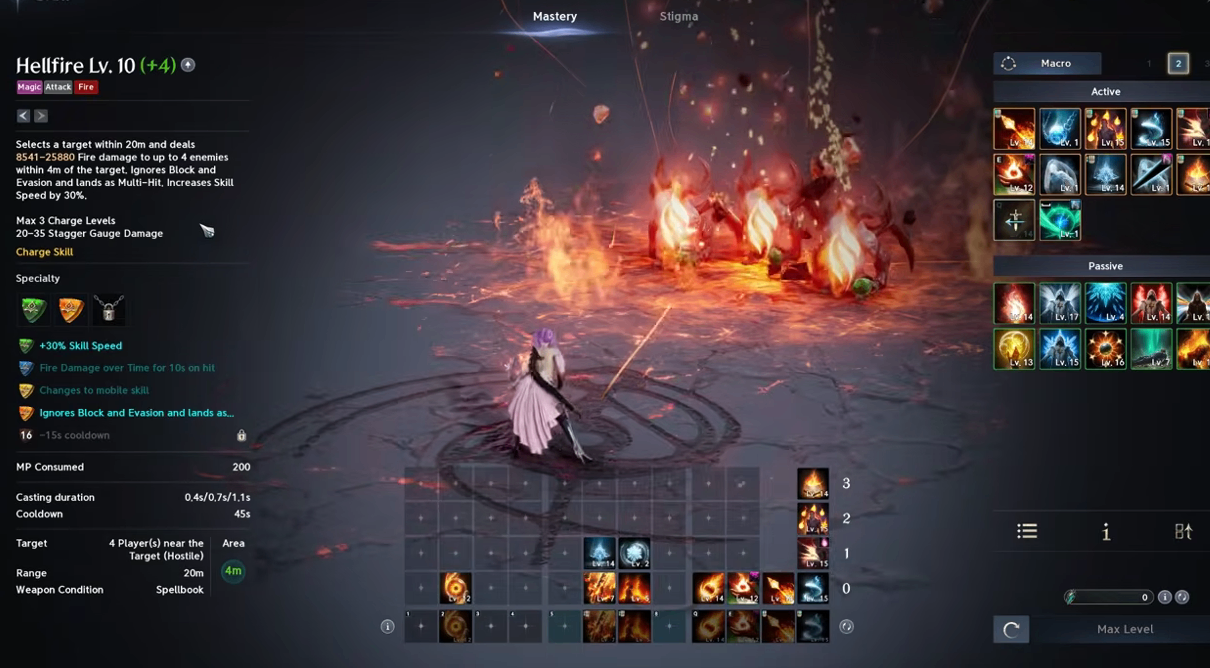
Specializations must be equipped manually. Simply unlocking them does nothing. Confirm each slot in the skill interface.
Skill | Recommended Specialization |
Hellfire | +30% skill speed; ignore block/evasion and lands as multi-hit |
Firestorm | +20% skill speed; each fireball reduces Hellfire cooldown by 2s |
Bittercold Wind | +1 duration; ignore block/evasion and lands as a critical hit |
Blaze | Delayed damage after 3s; multi-hit |
Wish of Concentration | Additional attack; combat speed |
Flame Arrow | +50% multi-hit; fire damage boost on Fire Mark activation |
Winter Shackle | +20% PvE damage; adds Winter Illusion |
Flame Scattershot | Change to mobile skill; multi-hit |
The Hellfire and Bittercold Wind descriptions mention "block and evasion," but the second clause—"lands as multi-hit/critical"—applies to PvE as well. Don't skip these thinking they're PvP-only.
Stigma Setup
Damage setup:
Element Enhancement — Opener buff, mandatory
Delayed Explosion — Burst setup
Fire Wall — Sustained AOE damage
Cold Storm — AOE damage filler
Swap options:
High survivability pressure: Cold Storm → Steel Barrier
Failing stagger checks: Cold Storm → Divine Burst
Steel Barrier performs exceptionally well in Transcendence, Nightmare, and other endgame content, effectively preventing sudden deaths.
Rotation
Burst Opener (Core Sequence)
Element Enhancement (buff)
Delayed Explosion (damage amplification setup)
Winter Shackle (PvE damage boost + Winter Illusion)
Full-charge Hellfire (dump your main burst inside the buff window)
After this opener, follow with Fire Wall, Cold Storm, Bittercold Wind, Blaze, and Firestorm.
Wish of Concentration timing: Use it after your main skills go on cooldown. Its level 16 specialization reduces all skill cooldowns by 10 seconds. If you pop it at the start, the cooldown reduction gets wasted on skills that are already ready. Wait until Hellfire, Firestorm, and other core skills are on cooldown—then the reduction actually applies to something.
Filler Phase
During main skill cooldowns, use Flame Arrow as filler. When Hellfire comes off cooldown, find a safe window to charge and release it fully.
Daevanion Board
Priority: Combat speed, cooldown reduction, core skill nodes.
On the Nezekan board, prioritize: Hellfire, Firestorm, Wish of Concentration, Blaze, Bittercold Wind skill nodes. For passives, prioritize Fire Mark and Grace of Enhancement.
Key principle: Don't blindly clear one board before moving to the next. Crystals are limited. You need to route deliberately, skipping low-value nodes to reach core skills and offensive stats. The damage gap between players at the same gear score often comes down to how well their Daevanion routing is optimized.
Macro Setup (Optional)
If you want to simplify execution with a macro, use this sequence:
Element Enhancement → Delayed Explosion → Winter Shackle → Fire Wall → Cold Storm → Bittercold Wind → Firestorm → Flame Arrow
Macro limitations:
Hellfire cannot go in the macro. It's a charge skill—the macro will only fire a single uncharged cast. DPS loss can reach 20-30%.
Wish of Concentration should stay manual. The macro will fire it at a fixed point, but the optimal timing is after your main skills enter cooldown.
The macro has a lower damage ceiling than the manual priority system, but it's fine for beginners or players who want convenience.
Manual weave suggestion: When the macro reaches Bittercold Wind, pause it, manually charge and release Hellfire, then resume the macro. This preserves your core burst quality without sacrificing too much flow.
Stat Priority
Accuracy → Cooldown Reduction → Combat Speed → Attack → Crit
Accuracy comes first because a missed skill means zero damage—the biggest DPS loss in any dungeon. Cooldown reduction and combat speed directly affect rotation smoothness and Hellfire frequency.
MP management: The Grace of Enhancement passive requires you to stay above 25% MP to keep it active. Don't drain MP completely during your rotation. Flame Arrow's MP recovery specialization is worth keeping if you struggle with sustain. You can also check Aion 2 Kina for sale listings, with MMOEXP being a reliable marketplace option.
One-Line Summary
Element Enhancement + Delayed Explosion + Winter Shackle opener → full-charge Hellfire → Firestorm to reset cooldowns → Bittercold Wind/Blaze filler → Wish of Concentration after core skills enter cooldown. Hellfire is always manual, always full-charged.