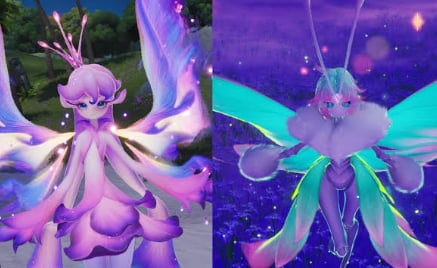
Summary: Prismana Glynsera is currently one of the most important limited-time targets in Aniimo, and there is a much faster way to work toward its Prismana Flow without relying entirely on Nurture. During the current Vein Abundance rotation, Glynsera appears in Beast Fang Ridge, making this the perfect time to farm the area aggressively. The current APAC event window runs through September 28, 2026, while the event rotation will later move to Melloblum, buy Aniimo Boosting, Waleetle and Inferlupa.
The key idea is simple: use the area's large number of repeatable Aniimo spawns to generate Lucky Strikes, build Prismatic Energy, and push toward a Prismana Flow without consuming your limited Nurture opportunities.
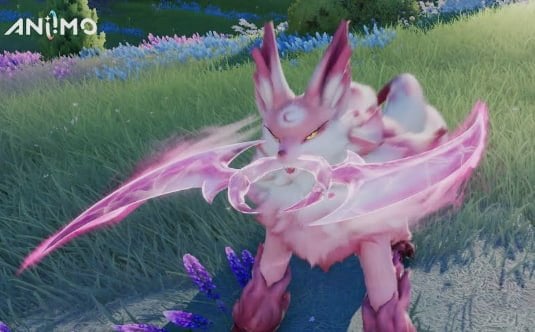
How Prismana Glynsera Farming Works
Vein Abundance gives the featured region an important boost. During the event, the first three Nurture sessions of the weekend in the designated area receive a 1.5x Prismatic Energy boost after harvesting the Veinfruit. However, those boosted Nurture runs are limited, so they should not be your only plan.
Capturing Aniimo can also trigger a Lucky Strike, which increases the region's Prismatic Energy without consuming the normal Nurture quota. Current event data lists Lucky Strike as the quota-free route, with the game's event rules giving it a separate chance to increase Prismatic Energy.
That is what makes the high-density event area so useful.
Instead of repeatedly spending Nurture resources, you can keep catching the Aniimo that spawn there and let the Lucky Strike system gradually build the same energy you need for the Prismana loop.
Why Hexxin Is the Key to the Fast Farm
The most useful setup starts with Hexxin.
Hexxin's Black Hole Domain creates a black hole that continuously pulls nearby targets together. That makes it much easier to gather a large group into one area before using your Break-focused Aniimo.
You do not need to heavily invest in Hexxin for this purpose. The important part is the crowd-control function.
Once the Aniimo are grouped, switch to an AoE Breaker such as the one used in the video. The exact Breaker can vary, so the important requirement is simply having a reliable AoE tool that can weaken several targets at once.
Aniimo's Break system makes this especially efficient: when the yellow Break gauge reaches zero, the target enters Break state and becomes ready to catch.

Use Cheap Aniipods to Keep the Loop Going
After grouping and breaking the wild Aniimo, capture them with Basic Aniipods.
There is no reason to burn expensive capture items on ordinary event spawns when your goal is simply to generate more capture attempts and trigger Lucky Strikes.
The loop is straightforward:
Hexxin → group the Aniimo → AoE Break → capture → repeat.
Because the event creates a dense supply of targets, you can perform the loop repeatedly instead of spending another Nurture charge every time you want to increase Prismatic Energy.
Community discussions around Vein Abundance are already highlighting this exact concept: the weekend event creates large groups of Aniimo that can be caught repeatedly, allowing players to generate Lucky Strikes without consuming additional Vein Essence.
Don't Waste Your Three Boosted Nurture Runs
This does not mean Nurture is useless.
The opposite is true: because the first three weekend Nurture sessions receive the event bonus, they are still valuable for quickly increasing Prismatic Energy. The better strategy is to combine both systems rather than choosing only one.
Use the boosted Nurture sessions first, then move into the high-density capture area and continue farming Lucky Strikes after your limited Nurture attempts are gone.
This gives you two separate ways to push the same regional energy bar.
It is also worth checking the event schedule before committing resources. The special Prismana rotates by region, with Glynsera in Beast Fang Ridge followed by Melloblum in Rosetower Woods, Waleetle in Berylline Vale and Inferlupa in Nimbus Fields. The final Prismana Carnival brings all four back simultaneously.
What Happens When Prismatic Energy Fills?
The goal of the entire process is to reach maximum Prismatic Energy and trigger a Prismana Flow.
Once the area reaches the required state, the featured Prismana can appear. The current system has also been adjusted so that when a Lucky Strike fills Prismatic Energy to maximum, the active area's Prismana can respawn immediately. That change makes quota-free Lucky Strike farming even more relevant for repeated Prismana attempts.
So the event is no longer simply:
Nurture → wait → Prismana
Instead, you can think of it as:
Nurture → capture → Lucky Strike → more Prismatic Energy → Prismana Flow.
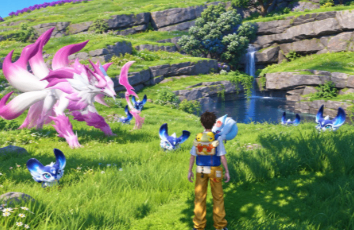
Make the Captures Pay for Themselves
There is another reason to keep the capture loop cheap.
Captured Aniimo can be reported through the research system for Credits, and the Research Expert talent increases reporting rewards. The maximum level currently gives 30% more Credits from reporting.
That means the cheap Basic Aniipod approach can be more sustainable than it initially looks. You are not simply throwing resources away on hundreds of captures; part of that investment can return through the game's reporting economy.
This is especially useful when you are farming for repeated Prismana attempts rather than trying to catch one individual Aniimo with a premium pod.
The Fastest Glynsera Farm Right Now
For the current Glynsera rotation, the practical setup is simple:
Use your three boosted Nurture sessions during the event weekend, then move to the high-density Beast Fang Ridge area.
Bring Hexxin for Black Hole Domain and an AoE Breaker to finish the grouped targets. Catch the weakened Aniimo with Basic Aniipods and repeat the process as long as the event spawns remain active.
The important thing is that the system is quota-free rather than literally infinite: you can continue generating capture attempts and Lucky Strike opportunities without another Nurture charge, but you still need capture pods and the event's active spawn conditions.
That makes this one of the most efficient ways to pursue Prismana Glynsera during Vein Abundance while saving your limited Nurture resources.
And the same concept should remain useful for the later Prismana rotations. Once the featured region changes, the target changes, but the basic loop-group, break, capture, trigger Lucky Strikes, Aniimo Boosting, build Prismatic Energy, and force Prismana Flow-stays the same.