Summary
The Fallen Emperor is ARC Raiders' first dungeon, hidden inside the massive wreck on Pendola Pass. Getting inside requires the Emperor Gateway Conduit, crafted from a rare blueprint and three ARC couplers. Once inside, Raiders must overcome electrified machinery, dangerous parkour, deadly lasers, and hostile ARC units to reach a loot-filled hangar. This guide covers how to unlock the Emperor, prepare the right loadout, survive its changing rooms, and escape with valuable Amplification Modules, crafting materials, and useful ARC Raiders Items.
1. How to Unlock the Fallen Emperor
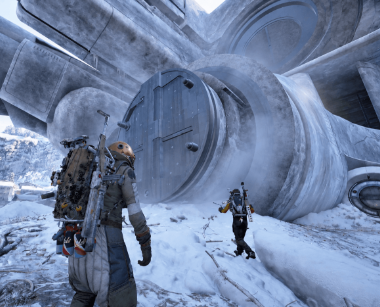
You cannot simply walk into the Emperor. First, you need to obtain the Emperor Gateway Conduit, a legendary key crafted at Workbench I.
The process begins during the Redirection map condition on Pendola Pass, when damaged Emperor Relays activate and allow Raiders to call down Emperor Payloads.
Follow these steps:
Enter Pendola Pass during Redirection. Watch for an active Damaged Emperor Relay. Its red laser beam and map indicator make it easier to identify.
Search the active relay for an Emperor Beacon. The beacon is used to call down a payload.
Deploy the beacon in a suitable location. Its signal is visible to other players, so prepare for competition.
Take cover while the payload falls. The incoming debris can cause serious damage to your health and shields.
Breach the large upright payload. This is the important container for obtaining ARC couplers and potentially the rare blueprint.
The small broken pieces surrounding the main payload mainly provide ordinary ARC materials. Prioritize the large upright container if your goal is to unlock the dungeon.
Materials Required for the Emperor Gateway Conduit:
| Required item | How to obtain it |
|---|---|
| Emperor Gateway Conduit Blueprint | Rare drop from Emperor Payloads |
| ARC Conductive Coupler | Emperor Payloads; also reported from the Frigate |
| ARC Insulated Coupler | Emperor Payloads; also reported from the Frigate |
| ARC Plated Coupler | Emperor Payloads; also reported from the Frigate |
Once you have the blueprint and all three couplers, extract successfully and learn the blueprint. Craft the conduit at Workbench I, then enter another Pendola Pass raid and use it on the socket at the Emperor's base.
Important: You cannot craft the conduit during the same raid in which you collect the required materials. Do not risk losing your rare components by assuming you can finish the crafting process in the field.
2. Redirection Tips: Get the Blueprint Without Wasting Runs
Redirection is competitive because every Raider can see an active relay's signal. Reaching a payload first can make the difference between obtaining the materials you need and arriving after someone else has taken them.
Use these strategies to improve your chances:
Stay within reach of several relays. Position yourself near multiple possible activation points rather than committing to one inactive location.
Move quickly when a relay activates. If you are far away, nearby Raiders may reach it first.
Deploy the beacon near hard cover. Incoming debris can destroy health and shields, so identify a sheltered position before calling the payload.
Carry extra beacons when possible. They can allow multiple payloads to be called from one relay opportunity.
Expect PvP. A visible signal attracts attention, and some players may wait for others to expose themselves before attacking.
If your loadout has three safe-pocket slots, prioritize the rare blueprint first. Then secure one of each required coupler before carrying duplicates. This protects your progress if the raid ends badly.
3. Best Loadout Before Entering the Emperor
The Emperor is a lengthy challenge rather than a quick loot stop. You need weapons for ARC enemies, tools for traversal, and enough healing supplies to survive mistakes.
| Equipment | Recommended purpose |
|---|---|
| Anvil | Destroy electrified nodes and deal with smaller ARC enemies in confined areas |
| Hullcracker | Handle Hydras encountered throughout the dungeon |
| Snap Hook | Cross gaps, climb shafts, and recover from difficult jumps |
| Shield chargers | Restore protection after combat and environmental damage |
| Healing items | Recover from damage during the trials |
| Stims | Help maintain movement through stamina-draining gas sections |
| Silenced weapon | Reduce noise while dealing with threats near the final loot hangar |
Bring a balanced loadout instead of filling every slot with damage-focused equipment. The Snap Hook can save a run when a jump goes wrong, while healing and shield supplies help you survive the final encounter.
Before advancing, locate the doors and understand their lighting. The large sealed door with two white lights marks the way forward. A door marked with yellow lights leads back toward the starting area or outside the Emperor.
4. Fallen Emperor Dungeon Walkthrough: How to Beat the Trials
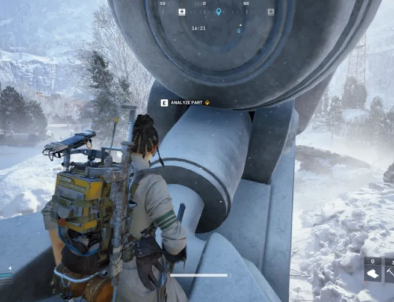
The dungeon contains roughly a dozen challenges. The starting floor and final loot hangar remain consistent, but the intermediate trials can appear in different orders. Learning the mechanics of each room is more reliable than memorizing one route.
Ground Floor and Elevator:
The opening section introduces electrified machinery and a Hydra guarding the path.
Shoot electrified boxes to discharge them before touching them.
Use a Hullcracker to deal with the Hydra.
Find the glowing nodes around the elevator mechanism and surrounding walls.
Destroy the nodes to deactivate the elevator's electrical hazard.
Check the elevator stops for breachable containers before continuing upward.
Do not rush through the opening section. The containers along the way can provide useful materials, and the same electrical mechanics appear in later rooms.
Gas Room and Crushing Walls:
The gas room drains stamina, making it harder to sprint through the hazard. The walls then close in, creating a dangerous timing challenge.
The safest approach is to:
Drop into the dip in the middle of the floor.
Wait for the crushing walls to pass through the gaps.
Move only when the path is clear.
Use the Snap Hook to reach elevated sections and cross to the exit.
Stims are useful here because the gas can leave you without enough stamina for a long sprint. Avoid wasting them before you understand the timing.
Container Hangar and Vertical Shafts:
Some rooms combine moving containers, narrow platforms, and hostile ARC units. Falling can cost health or end the run entirely.
Clear nearby Hydras from cover before crossing exposed areas.
Use moving containers to reach ledges and ladders.
Shoot electrified containers before landing on them.
Drop through shaft openings one level at a time instead of jumping several levels at once.
Save the Snap Hook for difficult climbs or jumps that would otherwise be risky.
In the maze, maintain your original direction and watch for smaller ARC enemies that can chase you through the openings beneath the walls.
Laser Room:
Rotating lasers are lethal, so treat the room as a movement puzzle rather than a place to fight.
Watch the beam pattern, identify safe gaps, and move decisively. Some containers can block laser beams, providing temporary protection. If you use a direct route, follow the corridor's turns carefully and watch for additional moving hazards near the exit.
Do not stop in an exposed area to loot while the lasers are active. Survival is more valuable than an extra container if you are carrying rare materials.
5. Final Loot Hangar: Where the Best Rewards Await
The final hangar is the main reward for completing the dungeon's trials. Follow the large opening into the hangar instead of taking the adjacent yellow-lit door, which leads back toward the starting area.
Once inside:
Ride the large moving structure and jump down near the collapsed container.
Locate and destroy the six glowing nodes, three on each side of the hangar.
Take cover as the roof opens and additional ARC threats enter.
Watch for the Vaporizer and use cover to limit your exposure.
Search the containers and wall-mounted canisters once the immediate danger has passed.
Some containers are dangerous. Orange canisters can explode, so step away when a container shows warning signs instead of attempting to loot it immediately.
What Loot Can You Find Inside the Emperor?
| Reward | Why it matters |
|---|---|
| Amplification Modules, Marks I–V | Used for weapon amplification progression |
| Emperor Modulators | Needed for the Gunsmith IV upgrade |
| Amplification crafting materials | Support amplified weapon crafting |
| ARC Data Modules | Valuable additional loot |
| ARC parts | Useful for crafting and progression |
The Emperor is particularly attractive for players seeking Amplification Modules. However, loot is not guaranteed in a fixed quantity, and dangerous containers can make greedy looting costly.
Prioritize rare modules and progression materials over ordinary items when your inventory is limited.
6. How to Escape the Emperor With Your Loot
Reaching the final hangar does not guarantee success. You still need to leave the dungeon and extract from Pendola Pass.
Keep these rules in mind:
Watch the timer. The dungeon warns players when the safe window is closing with around 10 minutes remaining. Leave enough time for the final hangar and extraction.
Use your safe pocket. Secure valuable Amplification Modules and other important items before leaving when possible.
Do not fight every enemy. If your supplies are running low, avoid unnecessary combat.
Prepare your extraction route. The exit returns you to the exterior, where you can call a Ballistic Gondola.
Expect danger outside. The Reckless Transceiver near the Emperor is a convenient extraction option, but its exposed position can leave you vulnerable.
If you are playing with a teammate, communicate before moving through the final rooms. A teammate who can revive you may make the difference between recovering from a mistake and losing the entire run.
7. Is the Fallen Emperor Worth Running?
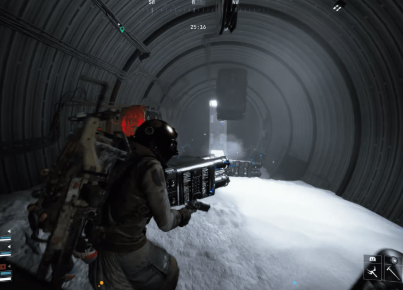
For players who want Amplification Modules, Emperor Modulators, and additional ARC crafting materials, the Fallen Emperor is one of the most important destinations in Frozen Trail. Its changing room order also keeps repeated runs from becoming entirely predictable.
However, the dungeon demands preparation. Players who enter without enough healing, movement tools, or time may lose more than they gain.
The best approach is to unlock the conduit first, enter with a purpose-built loadout, learn the mechanics of each trial, and prioritize high-value loot before the extraction window closes.
Final Thoughts
The ARC Raiders Fallen Emperor dungeon rewards preparation, awareness, and smart decisions under pressure. Unlocking it requires the Emperor Gateway Conduit, while surviving the interior means mastering electrical hazards, moving platforms, crushing walls, and laser traps. Focus on the rare modules and crafting materials you actually need, keep an eye on the clock, and never let one more container cost you an entire successful raid. If you need additional resources to support your progress, explore ARC Raiders Items for sale.