Weekend Drop -














Summary
The Harvester Event creates a great opportunity to farm damage points from Flying ARC enemies in ARC Raiders. With the right ARC Raiders Items setup, Fireworks can deal huge amounts of damage while Barricades and Snitchcan Scanners help control enemy movement. A recent run reached 63,390 points, proving that this strategy has plenty of room for even higher scores.
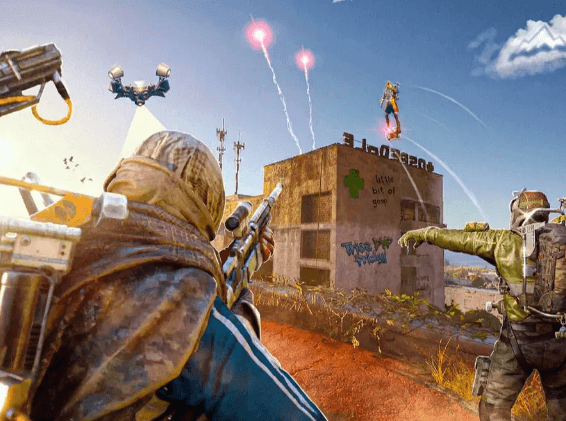
1. Best Loadout for the Flying ARC Trial
Before entering Spaceport, prepare your equipment carefully. The strategy relies on having enough tools to keep the Flying ARC enemies grouped together.
A recommended setup includes:
10 Firework Boxes
11 stacks of Snitchcan Scanners
3 Barricades
6 Lure Grenades
Enough healing and shields to survive mistakes
Fireworks are the most important part of the setup because your goal is to maximize damage while multiple Flying ARC enemies are packed into a small area.
2. Why Spaceport Works So Well
The area underneath the launch towers is ideal for this strategy. The structure creates a relatively enclosed space where Flying ARC enemies can be funneled into a predictable position.
Instead of fighting them across an open area, you want to make their movement as restricted as possible. This gives your Fireworks a much better chance of hitting several targets at once.
The key is patience. Do not activate your Fireworks immediately. First, allow the enemies to gather and position yourself where they have limited angles to attack.
3. How to Use Barricades
Barricades are more important than they initially appear. Their main purpose is not simply to block enemies, but to control the direction from which they approach.
Place a Barricade near the ground and leave enough space for the Flying ARC enemies to continue moving toward you. If you block too much of the area, they may attack or destroy the Barricade instead of entering your Firework zone.
Removing enemy bodies and other objects from the area can also make a noticeable difference. Clutter may prevent you from placing equipment in the ideal position.

4. One Firework vs. Two Fireworks
Early testing suggests that using two Fireworks can dramatically improve damage coverage.
A single Firework can work, but it may leave some enemies outside the explosion area. When two Fireworks are positioned correctly, their coverage overlaps and gives you a much better chance of damaging multiple Flying ARC targets.
The important part is placement. Do not simply drop both Fireworks in the same spot. Use the Barricades to create a funnel, then place the Fireworks where the enemies naturally concentrate.
5. Use Snitchcan Scanners to Keep the Pressure On
Snitchcan Scanners can help maintain the encounter and bring additional targets into the area. Since the strategy depends on having several enemies available for Firework damage, managing your scanners efficiently is important.
However, do not throw everything at once. Watch the enemy movement and use the scanners when you need to refresh the encounter.
This also gives you more flexibility if your first Firework placement does not produce enough damage.
6. The Biggest Mistake: Getting Too Greedy
High scores are tempting, but survival still matters.
During the run, it is easy to stay for one more Firework or attempt another melee kill while your health and shields are already low. This can quickly turn a successful trial into a failed extraction.
Keep your cloak ready for emergencies, maintain cover behind the Barricades, and always know where your extraction route is. If your shield is close to breaking, prioritize survival over a few extra points.
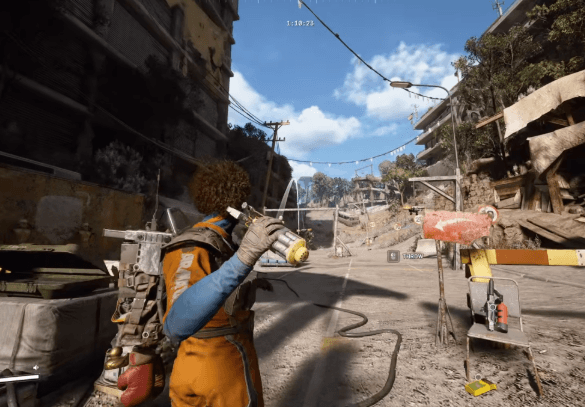
7. How to Push Toward 100K Points
A score around 63K shows that the method is already effective, but the potential ceiling appears much higher.
To maximize your score:
Funnel as many Flying ARC enemies as possible into one area.
Use Barricades to restrict their movement.
Place Fireworks before the enemies fully commit to the attack.
Test two-Firework setups for better damage coverage.
Use Snitchcan Scanners to maintain enemy pressure.
Avoid wasting Fireworks on poorly positioned targets.
Leave enough resources for the final escape.
The biggest improvement comes from better Firework placement and enemy grouping, rather than simply bringing more equipment.
Final Thoughts
The Spaceport Harvester Event provides an excellent environment for experimenting with Flying ARC damage strategies. Fireworks become extremely powerful when enemies are forced into a compact area, while Barricades and Snitchcan Scanners give you the control needed to repeat the setup. With cleaner positioning, better timing, and less greed, 100K damage points looks like a realistic target for players willing to optimize the route or buy ARC Raiders Items to prepare their setup.
![[Expedition ⑤ Material] Foundation 1~4](https://assets.mmoexp.com/images/202607/18319d795653d1162748a8e5f10e1d3655a23dc7.webp)
![[Nomadic Envoys Services] Stash slots +24](https://assets.mmoexp.com/images/202605/7cc0b5e15731160f00918a5748eccd12f26fe3a5.webp)
![[BluePrint] Extended Barrel III](https://assets.mmoexp.com/images/202605/8ae025bf6fe8359742ebe88275df0051724ab65c.jpg)