Weekend Drop -













Ascension is playable again through a fan-made custom game menu on PC, sitting alongside Moon, Kino der Toten, Der Riese, and other classic Zombies maps that Treyarch has not officially brought back together. Players searching for how power, the three landers, and Pack-a-Punch work on Ascension, and which perks matter most against the monkeys, will find the core loop broken down here from a real custom-game run. The map runs with Black Ops 2 weapons and HUD elements layered on top of its original Black Ops 1 design. This is written for returning Black Ops 1 veterans and newer players trying Ascension for the first time in this custom format.
Why Ascension Still Matters
Ascension is credited as the first map to introduce PhD Flopper, and the player in this run also recalls Stamina-Up arriving on the same map, though that second detail is offered as a memory rather than a confirmed fact. It originally shipped as Black Ops 1 DLC before later appearing in Zombie Chronicles. Running it here with Black Ops 2 weapons, interface elements, and Black Ops 2 Bot Lobbies gives it a different feel while keeping the original layout intact. This matters most to longtime fans who already know the map and want to see it in a new engine rather than relearn it from scratch.
Powering The Map And Landers
Turning on power first is the priority, since it unlocks the Mystery Box, most perk machines, and the Pack-a-Punch room. After power, three separate landers need to be activated, each tied to a beacon that has to be triggered before the lander can be called. Completing all three landers is what opens the rocket sequence leading to Pack-a-Punch. New players should treat each lander as a checkpoint and avoid opening doors that aren't needed to reach it, since extra doors only give monkeys more paths in.
Perk Priorities That Matter
Juggernog and Mule Kick are treated as the two most important perks in this run, since losing either one removes real survivability or an entire weapon slot. PhD Flopper and Double Tap get picked up opportunistically once a door is already open nearby, rather than being sought out right away. Quick Revive is grabbed early mainly because it sits close to spawn. The table below compares how each perk from this run is prioritized.
Perk | Why It Matters | Priority | Monkey Risk |
Juggernog | Core survivability | High | Stolen if unguarded |
Mule Kick | Adds a third weapon | High | Losing it drops the extra weapon |
PhD Flopper | First introduced on this map | Medium | Lost if door stays open |
Double Tap | Grabbed when convenient | Medium | Lost if room unguarded |
Quick Revive | Close to spawn, early pickup | Medium | Can be stolen by monkeys |
Stamina-Up | Reportedly added with PhD Flopper | Situational | Lost if monkeys reach it |
Jug and Mule Kick clearly outrank the rest, since losing them erases the most progress in a single hit. Players chasing high rounds should lock those two down before spreading points toward the others, especially when buying cheap BO2 Bot Lobbies.
Monkeys Are The Real Threat
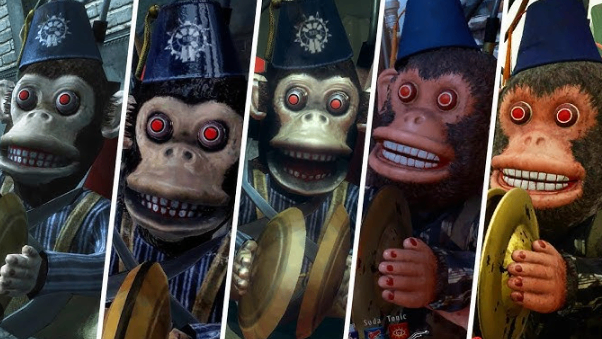
The monkeys on Ascension can steal an active perk or a Pack-a-Punched weapon once they reach it, which is the biggest danger in this run. At one point, they sit on Mule Kick and force the player to give up a Pack-a-Punched Galil, and later they threaten Juggernog until the player fights back to the machine. The player also mentions believing that killing every monkey in a round without letting one touch a perk grants a bonus perk, though this is stated as a recollection rather than a confirmed rule. Anyone holding a full perk set on high rounds needs a chokepoint plan ready before monkey rounds begin.
Reaching Pack-a-Punch
Pack-a-Punch on Ascension opens once all three landers are activated and the rocket sequence finishes, rather than through a separate side task. In this run, the Galil is chosen as the first weapon to upgrade because it's the player's preferred assault rifle in the series. Deciding which weapon to Pack-a-Punch before the rocket finishes matters, since points get tighter once the map is fully open.
Which Weapon Should Get Pack-a-Punched First?
There's no single right answer, but this run favors the Galil for personal preference rather than any stated performance edge. Players without a strong favorite should pick whichever weapon they're already landing shots with consistently on the map.
What Happens If Monkeys Steal A Perk?
The perk becomes unavailable until it's bought back at its machine, and a lost Pack-a-Punched weapon has to be re-earned through the Mystery Box or a wall buy. That's the main reason guarding at least one perk room matters once monkeys start spawning.
Do You Need Every Door Open?
No, opening every door isn't necessary and adds risk, since each one gives monkeys another path to reach perks and weapons. Power is really only needed to reach the Mystery Box, Pack-a-Punch, and the perk machines a player still wants.
Quick Tips
· Turn on power before spending points on doors that aren't needed yet.
· Guard Juggernog and Mule Kick specifically once monkey rounds start.
· Save the last zombie of a round to finish lander and door tasks safely.
· Pick a weapon to Pack-a-Punch before the rocket sequence completes.
· Watch ammo closely, since running low comes up repeatedly in this run.
Who Benefits Most?
Returning players get a direct refresher on Ascension's power, lander, and Pack-a-Punch sequence without relearning the map from scratch. Solo players get the most out of the door- and perk-guarding advice, since fewer players means fewer chokepoints can be covered against monkeys. Advanced players chasing high rounds benefit most from the perk-priority breakdown and the reminder to limit unnecessary door openings.
Ascension's return in this custom format keeps its original risks intact, especially around monkeys and perk loss, so the safest path is prioritizing power, Juggernog, and Mule Kick before chasing every door or perk at once. That approach holds up a run longer than trying to unlock the whole map immediately.