
COD Black Ops 7 Cursed Ashes Zombies Map: Zero-Failure Top-Tier Guide
Always dying in the early rounds of the Cursed Ashes Zombies map in Black Ops 7, or getting stuck on Easter eggs and unable to defeat the final boss? This top-tier setup, tested in hundreds of rounds, provides a complete walkthrough, from primary and secondary weapons to Gumballs, skills, and tactics. Whether you're soloing, clearing Easter eggs, or pushing through hundreds of rounds in a team, you'll be rock-solid. Want to practice your controls beforehand and avoid failures? Purchase CoD Black Ops 7 Bot Lobbies from MMOexp and practice in the COD AI lobby for a risk-free, smooth playthrough experience.
I. Choosing the Right Primary Weapon is Half the Battle! M15 MOD 0 is the Answer for This Map
The core advantage of M15 MOD 0 lies in its top-tier primary weapon for this zombie map. It has an extremely low skill ceiling, and its damage is more than sufficient even in the late game. It can also be equipped with crucial under-attachments needed for boss battles, making it an all-around choice for clearing mobs, fighting bosses, and clearing Easter eggs.
Suitable for: New players just starting out on this zombie map who are frequently dying due to randomly choosing weapons.
II. 7 Precisely Enhanced Attachments for Maximum Mob Clearing and Boss Fighting
This is the optimal attachment combination tested and proven: an integrated suppressor for increased range and extra salvage items, a 16.5-inch fused barrel for maximum bullet velocity, an M335-X with a concealed underbarrel for smoke cover and repair device, a rear-mounted flip magazine for faster reloads, an hex grip for improved mobility, a telescopic stock for increased movement speed, and 5.56 overpressure ammunition for increased damage. Each attachment precisely serves the practical needs of the zombie map.
Suitable for: Advanced players who have obtained the M15 with MOD 0 but don't know how to configure attachments.
III. Choose this as your secondary weapon and you'll be instantly defeated! The Undead Fluid Gauntlets are a monster-clearing godsend.
This section highlights the core logic of secondary weapon selection: the Undead Fluid Gauntlets are the must-have secondary weapon for this map. They deal high damage and provide life steal, making them ideal for clearing most regular zombie battles outside of boss fight areas, significantly reducing your survival pressure.
Suitable for: Players who frequently die from being surrounded by regular zombies.
IV. Choosing the Right Gum for a Start
This section provides optimal gum combinations for different scenarios. For solo boss battles, choose Energy Barrel, Shield Enhancement, and Alcoholic Drink. For team battles, use the Near-Death Experience option. Choose the Gift Card at the start to get 30,000 Essence, allowing you to unlock doors and upgrade weapons in one go, without having to slowly accumulate resources in the early game.
Suitable for: Players unsure how to choose gum or those with slow early-game development.
V. Maximize Skill Upgrades: Withstand Zombie Hordes Even in High-Level Rounds
This section outlines essential core skills and optimal upgrade directions. Must-have skills like Mighty Nog, Quick Resurrection, and Speed Cola are all indispensable. Combine them with corresponding upgrade effects; broken armor restores health, and resurrection grants brief invincibility, preventing immediate defeat even from mistakes.
Suitable for: Players who frequently get overwhelmed and killed by zombies in high-level rounds.
VI. Tactics + Battlefield Upgrades: These are the Last Resort for Survival
Key Points: This section highlights the core uses of the Cymbal Monkey and Ether Shield. The Cymbal Monkey distracts zombies, crucial for repairing devices and dodging boss mechanics; the Ether Shield is an absolute lifesaver, rendering all enemies immune to your attacks. It provides teleportation in solo play and group invisibility in teams, and two charges can directly determine the outcome of a boss battle.
Suitable for: Players who frequently die at crucial stages of boss battles or get stuck on Easter egg progression.
Want to master the entire easter egg walkthrough without any stress or mishaps? Head to MMOexp cheap CoD BO7 Bot Lobbies bot room for optimized gameplay, refining every detail to perfection.
Useful Tips
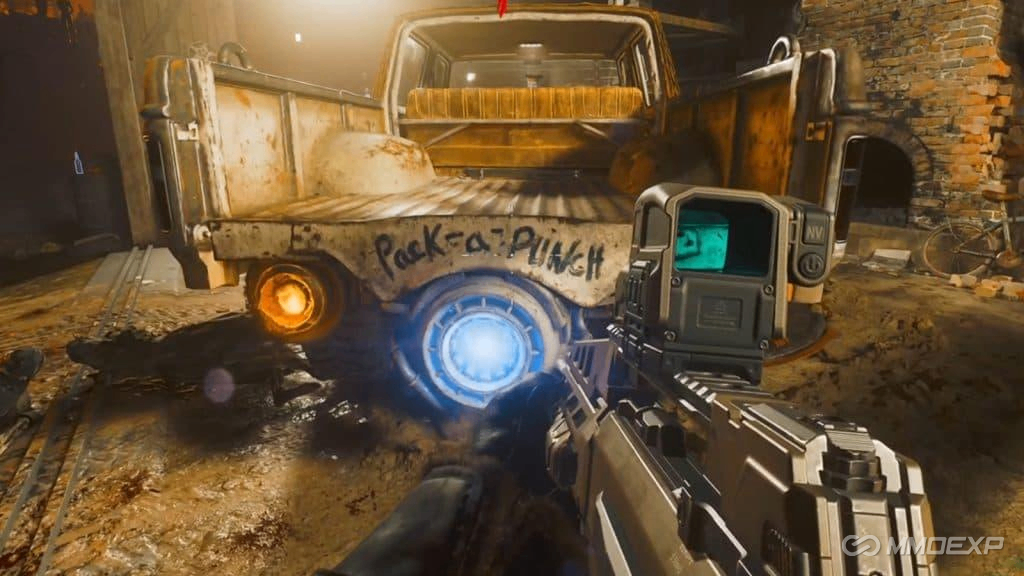
After getting the gift card gum in the first round, prioritize opening the door and heading straight to the upgrade machine. Max out your main weapon first; this will triple your monster-clearing efficiency.
When repairing Old Tethys during the boss fight, throw the cymbal monkey to distract the zombies, then activate the smoke grenade. With this double cover, you'll be almost uninterrupted.
Don't use the Ether Shield carelessly. Save it for crucial moments like when the boss unleashes a full-screen explosion or when you're surrounded by zombies. This will maximize its survivability.