

![[Carry Run] 100K Obducite (Need to pick by yourself)](https://assets.mmoexp.com/images/202603/f0a58fe810e59a7f689a15954c2507518b5cc3f5.png)
Summary
You've followed the guides and maxed out your stats, yet you're still stuck at Torment difficulty—before you blame your gear, the real problem might be the damage numbers you've been believing in. Countless Season 14 players have been misled by stat panels, wasting valuable resources they could have saved or even spent on cheap Diablo 4 Gold to acquire better fundamentals, and mastering these six points could be your key to the top.
1. Distinguish Panel Damage Values
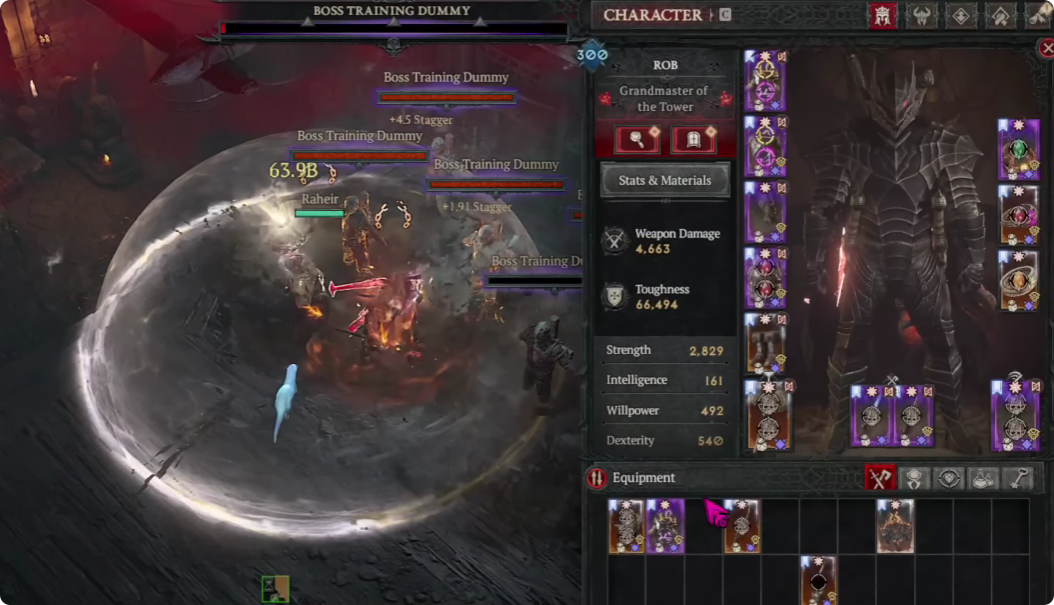
Here's an uncomfortable truth: the critical hit damage values displayed on your character stat panel are miscalculated and inaccurate. Attack speed bonuses often show negative values, making them equally unreliable. Neither reflects your character's actual damage output in real combat.
Multiple player tests have confirmed this: two characters with vastly different stats on their stat panels may deal identical damage in actual combat. The panel lies to you.
The Solution: Ignore the panel statistics entirely. Instead, focus on the actual affix values on your Diablo 4 items. Manually sum them up to evaluate the proportion of each damage type. This gives you an accurate picture of what your character is actually capable of.
2. Distinguish Damage Types
By the endgame of Season 14, misinterpreting damage types is a mistake you absolutely cannot afford. Your entire damage calculation hinges on understanding this distinction.
The Core Difference:
Damage bonuses marked with a "+" are Additive Damage
Damage bonuses marked with an "×" are Multiplicative Damage
How They Work Together:
Additive Damage comes from a wide range of sources, including most nodes on the Paragon Board and some equipment affixes. All Additive Damage is pooled into a single base damage pool, added to your weapon damage, and then amplified sequentially by various Multiplicative Damage types.
Multiplicative Damage includes critical hit damage, Vulnerable Damage, and specific elemental damage, among others. Each type of Multiplicative Damage is calculated independently, and their multiplication results in a significant amplification effect. This is where your real damage scaling happens.
Slot Efficiency Matters:
Different equipment slots have different maximum bonuses for the same damage type. For example, gloves have a maximum of 20% total damage, while Fire Damage or Physical Damage can reach 24%. Stacking specific elemental types on appropriate slots is often more efficient than spreading bonuses randomly.
The Best Strategy: Develop a balanced approach to various sources of Multiplicative Damage, rather than concentrating all resources on a single stat like critical strike damage. Completely abandoning certain multiplicative damage types—such as Vulnerable Damage—will result in a significant loss of output potential.
3. Select Correct Aspects
The power level of your Diablo 4 items directly affects the effectiveness of Aspect effects. This is a detail many players overlook.
Item Power Matters:
An 850-power item cannot support a full roll of Aspect values. Even for the same Aspect, the displayed percentage on an 850-power item will be lower than on a higher-power item. What may seem like a minor difference of 3% to 4% can have a considerable impact when accumulated across multiple Aspects.
Evaluate Conditional Aspect Coverage:
For Conditional Aspects, you need to evaluate their actual coverage in real combat—not just their theoretical maximum.
Take the Aspect of Limitless Rage as an example. It requires 350 Fury to trigger. Even with extremely fast Fury generation, the actual coverage rate is usually no more than three-quarters, making its actual benefit far lower than the theoretical value. If your Fury generation is insufficient, the benefit will be reduced even further.
The same principle applies to other Aspects that require enemies to be in a specific state to trigger. Their actual coverage must be evaluated based on your specific playstyle and operational rhythm. Don't blindly follow guides; test and adjust based on how you actually play.
4. Build the Paragon Board in Order
When building your Paragon Board, the correct order is not to fill all nodes one board at a time. This common mistake wastes points and delays your power spikes.
Step One: Unlock All Boards First
Unlock all available boards with the fewest points possible. Activate all Glyph slots and Legendary nodes on each board, taking only the shortest path to unlock them. This gives you access to every major power source before investing heavily in filler nodes.
Step Two: Prioritize Defensive Nodes
After completing the global board layout, your second step is to comprehensively select defensive nodes. This includes Maximum Life, Resistance to All Elements, and Armor. Survival is the foundation of endgame progression.
Step Three: Fill Excess Damage Nodes Last
Finally, go back and fill in any excess damage nodes (sources of Additive Damage). Even if your character has reached Paragon 200 or even Paragon 250, there may still be unfilled Additive Damage nodes. These nodes are crucial for boosting your build's output in the endgame and cannot be ignored.
5. Upgrade Glyph Levels Strategically
Your Glyph upgrades have key milestones that dramatically affect your power level. Understanding these breakpoints is essential.
Critical Milestones:
Level 25: Increases the area of effect, covering more nodes to activate bonus effects
Level 51: Unlocks Legendary bonus, which is multiplicative damage and has a significant impact on output
The Trap:
Many players mistakenly believe their Glyph is "completed" at level 51 and stop progressing further. This is a critical error.
Glyphs Can Reach Level 150:
Your Glyphs can continue to be upgraded far beyond level 51. For example, with Wrath, upgrading from level 51 to 150 more than doubles its Multiplicative Damage bonus.
When tackling higher difficulty content, low-level Glyphs will become a bottleneck. Therefore, repeatedly challenging Pits suitable for your level is essential—even with a higher failure rate, it's a necessary process that will steadily increase your Glyph level. There is no shortcut; consistent effort is the only way.
6. Build Defensive Systems Properly
Your build's survivability depends on the combined effect of multiple Damage Reduction sources, not just one or two. This is where many endgame characters fall apart.
The Fundamentals:
Searching for and selecting all Armor, Life, and Resistance nodes on the Paragon Board is a good start, but this alone is far from sufficient. You need layers of defense.
Special Items Are Not Enough:
While some special items, such as Melted Heart of Selig, provide huge Damage Reductions, they are not a complete solution. If you lack other Damage Reduction sources, your character will still struggle to survive in endgame content.
Sacrifice Offense for Defense When Necessary:
When your build guide requires certain Aspects or gear that cause you to die frequently, you should decisively replace them with defensive options. Survival is essential for dealing damage—a dead character deals zero DPS.
Look for Damage Reduction passives in the skill tree as well. Every layer of defense you add compounds with the others to create a survivable character capable of pushing higher difficulties.
Final Thoughts
Season 14's endgame demands more than just following guides blindly—the stat panel misleads, damage types must be distinguished, Aspects need real-world evaluation, the Paragon Board requires correct ordering, Glyphs demand continuous investment, and defensive systems cannot be neglected. By applying these six principles, you can break through any difficulty wall, because the difference between being stuck and dominating isn't always better gear—it's often better understanding. If you're short on resources, check Diablo 4 Gold for sale at MMOEXP to save time and focus on mastering these mechanics.