Weekend Drop -
















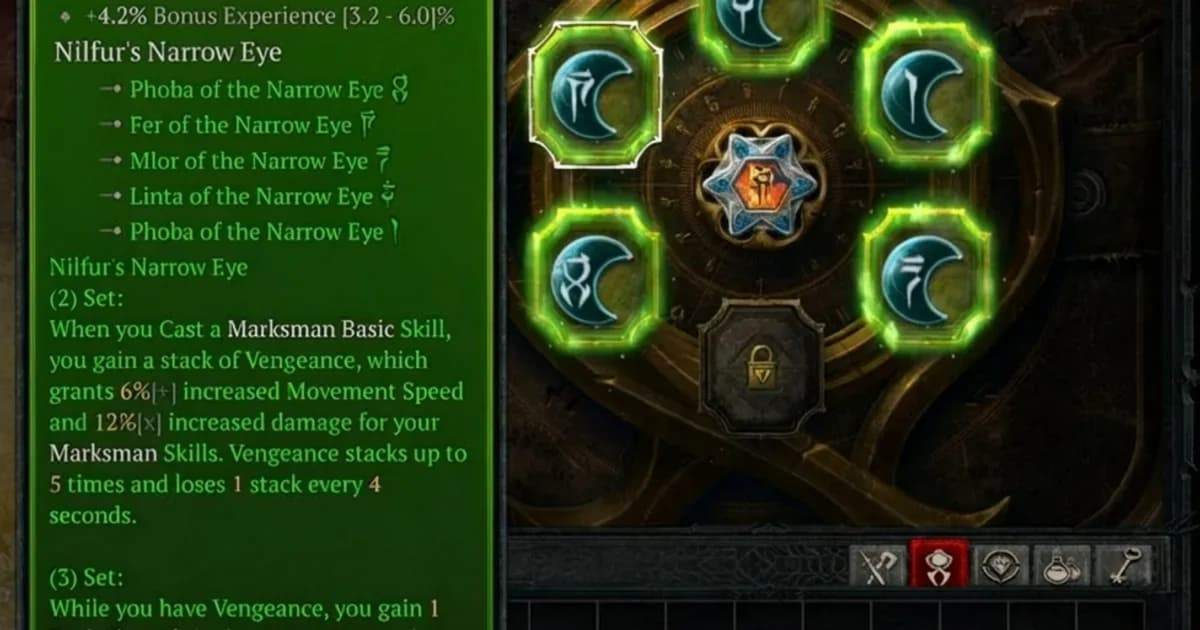
In Diablo 4 Season 16, one matching Charm plus one corresponding Horadric jewelry item can activate a two-piece Talisman bonus. Diamond Mind reduces set requirements by one but still requires at least two Charms, so it cannot activate that bonus with a single Charm on its own. A replacement is worth considering when the released Charm space gives you more than the displaced jewelry and Seal provide. Golden Epiphany still has a separate purpose: permitting multiple Unique Charms.
The 3.3.0 PTR opens October 27, 2026, at 10 a.m. PDT. Before testing begins, the useful comparison is how many Charms a layout saves, what fits into those sockets, and which equipment powers it costs. Three matching jewelry pieces offer the largest proposed saving, but their independent stacking remains unconfirmed.
Choose Your First Equipment Swap
If your build depends on multiple Unique Charms, keep Golden Epiphany. If you mainly use Diamond Mind to reach set thresholds, test matching Horadric Jewelry before replacing your Seal. When comparing Diablo 4 items for your build, prioritize the complete loadout over the number of active bonuses.
Your Current Situation | First Action | What Would Justify a Change |
You use multiple Unique Charms | Keep Golden Epiphany | A different layout must still permit every required Unique Charm |
Diamond Mind mainly completes set thresholds | Test one matching Horadric jewelry item while keeping the Seal | A comparison shows that another Seal preserves required bonuses and improves the loadout |
A ring or amulet supplies an essential effect | Keep that item; inspect another slot | You can replace a different piece without disrupting the rotation |
You have replaceable jewelry and need Charm space | Start with one jewelry substitution | The released socket holds something useful and outweighs lost equipment stats |
You want three Horadric jewelry pieces | Confirm independent stacking before committing | All matching contributions work and the gain covers both rings and the amulet |
In D4, jewelry adds one count only to its specified set. A jewelry affix for Set A does not increase Set B's count. Horadric armor and weapons instead add effects conditioned on the specified set's two-piece bonus; inspect the actual affix before counting it as a benefit.
What Each Equipment Swap Gains
For an existing Diablo IV Diamond Mind user, start with the working five-piece route of four matching Charms. Compare keeping and replacing the Seal with the same Horadric jewelry equipped. Here, a neutral Seal means one without set-requirement reduction; a replacement must support the intended socket capacity and Unique Charms.
Starting Layout | Test Layout | Potential Gain | Condition |
Diamond Mind, four set Charms, existing jewelry | Keep Diamond Mind and four Charms; add one matching jewelry item | Test removing one Charm after equipping matching jewelry. Keep the change only if the five-piece bonus remains active. | Combined behavior needs PTR testing; no extra saving assumed |
Same Diamond Mind baseline | Neutral Seal, four matching Charms and one matching jewelry item | Try another Seal's useful effects while preserving a proposed five-piece count | Follows the +1 rule; verify activation; no Charm saving versus baseline |
Same Diamond Mind baseline | Neutral Seal, two matching Charms and three matching jewelry pieces | Two released sockets at equal capacity | Requires independent jewelry stacking and a suitable replacement Seal |
Neutral Seal, five set Charms | Same Seal, two matching Charms and three matching jewelry pieces | Three released sockets | Requires independent jewelry stacking |
Neutral Seal, two set Charms | Same Seal, one matching Charm and one matching jewelry item | One released socket | Explicitly confirmed interaction |
An existing Diamond Mind user would save two Charms, not three. That figure applies to the proposed three-jewelry layout at equal socket capacity. The three-socket figure uses the different five-Charm starting point.
To isolate the Seal's impact, first compare Diamond Mind and a neutral Seal with the same four Charms and matching jewelry equipped. Then test whether Diamond Mind allows you to remove an additional Charm without losing the five-piece bonus. If both retain every required bonus, compare their affixes and actual combat performance.
Account for the opportunity cost of replacing your existing jewelry in both layouts. A ring that breaks resource sustain can make either new layout worse than your original. Removed Charms also lose their individual affixes, so an empty socket alone is not a completed upgrade.
Necromancer Setups to Test First
For Diablo 4 players already using Radamant's Desecration, the PTR notes give this test a concrete purpose. Its two-piece damage bonus rises from 50%[x] to 70%[x], while its three-piece damage reduction rises from 15% to 30%. These are the set's listed effects, not guaranteed increases to every source of character damage or permanent damage reduction.
The 30% Damage Reduction requires forming or consuming a Corpse and lasts 6 seconds. Check whether your build can maintain this effect during combat. The PTR also fixes a bug that prevented this reduction from applying correctly when Corpses were formed.
Start with your working Corpse Explosion setup using this set. Keep its skills and essential equipment fixed, and target a replaceable ring for the matching Horadric affix if one is available. The two alternatives below use a neutral Seal and compare equipment within the same PTR build. If your existing build needs the five-piece bonus, preserve it and use these as separate test loadouts.
Goal | Before the Swap | After the Swap | Intended Benefit |
Retain the two-piece effect | Two Radamant Charms and your existing ring | One Radamant Charm and a matching Horadric ring | Keep the two-piece effect and release one socket |
Add the three-piece defense | Two Radamant Charms and your existing ring | Keep both Charms and add the matching Horadric ring | Reach a proposed count of three for the 30% reduction effect |
The first option suits a player who already survives comfortably and has another useful, permitted Charm ready for the socket. The second suits a player whose damage is adequate but whose run ends to incoming damage. It uses the ring's count to pursue defense without removing either set Charm.
The first interaction is confirmed generally; the three-piece extension follows the announced +1 rule and needs activation checked. If you already use three Radamant Charms with a neutral Seal, a third comparison is two Charms plus the ring: preserve the three-piece effect while releasing one socket.
Account for the ring's lost affixes and the removed Charm's stats. If your original Diamond Mind already activates the three-piece threshold with two Charms, that same jewelry swap offers no automatic socket saving. Evaluate the combined Seal interaction separately.
Use the Released Charm Space
For D4's confirmed starter, one matching Charm plus jewelry replaces a two-Charm commitment. Before swapping Diablo 4 items to free a socket, have a useful regular Charm or a permitted Unique Charm ready to fill it.
Keep the second set Charm if its higher threshold is more useful than the alternative, as in the Necromancer defensive example.
If three matching jewelry bonuses stack independently, the two-Charm five-piece proposal deserves a test when both rings and the amulet are replaceable. Two ordinary Charms could then establish a compatible secondary pair, subject to socket capacity. Three different set identities on the jewelry cannot supply +3 to the main set.
A smaller change can also finish a secondary pair: four main-set Charms plus one matching jewelry item imply a five-piece count with a neutral Seal, releasing one socket relative to five Charms. That completes a secondary two-piece only if another matching Charm is already equipped. These higher-threshold layouts follow the announced count rule and need activation checked.
For dual-set plans, choose a second effect that supports your current rotation or a specific defense you lack. Avoid committing to an exact dual-five-piece arrangement until its counting rules and both sets' usefulness are established.
For Storm Druids, compare Storm Shepherd's two-piece Storm Skill support with its five-piece scaling from Spirit at cast before adding another set.
PTR Checks and Revert Rules
Use a Seasonal test character with Talisman access and keep a working baseline. Find Mrak beside the main Waypoint in a major city. Use his PTR Boosts to select Grant Talisman Items and Grant Seasonal Items (Horadric Items). In Diablo IV's PTR, test the count first, then the combat result:
Equip a neutral Seal, one Charm, and matching jewelry. Success means the two-piece effect activates. If it does not, restore the second Charm and check set names and requirements before proceeding.
Add matching jewelry individually. Continue toward the two-Charm five-piece layout only if each piece contributes independently. If the count stops increasing, restore enough Charms to maintain your main bonus; abandon that stacking-dependent layout.
Change only the Seal. Record active thresholds, usable sockets, and Unique Charm permissions. Keep Diamond Mind if removing it loses a required bonus; retain Golden Epiphany if the intended Unique Charm layout needs it.
Compare both loadouts in the same activity and difficulty with the same skills. Check damage consistency, resource sustain, and survival across repeated attempts. Restore the baseline if the new layout breaks your rotation or loses more performance than its added effects return.
For Radamant's defensive proposal, inspect the three-piece effect during normal corpse generation and consumption. A higher displayed set count without the intended combat effect is a failed comparison. Save the exact items and PTR build number when reporting unexpected behavior.