If you are searching for a Warlock build that delivers top-tier clear speed, high mobility, and surprisingly serious single-target damage, this Abyss + Miasma Chains setup deserves your attention. It doesn't rely on a single gimmick—instead, it overwhelms enemies through layered area damage, stacking DoTs, and relentless positioning. And if you're looking to gear up faster, you can always buy D2R Ladder Items to skip the grind and jump straight into endgame content.
The core strategy is simple but effective:
· Use Abyss for wide-area persistent damage and to group up monsters.
· Stack Miasma Chains on high-health targets for burst pressure.
· Leverage Bind Demon and Defiler for extra bodies and crowd control.
· Hit the 125 FCR breakpoint for lightning-fast teleports and spell cycles.
· Keep your mercenary with Meditation + Prayer + Cleanse for sustain and survivability.
· This build shines in high-density zones like the Pit, Stony Tombs, Chaos Sanctuary, River of Flame, Tower, Black Marsh, and especially Terror Zones—even on players 8 difficulty.
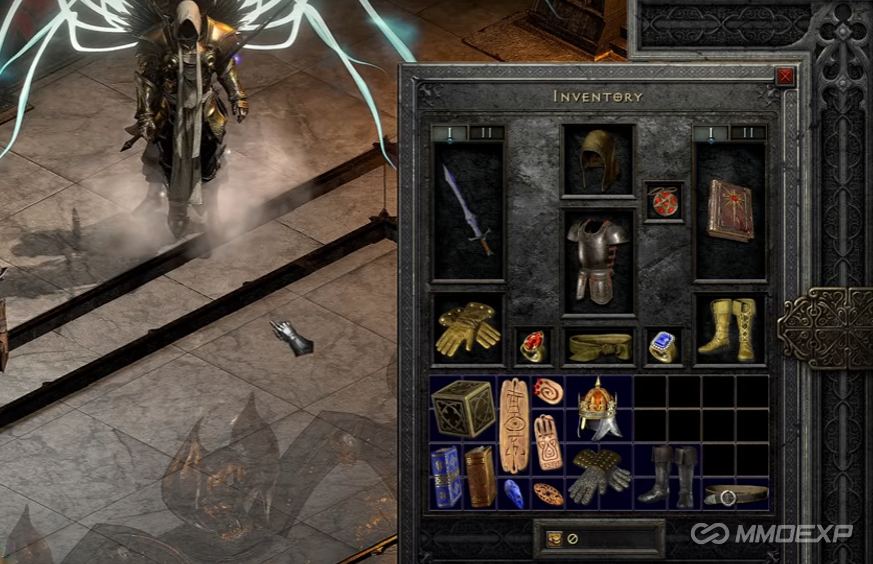
1. Build Identity: Why This Abyss Warlock Dominates
This setup excels at three things at once: AoE suppression, sustained DoT pressure, and kiting efficiency.
Key Strengths
· Exceptional clear speed – Abyss provides excellent area coverage and, with smart grouping, melts dense packs.
· Strong boss damage – Miasma Chains stack on single targets, making short work of act bosses, super-uniques, and TZ elites.
· Built-in control – Sigil Lethargy slows enemies, while Bind Demon and Defiler add meat shields and distractions.
· Silky smooth 125 FCR – Faster teleports and cast animations mean you dictate the pace in every map.
2. Skill Point Allocation
This build is built around two main damage skills, with leftover points invested into survivability and summons.
Primary Damage (Max first)
· Miasma Bolt – max
· Miasma Chain – max
· Abyss – max
· Utility Skills (1 point each)
· Enhance Entropy – 1 point (classic one-point wonder; huge value)
· Sigil Lethargy – 1 point (slow and control; helps with kiting and chasing)
Summon Support
· Bind Demon – max (more durable minions)
· Demonic Mastery – invest enough to summon 3 demons
· Defiler – at least 1 point; aim for 2 Defilers permanently. Even a single point here gives a noticeable power spike.
Remaining Points
· Dump all extra points into Blood Oath – this adds much-needed physical damage reduction, making your Warlock noticeably tankier in high-density content.
· Elders Tree
· Skip it entirely.
3. Gear Strategy – 125 FCR Is the Goal
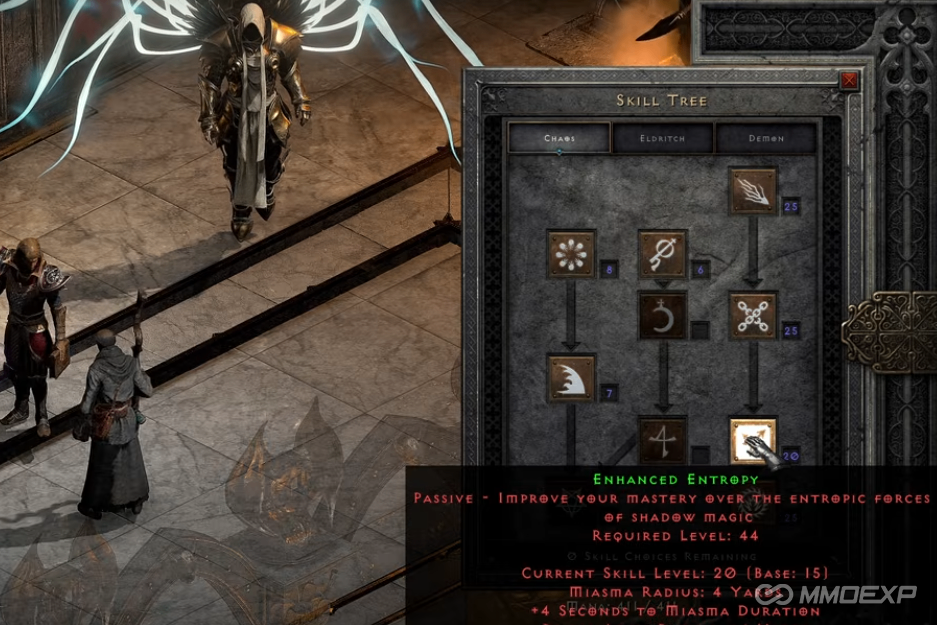
Every gear choice revolves around hitting 125% Faster Cast Rate, capping resistances, and adding skill levels.
Weapon
· Heart of the Oak – Best-in-slot for this build. Excellent all-round stats.
· Until you have HotO, use any caster weapon with FCR and resistances.
Helm
· Harlequin Crest (Shako) – Still the king. If you need resistances, socket it with a resist jewel or an Um rune.
Amulet
· Mara's Kaleidoscope – Adds skills and huge resistances. Perfect for this setup.
Armor
· Enigma – Mandatory for mobility. The teleport and strength bonuses are irreplaceable.
· Good alternatives: Authority (if available), Warlock runeword, or Hustle if you want even more movement speed and a different play feel.
Gloves
· Trang-Oul's Claws – The FCR and cold resistance help push you toward the 125 breakpoint.
Rings
· Two FCR rings – Required to hit the 125 FCR cap. Prioritize resistances and life here as well.
Belt
· Arachnid Mesh – The standard caster belt. +1 skill and 20% FCR are non-negotiable.
Boots
· Wraith Step – +1 to Chaos skills fits perfectly with this setup.
Charms
· Torch + Annihilus – Mandatory.
· If you don't have many skill grand charms, prioritise resistance and life small charms instead. This build performs well even without a full skiller inventory.
4. Why 125 FCR Matters for Gameplay
Hitting 125 FCR isn't just about reaching a number—it completely changes how the build handles.
What 125 FCR gives you:
· Faster teleport travel
· Smoother spell rotation
· Quicker repositioning against dangerous packs
· Easier hit-and-run tactics, especially against ranged mobs or extra-fast elites
· In practice, you’ll feel this as:
· Faster map entry
· Quicker mob grouping
· Shorter combat cycles
· Safer escapes when things get dicey
· This build rewards active play—you are in control of the pace, not the monsters.
5. Mercenary Setup – The Real Sustain Engine
Your mercenary isn't just a sidekick—he's your fuel tank. This setup ensures you never run out of mana or health and keeps curses/poison under control.
Weapon
· Insight provides Meditation aura, solving all mana issues so you can spam Abyss and Chains endlessly.
Armor
· Skin of the Flayed One – Provides life leech. Socket it with a resist jewel or Ral/Ort to fix elemental holes.
Helm
· Cure – Provides a cleansing aura, removing poison and curses quickly. This dramatically improves comfort during long farming sessions.
Aura Synergy
· Prayer (from mercenary base) – Interacts with both Meditation and Cleansing, granting additional passive life regen.
Net result:
· Infinite mana
· Steady HP recovery
· Immunity-tier curse/poison mitigation
· Near-zero downtime between packs
6. Playstyle Rotation – How to Farm Efficiently
This build is not a "stand still and tank" playstyle. It's a fluid dance of teleporting, casting, and repositioning.
Standard Mapping Rotation:
1. Teleport into a pack using high FCR.
2. Drop Abyss to create a damage zone and begin grouping enemies.
3. Apply Death Mark to priority targets or leftover monsters.
4. If a dangerous mob is still alive, cast Sigil Lethargy to slow it down.
5. Against elites or bosses, pre-stack Miasma Chains.
6. Let your summons and mercenaries hold the frontline while you maintain pressure from range.
7. Best Farming Locations

This build has excellent map coverage and performs well in almost any high-density area.
Recommended Zones:
· Pit (Tamoe Highland)
· Stony Tombs (Rocky Waste)
· Chaos Sanctuary
· River of Flame
· Black Marsh
· Tower (Countess runs)
· All Terror Zones
· Why these zones?
· Dense monster clusters
· Narrow corridors that funnel enemies into the Abyss
· High mix of trash mobs and elites—exactly what this build excels at
8. Boss Fighting Strategy

Against act bosses and high-HP targets, this build shifts from "AoE clear" to "pre-stack and detonate."
Approach:
· Pre-cast Miasma Chains before the boss becomes active
· Stack Chains to 5 layers as quickly as possible
· Keep Abyss active to maintain passive damage and clear any adds
· Let your summons and mercenaries soak hits while you reposition and refresh Chains
Key point:
5-stack Miasma Chains deal significant damage over time and are especially potent against boss-type enemies, waves, and super-uniques.
9. Build Strengths and Weaknesses
Pros
· Fast, clear speed across all zones
· High mobility with 125 FCR
· Great boss damage for a DoT build
· Tanky thanks to Blood Oath and mercenary sustain
· Smooth gameplay loop
· Cons
· Gear-dependent for FCR and resistance balancing
· Requires active positioning – not a "face-tank" build
· Slower startup if you're missing core items (HotO, Enigma, etc.)
10. Who Should Play This Build?
This Abyss Warlock is ideal for players who:
· Enjoy fast-paced, high-action farming
· Prefer caster builds with AoE control
· Want a build that can handle both clear and bosses
· Like running Terror Zones efficiently
· Are you looking for a fresh, high-end build in D2R that feels powerful and fluid
Final Verdict
This is a legitimate, high-performance Warlock build that handles everything D2R throws at you—dense mobs, elite packs, act bosses, and Terror Zones—all while maintaining 125 FCR mobility and mercenary-driven sustain. The gameplay loop is rewarding, the power ceiling is high, and the build scales well with investment. If you're ready to invest in the gear and learn the rhythm—or simply prefer to buy D2R Items to accelerate your progression—this Abyss + Miasma Chains Warlock will easily become one of your most reliable endgame farmers.