Weekend Drop -













Summary
If you want a high-pressure Stamina Dragonknight PvP build for Imperial City and Battlegrounds, this setup focuses on sustained pressure, explosive burst, strong defenses, and reliable healing. Its core strength comes from combining Blood Spawn with Take Flight to create repeated windows where your damage becomes significantly stronger.
The build is designed to stay aggressive while remaining durable enough to survive extended fights. To optimize it faster, buy The Elder Scrolls Online Items and get the gear you need.
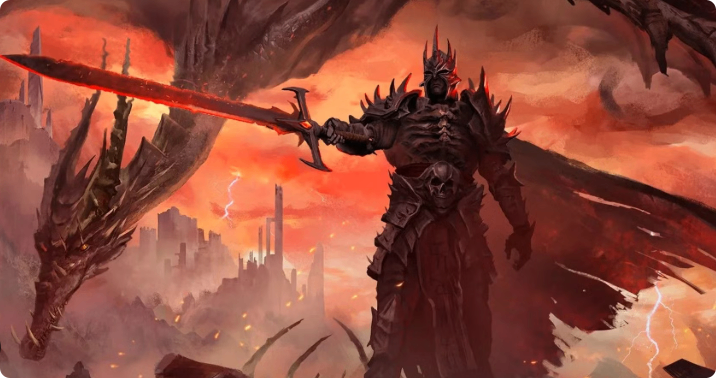
ESO Stamina Dragonknight PvP Build Overview
This Dragonknight uses Dual Wield on the front bar and Sword and Shield on the back bar. The build splits its attributes evenly between Health and Stamina and does not use Vampire or Werewolf.
Race, Mundus and Attributes
Mundus: The Warrior
Vampire/Werewolf: None
Attributes: 32 Health / 32 Stamina
Front Bar: Dual Wield
Back Bar: Sword and Shield
The overall strategy is simple: survive incoming pressure, generate Ultimate through Blood Spawn, then use Take Flight to create a powerful burst window.
Core Build Mechanics
Two mechanics drive the build.
Blood Spawn and Take Flight
Blood Spawn can grant Ultimate and a large resistance increase when you take damage. This means opponents attacking you can actually help accelerate your next offensive window.
Once enough Ultimate is available, use Take Flight. Besides its immediate burst damage and gap-closing utility, Take Flight provides increased damage afterward, allowing your entire kit to hit harder.
The result is a simple PvP loop:
1. Absorb pressure.
2. Generate Ultimate through Blood Spawn.
3. Apply your debuffs.
4. Stun the target.
5. Build three stacks of your Whip mechanic.
6. Use Take Flight.
7. Follow with a fully empowered Molten Whip.
This creates the build's primary kill window.
Front-Bar Skills
The Dual Wield bar is responsible for most of your offensive pressure.
Molten Whip
Molten Whip is your main spammable. Dragonknight abilities build Seething Fury, and reaching three stacks significantly increases the power of your next Whip.
Do not mindlessly spam Whip. Instead, build the stacks while preparing your burst and use the empowered cast immediately after your stun or Take Flight.
Shattering Rocks
Shattering Rocks provides an extremely valuable combination of crowd control and damage.
It gives you an unblockable stun, applies Minor Breach, deals damage, and provides healing after the effect finishes. Because it simultaneously helps control, penetrate and sustain, it is an important part of the offensive rotation.
Disintegrating Dragonfire
Use Disintegrating Dragonfire to apply Major Breach and reduce the target's defenses. It also provides damage-over-time pressure.
Keep Major Breach active whenever possible, especially before committing your Ultimate.
Incinerate
Incinerate provides additional Flame damage while also granting important offensive buffs simply by being slotted.
This makes it a high-value ability even when you are not actively casting it.
Quick Cloak
Quick Cloak provides Major Evasion, movement speed and additional area damage. It also helps trigger your front-bar weapon enchantments.
This slot can be adjusted to suit your preferred mobility option.
Take Flight
Take Flight is the centerpiece of your burst rotation. Use it after establishing your debuffs and building your Whip stacks.
The goal is to combine the Ultimate with an empowered Molten Whip while your increased-damage window is active.
Back-Bar Skills
The Sword and Shield bar focuses on defense, healing and maintaining important buffs.
Resolving Vigor
Resolving Vigor is your primary heal-over-time tool. Use it when taking sustained pressure and before switching into your stronger emergency heal.
Blood of the Elder Dragon
This is your burst-healing option. Its healing becomes more valuable when your Health is low, making it particularly useful when an enemy nearly breaks through your defenses.
Altar of Flame
Altar of Flame provides additional resource sustain and healing while contributing offensive pressure. Keeping it on the back bar makes it easier to activate before quickly returning to your offensive setup.
Molten Armaments
Use Molten Armaments to maintain your major offensive buffs and increase your overall weapon damage.
The alternative morph can be used if you prefer a longer-duration buff, but Molten Armaments is the preferred option for this setup.
Defensive Skill and Temporal Guard
Your defensive skill provides additional resistance and nearby damage while helping build your defensive stacks.
Temporal Guard is primarily a panic option. Even if you rarely activate it, keeping it slotted provides useful defensive value.

ESO Stamina Dragonknight PvP Gear Setup
The gear combination balances offensive scaling with strong defensive stats.
Recommended Gear
Oakfather's Retribution: Front bar
Rallying Cry: Back bar
Blood Spawn: Monster set
Armor of the Trainee: One heavy chest piece
Monolithic Refabrication: Mythic item
Oakfather's Retribution rewards you for fighting opponents with multiple buffs, giving additional penetration and weapon damage based on their buffs.
Rallying Cry provides a strong defensive and offensive package on the back bar, particularly when your healing abilities critically heal.
Blood Spawn is the engine behind the build because it contributes Ultimate generation, resistance and stamina recovery.
Monolithic Refabrication complements the bar-swapping design by providing offensive bonuses on the Dual Wield bar and defensive bonuses when you switch to Sword and Shield.
Traits and Glyphs
The build uses mostly defensive PvP traits:
Impenetrable on most armor
Reinforced heavy chest
Reinforced shield
Protective jewelry
Sharpened weapon setup
Defending on the back-bar weapon
Use Prismatic Defense glyphs on armor and appropriate weapon-damage and defensive glyphs on your weapons and jewelry.
The setup uses four Light, two Medium and one Heavy armor pieces while relying heavily on Protective traits for additional survivability.
Champion Points, Food and Potions
For Warfare, prioritize:
Untamed Aggression
Master-at-Arms
Ironclad
Resilience
For Fitness, use options including:
Sustained by Suffering
Pain's Refuge
Fortified
Solitude
Utility Champion Points can be customized around your preferred quality-of-life bonuses.
For consumables, use Bewitched Sugar Skulls for the strong overall stat package and Tri-Stat Potions for reliable resource recovery.
ESO Stamina Dragonknight PvP Rotation
The rotation is straightforward, but timing is critical.
Offensive Rotation
Start by applying Disintegrating Dragonfire to establish Major Breach.
Next, use Shattering Rocks to stun your target. While preparing the stun window, build your Seething Fury stacks.
Once you have three stacks, prepare the empowered Molten Whip.
When Blood Spawn has generated enough Ultimate:
1. Apply Major Breach.
2. Stun with Shattering Rocks.
3. Build three Seething Fury stacks.
4. Use Take Flight.
5. Immediately follow with the empowered Molten Whip.
6. Continue pressuring with Dragonknight abilities.
This is when opponents are most likely to panic. Keep attacking during the increased-damage window rather than wasting it on unnecessary defensive actions.
Defensive Rotation
When your health drops or the opponent wins the pressure exchange, switch to Sword and Shield.
Use Resolving Vigor first, followed by Blood of the Elder Dragon when you need a stronger heal. Maintain your defensive buffs and use your defensive abilities before returning to the front bar.
The most important rule is to avoid staying offensive when your defensive resources are already depleted.

Final Tips
The strength of this ESO Stamina Dragonknight build comes from its ability to turn incoming pressure into offensive momentum. Blood Spawn helps generate Ultimate while you are being attacked, and Take Flight converts that Ultimate into a major burst opportunity.
Keep Major Breach active, manage your three-stack Molten Whip carefully, and avoid wasting Take Flight outside a prepared burst window. When the enemy gains momentum, use your Sword and Shield bar to stabilize rather than trying to out-damage them.
For Imperial City and Battlegrounds, this combination of burst, survivability, penetration, healing and pressure makes the Dragonknight exceptionally well suited to aggressive PvP. To fully optimize your setup, The Elder Scrolls Online Items can help you secure the right gear and enchantments to maximize your burst potential and sustain in extended fights.