
summary
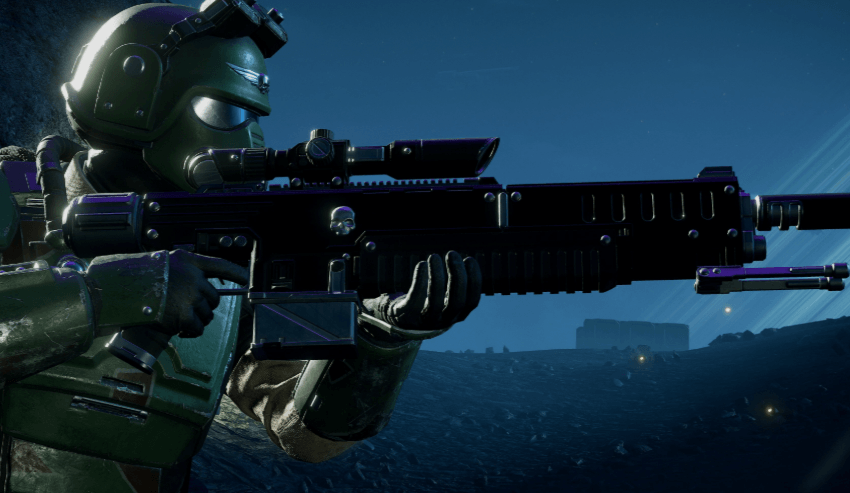
The Helldivers 2 Meltagun is quickly proving to be one of the most powerful anti-tank support weapons introduced with the Warhammer 40K Legendary Warbond. Its concentrated beam can destroy Bile Titans, Chargers, Impalers, Stalkers, and other heavy targets with surprisingly few shots. However, its short range, slow handling, and limited effectiveness against hordes mean that the weapon works best when paired with strong crowd-control tools. For players looking to strengthen their loadout and overall combat preparation, Helldivers 2 Items can complement this strategy. This guide explains how to use it effectively and build around its strengths.
Why the Meltagun Is So Powerful
The Meltagun is designed around one simple concept: maximum damage against high-value targets.
The weapon has a relatively short effective range of around 15–20 meters, but within that distance it can deliver enormous sustained damage. A fully connected beam can deal roughly 2,000 damage per second, allowing the Meltagun to destroy heavily armored enemies extremely quickly.
The weapon carries multiple charges, giving players several opportunities to eliminate heavy targets before needing another resupply.
Its biggest weakness is handling. The beam does not turn quickly, and its ergonomics are not particularly strong. This becomes especially noticeable when trying to track fast enemies or sweep the beam across multiple targets.
Therefore, accuracy and positioning are much more important than simply holding the trigger.
Meltagun vs Bile Titans
The Meltagun is exceptional against Bile Titans.
The key is to wait for a reliable opening. When the Titan exposes its head during an attack animation, place the entire beam directly onto the head.
A correctly positioned beam can destroy the head in a single charge.
This makes the Meltagun particularly effective when fighting Titans at close range. Instead of relying exclusively on Orbital Precision Strikes or Eagle 500KG Bombs, you can save those stratagems for situations where the Titan is too far away or surrounded by too many enemies.
Bile Titan Tip
Do not chase a moving Titan while continuously adjusting your aim. Wait for an attack animation that keeps its head relatively stable, then connect the beam.
Stable target + full beam connection = maximum Meltagun damage.
Meltagun vs Chargers
Chargers are arguably where the Meltagun feels most impressive.
A well-placed beam can destroy a Charger during its charge animation, sometimes before it even reaches you.
This gives the weapon a unique defensive advantage. Instead of dodging first and attacking later, an experienced player can stand at the correct distance, maintain the beam on the Charger, and eliminate it before impact.
This is especially valuable when several Chargers appear simultaneously.
However, avoid allowing multiple enemies to surround you. The Meltagun's limited turning speed makes it difficult to react when several fast targets attack from different directions.
Meltagun vs Impalers
The Meltagun also performs well against Impalers, particularly when their vulnerable area is exposed.
A direct beam can destroy an Impaler in approximately two charges in the tested scenarios.
If an Impaler is too far away or surrounded by other enemies, using an Eagle 500KG Bomb or another long-range stratagem may be safer.
The Meltagun should be considered a close-range execution tool rather than a universal long-range anti-tank solution.
Meltagun vs Stalkers
Stalkers are another interesting matchup.
The weapon can eliminate Stalkers quickly when the beam connects properly. This makes it surprisingly useful when defending yourself around a Stalker nest.
However, the short range creates a risk. Stalkers are fast, aggressive, and capable of attacking from unexpected angles.
If you know a Stalker nest is nearby, maintain enough space to avoid being surrounded before committing to the Meltagun.
Meltagun vs Smaller Enemies
This is where the weapon begins to show its limitations.
Although the Meltagun can kill smaller enemies, it is not designed for crowd clearing. Sweeping the beam across a large group does not produce the same efficiency as using a shotgun, explosive weapon, fire damage, or machine gun.
You generally need to maintain contact with an individual enemy long enough for the beam to deliver meaningful damage.
Because of the weapon's limited ergonomics, rapidly switching between multiple small targets is also inefficient.
Do not use the Meltagun as your primary horde-clearing weapon.
Best Meltagun Loadout
A strong Meltagun build should compensate for its weaknesses.
Recommended Build
Support Weapon: Meltagun
Primary: Purifier or another reliable crowd-control weapon
Secondary: Grenade Pistol
Grenade: Incendiary Grenade
Stratagem: Eagle 500KG Bomb
Stratagem: Machine Gun Sentry
Stratagem: Laser Guard Dog
This setup gives you a clear division of responsibilities.
The Meltagun handles Chargers, Bile Titans, Impalers, and other heavy targets.
The Purifier handles smaller enemies and groups.
Incendiary Grenades are excellent for bug breaches because the fire continues dealing damage while you reposition.
The Machine Gun Sentry provides additional crowd control and can protect your flank.
The Laser Guard Dog is especially useful because it can continuously attack smaller enemies without requiring constant ammunition management.
Why Eagle 500KG Still Matters
The Meltagun is extremely strong, but it does not completely replace orbital and Eagle stratagems.
The main reason is range.
If an Impaler or Bile Titan is far away, reaching it with the Meltagun can expose you to unnecessary danger. The Eagle 500KG Bomb provides an alternative for long-distance heavy-target elimination.
Use the Meltagun when the enemy is within reliable beam range.
Use the Eagle 500KG when distance, terrain, or enemy density makes close-range engagement dangerous.
This combination gives you much greater flexibility.
Ammunition Management
One major advantage of the Meltagun is that you do not need to fire constantly.
The weapon is most efficient when used against high-value targets.
Do not waste charges on every Warrior or Hunter. Save your ammunition for:
· Bile Titans
· Chargers
· Impalers
· Stalkers
· Other heavily armored targets
The weapon's available charges can provide numerous heavy kills if every beam is connected correctly.
A Supply Pack is therefore not always necessary. If you are primarily using the Meltagun for tanks and relying on your primary weapon for smaller enemies, its ammunition economy can be perfectly manageable.
Best Armor for the Meltagun
Because handling is one of the Meltagun's weaknesses, armor that improves weapon ergonomics or handling can make the weapon feel considerably better.
The new Warhammer 40K armor can also improve support-weapon reload speed. While the reload bonus is not revolutionary, it provides useful quality-of-life improvements when repeatedly using support weapons.
The main goal is to make the Meltagun easier to aim while maintaining enough survivability to operate at close range.
Meltagun Strengths and Weaknesses
Strengths
· Extremely high single-target damage
· Excellent against Chargers
· Can destroy Bile Titans rapidly
· Effective against Impalers
· Strong against Stalkers
· Can eliminate heavy targets during attack animations
· Excellent anti-tank specialization
Weaknesses
· Short effective range
· Poorer weapon handling
· Weak against large hordes
· Requires accurate beam placement
· Vulnerable when surrounded
· Not ideal for rapidly switching between small targets
How to Play the Meltagun Correctly
The biggest mistake is treating the Meltagun like a normal automatic weapon.
Instead, think of it as a precision anti-tank beam.
Stay near your team, keep enemies at a manageable distance, and identify the most dangerous heavy target first. Wait for a predictable animation, aim at the weak point, and maintain the beam until the target is destroyed.
Afterward, immediately switch back to your primary weapon and deal with the smaller enemies.
This rotation is much more efficient than trying to use the Meltagun against everything.
Final Verdict
The Helldivers 2 Meltagun is an outstanding anti-tank weapon and one of the strongest reasons to experiment with the Warhammer 40K Legendary Warbond. Its ability to destroy Chargers during their charge and rapidly eliminate Bile Titans gives it enormous value on high-difficulty Terminid missions. Players looking to further optimize their loadouts can also buy Helldivers 2 Items.
It is not perfect. Its short range, limited ergonomics, and poor horde-clearing ability prevent it from being a universal weapon.
But when paired with a strong crowd-control primary, Incendiary Grenades, a Guard Dog, and an Eagle 500KG Bomb, the Meltagun becomes a devastating heavy-target specialist.
For players who frequently struggle with Chargers, Bile Titans, and Impalers, mastering the Meltagun can dramatically improve your survival and mission efficiency.