Weekend Drop -













Summary:
NBA 2K27 MyPLAYER builds are all about spending attributes wisely. Early testing reveals key value thresholds for finishing, shooting, playmaking, defense, rebounding NBA 2K27 MT, and physicals that can help players avoid wasting valuable attribute points.
NBA 2K27 Attribute Ratings: Why Value Matters
Creating a MyPLAYER build in NBA 2K27 can be difficult, especially before the community has had enough time to fully test every animation, badge, and takeover. However, early information already reveals several important attribute thresholds.
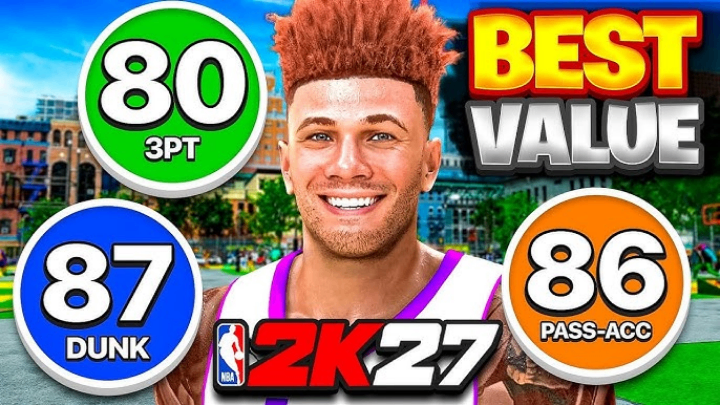
The goal is not necessarily to maximize every rating. Instead, players should look for ratings that unlock multiple useful badges, animations, or takeovers at the same time. These “value ratings” can make a build significantly more efficient and prevent players from spending attribute points where they provide little additional benefit.
Keep in mind that these recommendations are based on early information. As NBA 2K27 receives more testing and players discover new animations and gameplay mechanics, some values may change.
Best Finishing Attribute Values
Close Shot: 60 or 86
A 60 Close Shot is a simple value point for players who do not want to invest heavily in close-range scoring. It provides access to useful early badge benefits without requiring a major investment.
For players who actively use close shots and step-through moves, 86 Close Shot becomes much more attractive. This rating provides strong badge value, including Gold Ghost Stepper and Silver Paint Prodigy.
Driving Layup: 80
80 Driving Layup is one of the safest general-purpose thresholds for players who want access to strong layup animations. It provides several useful animation options for guards, wings, and bigs.
For players who rely heavily on Euro steps, floaters, spins, and other advanced gathers, going slightly higher can make sense. However, 80 remains an excellent starting point for an efficient build.
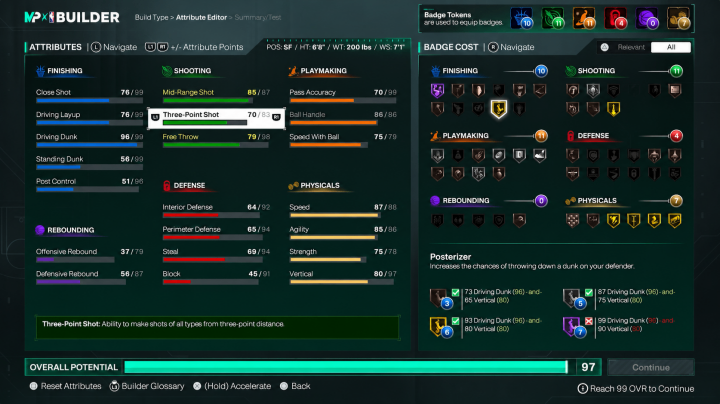
Driving Dunk: 87
If there is one finishing rating that stands out as an obvious value, it is 87 Driving Dunk.
This rating combines several important benefits, including Silver Posterizer, Airspace Takeover, and Pro Contact Dunks off two feet. Instead of spending significantly more points for only a small improvement, 87 gives players multiple meaningful unlocks at once.
For slashers and athletic bigs, this could become one of the most important NBA 2K27 attribute thresholds.
Standing Dunk: 45 or 81
A 45 Standing Dunk can be enough for players who simply want access to standing dunk animations without heavily investing in the category.
Players who want more reliable standing dunks should consider 65, while 81 Standing Dunk is particularly valuable for big men because it provides stronger contact dunk options and Silver Rise Up.
However, standing dunk mechanics can depend heavily on positioning. Players who catch the ball while moving may trigger driving dunk animations instead, making Driving Dunk potentially more valuable for certain centers.
Post Control: 86
86 Post Control is another excellent value rating. Several important post-scoring badges sit close together around this range, making 86 a strong investment for players who actually build around post scoring.
Rather than stopping at a low post rating that provides limited benefits, players who want a true post-oriented build should consider pushing toward this higher threshold.
NBA 2K27 Shooting Attribute Values
Mid-Range: 85
85 Mid-Range provides an attractive combination of shooting badges and takeover requirements. It is especially useful for players interested in creating shots and utilizing mid-range scoring.
Players who want access to shooting-related takeovers should also pay attention to the relationship between Mid-Range and Three-Point ratings. Some takeover requirements may require both ratings to reach specific thresholds.
Three-Point: 80 or 85
For many builds, 80 Three-Point looks like a comfortable value rating. It provides useful shooting badge access while also keeping the attribute investment manageable.
However, players targeting specific shooting takeovers should consider 85 Three-Point, particularly when paired with an 85 Mid-Range rating. This combination can provide greater flexibility for takeover progression and shooting animations.
Free Throw: Build Dependent
Free Throw is one of the hardest attributes to assign a universal value to because its importance depends heavily on the game mode.
Park players may have little reason to invest heavily in Free Throw, while players who regularly play 5v5 modes should prioritize it. Point guards and centers can especially benefit from a reliable Free Throw rating because they may face more situations involving intentional fouls or trips to the line.
Best Playmaking Ratings
Pass Accuracy: 80 or 86
80 Pass Accuracy is a useful baseline because it can unlock important playmaking takeover benefits. Players who frequently create assists should consider going up to 86, which provides Gold Dimer.
However, pass accuracy should always be considered alongside position and playstyle. A corner lockdown who rarely handles the ball does not necessarily need the same passing investment as a primary point guard.
Ball Handle: 71 or 81
71 Ball Handle provides access to useful dribble animations and is a solid value point for secondary ball handlers and some bigs.
81 Ball Handle is even more attractive because it reaches the Silver Handles for Days threshold while providing access to additional dribble animations.
For players who barely dribble, however, a lower rating may be sufficient.
Speed With Ball: 40, 68, or 75
40 Speed With Ball is a useful minimum for players who want the Normal dribble style instead of being restricted to basic options.
At 68, smaller bigs can access Bronze Lightning Launch, while 75 Speed With Ball provides Silver Lightning Launch and additional dribble style options.
These ratings are especially relevant for undersized centers, forwards, and lockdown builds that occasionally attack from the perimeter.
NBA 2K27 Defense and Rebounding Value Ratings
Interior Defense and Block: 80/80 or 84 Block
A combination of 80 Interior Defense and 80 Block is a strong defensive investment for big men. It can satisfy important takeover requirements while providing respectable protection around the basket.
For players who want stronger rim protection, 84 Block is another important threshold.
Perimeter Defense: 85
85 Perimeter Defense is a strong value rating for locks and two-way builds. It provides access to several useful defensive badges and creates a more complete defensive profile.
Lower ratings such as the low 70s can work for players looking to minimize attribute spending, but 85 is a much more attractive target for players who prioritize perimeter defense.
Steal: 60 or 77
60 Steal is worth considering simply for access to Bronze Interceptor.
Players who actively defend passing lanes should aim for 77 Steal, which unlocks Silver Interceptor. This could be particularly important in NBA 2K27 because passing and defensive interactions appear to make lane interceptions an important part of defensive gameplay.
Rebounding and Physicals
Rebounding has reportedly seen some of the biggest changes in NBA 2K27, making these ratings especially important for centers.
80 Offensive Rebound is a useful threshold for Silver offensive rebounding benefits and rebounding-related takeover options. Players building more specialized rebounders can consider 82 or higher.
For Defensive Rebound, 75 combined with 76 Strength provides a strong value combination because it can unlock Silver Box Out Boss. This is particularly useful for smaller defenders who need to secure position against stronger rebounders.
For dedicated rebounders, 87 Defensive Rebound is another major threshold.
Speed, Agility, Strength, and Vertical
Physical attributes are more difficult to generalize because their value depends heavily on position.
Centers should generally prioritize Speed because mobility is critical on both ends of the court. Guards can often operate effectively with ratings in the mid-80s, while lockdowns may want significantly higher Speed depending on their defensive role.
80 Agility is a solid general target, especially for players interested in defensive movement and relevant motion styles.
For Strength, 74–76 is an excellent range for several useful defensive and rebounding benefits. Players who want stronger physical badges should consider moving toward 84 Strength.
Finally, 87 Vertical is another excellent finishing threshold because it works with important dunk-related requirements and complements an 87 Driving Dunk build.
Final Thoughts: Build Smarter in NBA 2K27
The biggest lesson from these early NBA 2K27 attribute tests is simple: do not automatically max out every rating.
Instead, identify the thresholds that unlock multiple badges, animations, or takeovers at once. Ratings such as 87 Driving Dunk, 85 Mid-Range, 85 Perimeter Defense, 77 Steal, 80 Interior Defense, and 80–87 Rebounding can provide significantly more value than randomly adding points.
Most importantly, these recommendations should be treated as an early NBA 2K27 build guide rather than permanent rules. Once the game launches and the community has weeks or months to test animations, badges, takeovers, cheap NBA 2K27 MT Coins, and gameplay mechanics, better value thresholds will likely emerge.
For players preparing their first NBA 2K27 MyPLAYER build, understanding these early attribute breakpoints can help avoid one of the biggest mistakes in the builder: spending valuable points without getting meaningful new abilities in return.